filmov
tv
Using tabs to organize code with the Arduino IDE

Показать описание
🤩 FREE Arduino Crash Course 👇👇
✅ PCB Assembly capabilities info:
***Want to learn more? Check out our courses!***
Arduino Sketch Build Process Website:
***Get the code, transcript, challenges, etc for this lesson on our website***
***We designed this circuit board for beginners!***
SHOP OUR FAVORITE STUFF! (affiliate links)
---------------------------------------------------
We use Rev Captions for our subtitles
Arduino UNO R3:
Budget Arduino Kits:
Multimeter Options:
Helping Hands:
Soldering Stations:
AFFILIATES & REFERRALS
---------------------------------------------------
FOLLOW US ELSEWHERE
---------------------------------------------------
________________________________
Did you know in the Arduino IDE that you can organize your code using different tabs? In this lesson, you’re gonna learn how to add these tabs, how they get organized in the Arduino sketch folder and how to use them in order to better organize your code. Stay tuned. Before we get started, if you wouldn’t mind subscribing to the channel, it really helps us bring you the best content. It doesn’t cost you anything but a click and it allows us to keep doing this. All right, so here we are in the Arduino IDE. I’ve got a program open. It’s called Tabbatha and I have got a sketch written out. So, let me just familiarize you with the sketch so you kind of get an idea what’s going on. So I’ve got some neopixels. Those are individually addressable LEDs. It’s like an individually addressable LED strip. You’ve probably seen ’em around. Really cool looking. And I’ve using this library called fastLED to control them. And I’ve got some variables here that set up the number of pins and which data pin I’m using and and a array to store the different LEDs that I’m in. Okay, and then I have some functions that do some different things. So one is setting them all the LEDs red. Then one sets ’em all blue, one sets ’em all green but it uses this little fadeall function in here that kind of makes it interesting. And I also have that function right here, fadeall. So I’ve got four functions and then below that I have my setup in my loop. So in setup, you know just start serial communication and then I’m just initializing some stuff for that fastLED library. Nothing crazy going on in setup. And then loop, all I’m doing is I’m calling these three functions: setRed, setBlue and setGreen. Okay, so what I wanna do is I wanna you know there’s a lot kind of, I don’t know, going on in here. Maybe I wanna like reduce the clutter in here and let’s say I wanna put each one of these functions in its own file, in its own tab. All right, so all of the files that you create in Arduino are gonna live in the Arduino Sketchbook folder. And you can figure out where your Sketchbook folder is by going to if you’re on a Mac, you’d go to Arduino Preferences or if you’re on a PC, I think it’s File Preferences. And the first thing they show is your Sketchbook location. So the location of my Sketchbook folder is under my name, my documents, and then in a folder Arduino. And then I have saved Tabbatha somewhere inside this folder. So I’m gonna go ahead and open that up. All right, so here is the folder Tabbatha and you’ll notice I’ve got a .eno
CONTINUED...
***About Us:***
This Arduino lesson was created by Programming Electronics Academy. We are an online education company that seeks to help people learn about electronics and programming through the ubiquitous Arduino development board.
***We have no affiliation whatsoever with Arduino LLC, other than we think they are cool.***
 0:12:18
Using tabs to organize code with the Arduino IDE
 0:05:50
Arduino Multi Tab Sketch | How to Use Arduino Tabs and Code Splitting in Arduino IDE
 0:03:17
Arduino Tutorial | How to Organize your Code using Multi File Tabs on the Arduino IDE
 0:10:52
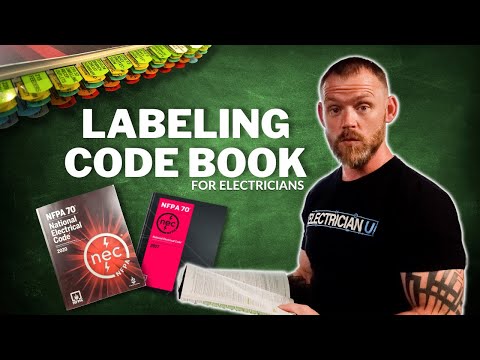
How to Organize and Label Your Code Book!!!
 0:04:33
Tabs vs Spaces - Does it Matter - Code Formatting Debate
 0:01:52
How To Organize Your Opened Tabs in VSCode
 0:10:34
How to Create Tabs Within Tabs in Excel
 0:05:09
Just Create Tabs Using HTML and CSS - No JS Required
 11:54:57
Python Live Streaming 10 hours part 237
 0:03:04
Create Tabs Using HTML CSS Only (Under 3 MINS!)
 0:01:07
VS Code tips — Switching editor tabs by scrolling
 0:03:29
SSMS - how to organize your query tabs with one checkbox
 0:00:14
Using tabs on Arduino IDE #akramslab
 0:06:22
Organizing Tabs with Safari Tab Groups on iPad
 0:00:23
How to Sort A to Z in Google Sheets
 0:02:49
How to Organize Chrome Tabs Like a Pro
 0:00:31
Pin VS Code Tabs?
 0:11:27
Top Features of EDGE! (You've GOT to KNOW these!)
 0:00:49
VS Code tips — Using native tabs on MacOS
 0:12:37
DIY Washi Tape Tabs Color Code Planner Setup & Notebook Organization
 0:22:01
2023 NEC Ultimate Tabs Instruction Video How to Tab your 2023 NEC
 0:07:32
How to Use Onetab Chrome Extension to Organize and Share Browser Tabs
 0:00:26
Save your tabs!
 0:07:18
Transform Your Tabs with This Simple CSS Trick
Комментарии