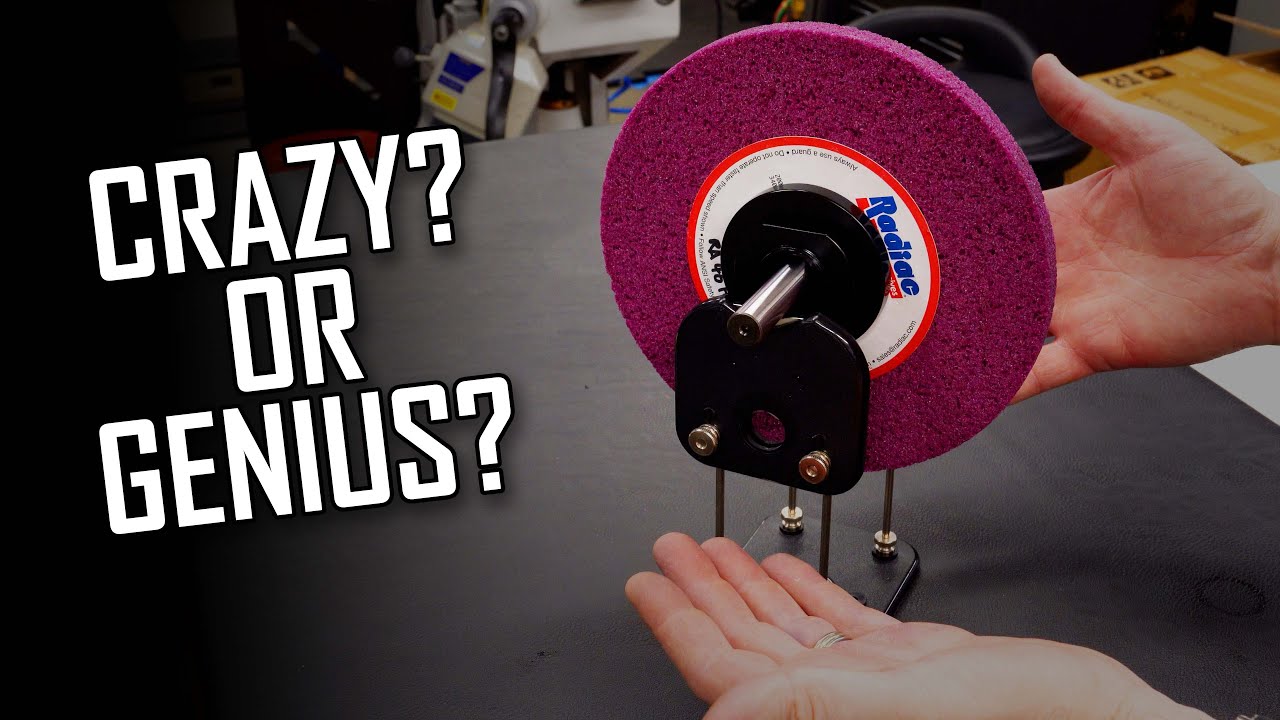
Using the Wrong Tool to Balance a Grinding Wheel

preview_player
Показать описание

Today we're balancing a wheel for the surface grinder using an RC prop balancer. It's definitely the wrong tool for the job, but it might work anyway.

Tools used in this video:
*This site contains affiliate links for which I may be compensated

Licensed under Creative Commons: By Attribution 3.0 License

00:00 Intro
00:50 Balancing hardware
04:38 Shopping for balancers
07:52 Prop balancer as a design pattern
12:10 Or maybe the prop balancer will work?
15:47 Test grind!
20:27 Inspecting the result
21:48 Wrap
Рекомендации по теме
Комментарии
Автор

I have hours of experience watching surface grinders on YouTube. Everything looks good to me!

ElectricalInsanity
Автор

Your grind looks good to me.
Fish scaling or scalloping: Sloppy spindle bearings (doubtful, yours is new) Cold spindle, a cold spindle will usually have about .0001 radial play until it warms up. Balance combined with cold spindle is also common. (Who wants to wait around for 45 minutes to grind for 10 minutes?)
Stepover lines: Sharp leading edge of the wheel can create stepover marks, just touch the leading edge with a Norbide stick (after dressing) to make a slight radius, the leading edge of the wheel does the heavy lifting, the trailing edge does the fine finishing, grind either front>back or back>front, don't alternate.
Welcome to the rabbit hole.

ShadonHKW
Автор

The key to a good surface finish is to, before starting starting up the surface grinder, lean down and whisper "you can do it, buddy". The difference is like night and day.

SethKotta
Автор

To inspect your true surface finish, take your precision ground stones and run them over your ground work. This will expose balance issues, wheel hop, step-over and any heat you may have put it the part from grinding. Use this to perfect your skills. You’ll be surprised at how much this will show you

brandontscheschlog
Автор

I saw a great tactic for balancing wheels. You use an accelerometer and a tachometer and connect the two to an oscilloscope. This way you can see the phase difference between the vibration and place you put the reflector

LiviuGelea
Автор

The rolling type balancers shouldn't be underestimated. A good one with hardened steel rods is *very* sensitive. They are also very easy to make. It would take air or magnetic bearings and large wheels to be more sensitive. You prove they are accurate by flipping them around, just like calibrating a precision spirit or electronic level.

Grinding wheels are funny things. Eccentricity makes them imbalanced. Balancing and dressing can throw them a little bit out of balance again, and they will dress a bit eccentrically again! It may take 2-3 sessions of balancing and dressing to get them close to perfect.

Never use aluminum on any balancing device, it dents microscopically from weight.

Bob_Adkins
Автор

I still have my Dubro balancer from my RC flying days over two decades ago. I'm always finding new uses for it and it always continues to impress me.

MotoRideswJohn
Автор

I'm also new to surface grinding and learning every day. One thing I did learn was, after you balance a wheel, then dress it. If you put it back on the balancer, it show out of balance. So, I've had the best luck and the best finish, if I balance, then dress, then balance again, then dress again. It's a little longer process, but way better results.

rkoellner
Автор

1. Anderson balancer is the ONLY way to go to get a good balance. (The one shown in your video for $1925.00). I looked for 4 months & found a used one for $250.00 & it's perfect. They are available. Even the guys @ Anderson told me not to change the wheels: each wheel has a precision bearing & is balanced @ the factory. Wheels for my balancer, (which will hold a wheel up to 22" in diameter & 10 inches wide), sell for over $200 each. Spin a wheel with your finger @ it will spin for about 2 1/2 minutes. 2. Make your own test shaft--I did. Between centers & taper of 1/4 inch to every inch of width. Simple to set up & turn.
3. Wheel goes on test shaft & tap shaft on solid surface to seat. Test your shaft with machinist blue to check contact. It will stay easily if the shaft is correct. 4. Every time you mount your wheel in machine, true it. Diamond tip should be about 3/4 inch behind center to make it be about 15* angle of contact. Too close to center will wear the tip off of the diamond. 5. Your finish grind shows signs of hopping. Look @ the reflection & you can see it. Slow your pass, decrease step over until wheel grinds very smoothly. Watch for loading.
6. My finish pass with an 8 inch Radiac ceramic wheel, 36 grit, on 55 Rockwell steel is .000025 inch to .000050 depth @ .005 inch step over & it produces a mirror finish that you can shave with. Try it & see. I can't even get that good a finish with my 150 grit diamond wheel, no matter what I do. 7. Check out Steve Barton @ Solid Rock Machine Shop on YouTube. He's the best I've found. Works within 50 millionths of an inch & his products are unsurpassed in quality & accuracy. Sorry this was so long....

robertginther
Автор

Steve Summers put up a video several years ago about using the DuBro balancer for grinder wheels in the shop. He says it works great. I got one for my balancing needs and agree with Steve. Just handle it carefully and be gentle. It should last indefinitely in the home shop.

sierraspecialtyauto
Автор

I think you may have a few things that are contributing to the surface finish that you are getting. I have been in the trade for 30+ years now and a couple of things..
First the type of coolant is very important, we always used grinding coolant as apposed to milling coolant. My experience has shown that if you are using a milling type of oil, the wheels would tend to clog, and this led to poor finish and even burning of the part.
This leads me to the second point.
You really need to use enough coolant to really keep everything really cool and theotetically you should not see any sparks, especially on light cuts. Also bear in mind that the coolant is also there to clear the wheel in operation.
The other thing that I have experienced is that some of the modern import grinders don't seem to be as rigid as the old school (Cincinnati for example) machines and I found that I just couldn't get the same quality finish unfortunately.
Hope this helps for what its worth.

MichaelStevens-pliv
Автор

I painfully went down this same rabbit hole a few months ago. Static balancing is good, but the king of balancing is dynamic balancing. You identified the core problem, overcoming static friction. If the magnitude of imbalance is below the amount of leverage needed to overcome the friction, it doesn't move. Or it settles into a position that is not truly indicative of the imbalance. Dynamic balancing can reveal greater detail, below what is needed to overcome the static friction. All one needs to do it install a reflective sensor on the mounting wheel for phase, as well as a *very* cheap accelerometer, and then run those two signals into a pocket oscilloscope and you can balance in place on the machine. :D

SolarMillUSA
Автор

Finally, a long awaited episode that delivered pure entertainment. I look forward to the next release! Looked like a nice grind to me but I'm not a grinding expert.

Mike-ffib
Автор

I was watching you balance that prop. My dad the aerospace engineer just taught us to sand a little off the end of the heavy blade, no sense of using tape or that blob of glue. That Du Bro prop balancer works great on small stuff way past 20, 000 rpm. Great Video!!

donalddepew
Автор

Started this video and you spoke of making a balancer for the arbor. I stopped the video to find a link to the one I have used for many years. Came back and continued your video. :) you brought forward the very same one I've used forever with my R/C planes. You got this, those things will last forever. Like all precision machines even the smallest need care.
Good job, appreciate the video and the time you put into it so we can enjoy it.

wbujb
Автор

My first thought for this went to graphite air bearings, which are surprisingly easy to make. Virtually no friction, and by carving the channels after assembly you can get rid of almost all misalignment. You could also add a feature to the part of the arbor that goes in the bearings, such as a flange, and a corresponding feature in the bearings, you could "key" the arbor axially, while still allowing free rotation.

cameronwebster
Автор

If you want a balancer with 2 horizontal rails, you might get some inspiration from "Adam the machinist". He makes high precision jigs with....3D printed plastic and carbide rods. He shows that plastic differential adjustments are surprisingly effective.

ErikBongers
Автор

I don't claim to be an expert at surface grinding. I've been using a similar Radiac wheel on my grinder for several years now. I don't use it that often. Started out with a 8" OD wheel now around 7"- 7-1/4 OD. Have never used a balancer to balance the wheel. Does leave a nice finish most of the time. I noticed the last time I used it, it started to leave a ripple like you had shown before balancing the wheel. Time to try your balancer and see if it makes a improvement in the quality of the finish.
Your grind sample looks very nice! Thanks for the video, Ken

GSR
Автор

I had made the exact same style of balancer for my grinder, I used small bearings but their was too much friction, then I tried larger bearings which helped but still not satisfied. I was considering using the round stock or putting a inverted Vee on the top of the side pieces and getting rid of the bearings all together.

I had operated a Berco crank grinder and a large surface grinder and both used the large wheels for balancing. I deduced that you need the fulcrum effect that the wheels provide with the low friction of small bearings. Now you have given me another consideration. Machining the tapered disc's and keeping it all concentric was a concern.

gjkozy
Автор

I've designed infant pendulum swings for 15 years that rocked infants to sleep. We paid a lot of attention to bearing decay, as the lower the friction, the better they would work. One year instead of a hanging pendulum style seat, we made a curved track and wheel system for the child's seat to "rock" on. I was in charge of the drive and track system. I prototyped many different track, wheel, wheel cross section, ball bearings, plain bearings, etc. And counted the system decay on each one. What that meant was putting a 20lbs weight in the seat, pulling the seat to the hard stop of the track, and counting how many cycles it went until it stopped. It ranged from about 8 cycles to 70 cycles, with all the different combinations. This is all very relevant to the balancer you showed. What I found was the following: The smaller the ID of the wheel, the better. So if a plain bearing, a shaft diameter of 1mm worked better than a shaft dia of 4mm. If a ball bearing, a shaft dia of 4mm worked better than a shaft dia of 8mm (608 skateboard bearing). In all cases, a ball bearing worked better than a plain bearing, even a small plain bearing compared to a larger ball bearing. Next was the wheel diameter that the bearing was mounted inside. The larger the diameter, the better it worked. A 2" wheel was much better that a 1" wheel, etc. Last was the cross section of the wheel and how it contacted the track. In general, the smaller the contact area, the better it worked. I had about 100 data points on all the variables, and plotted them all out, and that led to the mass-produced product that we sold tens of thousands of. So in my experience, if I was to make a wheel type balancer, I'd use a much smaller bearing than a 608. Something with maybe a 4mm ID from McMaster. Get the FAG brand that's what they sell if you get their Japanese bearings, and they are very high quality. (sorry, this was 10 years ago, I forgot the bearing trade numbers now). Then use a large diameter wheel. Maybe 2-3" in diameter. Turn the wheel on the lathe and bevel its edge to maybe a flat about .050" wide. Smaller would be even better, but I think the risk of it getting dinged will override the decay advantage. IMO:)

nickp