filmov
tv
Replace Porch Columns (Porch Posts / Porch Columns / Use Post Jack DIY / How To Remove And Replace)

Показать описание
Check Out Our FREE GUIDE: *25 Must-Have Carpentry Tools...Under $25 Each!*
AFFILIATE TOOL LINKS:
Tiger Post Jack (For Lifting Roof):
Swanson Speed Square:
Makita Circular Saw:
Irwin 48" Level:
Stanley Tape Measure:
(These are affiliate links. When you shop through these links, we receive a small commission at NO EXTRA CHARGE TO YOU. We greatly appreciate the support!)
FOLLOW US ON INSTAGRAM:
FOLLOW US ON LINKEDIN:
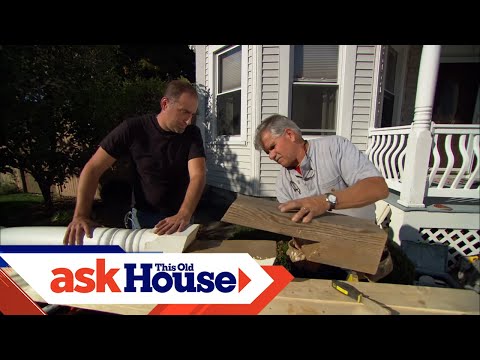
Taking out old porch columns and replacing them with new ones isn't as difficult as it seems. This video will show you the entire process, from start to finish. But just remember--removing any structural support from your house can be extremely dangerous! You should always consult a professional carpenter, contractor, and possibly engineer before attempting it yourself.
Tool List:
Post Jack
Tape Measure
Speed Square
16 oz Hammer
6-in-1 Painter's Tool
Circular Saw
Miter Saw
48-inch Level
CaulkingGun
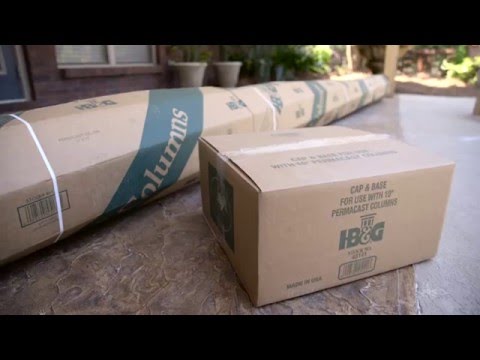
Material List:
New Column
Siliconized Caulk
Post Base
How To:
1) Use a post jack to carefully lift the roof weight off of the column. Only crank in quarter turns, watching the beam lift while doing so. Only lift the beam enough to pull the column out without force. Remove the old post / column.
2) Either measure the original column, once removed, or measure the new opening and subtract 1/8"-3/16". You can also measure the space BEFORE the old column is removed, but if there is sagging, I like to take the opportunity to lift it out just a little.
3) Cut your new column to length using either a miter saw (easiest option), or a circular saw and a speed square. Just make sure that you're leaving enough length at the bottom of the post for a railing, if the column is figured, and also factor in the height of the post base.
4) If the railing is wood, caulk the end grain on the bottom to prevent against water intrusion.
5) Attach the post base with provided screws.
6) Set new column in place and plumb with a level.
7) Counter-turn the screw on the post jack to let the roof weight back down onto the post. Caulk the seam at the top.
For more tips, trick and articles, check out our blog, The Honest Carpenter:
AFFILIATE TOOL LINKS:
Tiger Post Jack (For Lifting Roof):
Swanson Speed Square:
Makita Circular Saw:
Irwin 48" Level:
Stanley Tape Measure:
(These are affiliate links. When you shop through these links, we receive a small commission at NO EXTRA CHARGE TO YOU. We greatly appreciate the support!)
FOLLOW US ON INSTAGRAM:
FOLLOW US ON LINKEDIN:
Taking out old porch columns and replacing them with new ones isn't as difficult as it seems. This video will show you the entire process, from start to finish. But just remember--removing any structural support from your house can be extremely dangerous! You should always consult a professional carpenter, contractor, and possibly engineer before attempting it yourself.
Tool List:
Post Jack
Tape Measure
Speed Square
16 oz Hammer
6-in-1 Painter's Tool
Circular Saw
Miter Saw
48-inch Level
CaulkingGun
Material List:
New Column
Siliconized Caulk
Post Base
How To:
1) Use a post jack to carefully lift the roof weight off of the column. Only crank in quarter turns, watching the beam lift while doing so. Only lift the beam enough to pull the column out without force. Remove the old post / column.
2) Either measure the original column, once removed, or measure the new opening and subtract 1/8"-3/16". You can also measure the space BEFORE the old column is removed, but if there is sagging, I like to take the opportunity to lift it out just a little.
3) Cut your new column to length using either a miter saw (easiest option), or a circular saw and a speed square. Just make sure that you're leaving enough length at the bottom of the post for a railing, if the column is figured, and also factor in the height of the post base.
4) If the railing is wood, caulk the end grain on the bottom to prevent against water intrusion.
5) Attach the post base with provided screws.
6) Set new column in place and plumb with a level.
7) Counter-turn the screw on the post jack to let the roof weight back down onto the post. Caulk the seam at the top.
For more tips, trick and articles, check out our blog, The Honest Carpenter:
 0:12:56
Replace Porch Columns (Porch Posts / Porch Columns / Use Post Jack DIY / How To Remove And Replace)
 0:07:16
How to Replace Porch Posts Columns, Complete Guide with Tips, Easy
 0:05:06
How to Install Porch Columns | This Old House
 0:05:28
How to Install Porch Columns | This Old House
 0:08:05
How to Replace a Porch Column | Ask This Old House
 0:08:15
How to Replace a Porch Column
 0:07:27
How to Repair a Rotted Porch Post | Ask This Old House
 0:12:03
THE CORRECT WAY TO INSTALL PORCH POSTS
 0:01:52
Colonnade Porch Posts
 0:12:26
How To Properly Install Porch Post Columns
 0:00:35
Replacing Porch Posts is Easier Than You Think! 🔨 😮 🏠
 0:02:19
DuraPoly Fypon PCV Post
 0:03:53
Jacking Up a Porch Roof at a Side Wall
 0:01:50
YellaWood® Columns
 0:05:57
Replacing a Rotten Patio or Porch Post
 0:04:20
How To Replace Porch Support Posts Correctly DIY Step by Step | How To Replace Load Bearing Columns
 0:05:32
HB&G PermaCast Column Installation Video
 0:14:13
How to Install RDI Post Wrap and Trim Base, Adjustable 4 - Piece, 6x6, Complete Guide and Review
 0:32:40
How to install USA Vinyl Weatherables PVC Porch Posts.
 0:02:21
Zipbolt Exterior XT Post Anchor 17.800
 0:11:32
😳Replace Porch Posts! The Right Way!😮
 0:00:50
Repairing a Rotten Porch Post
 0:10:58
Porch Railing installation, aluminum pre-assembled Universal Rail.
 0:09:38
How To Replace Columns
Комментарии