filmov
tv
Measuring Resistance with a Digital Multimeter

Показать описание
Here’s how you can measure resistance:
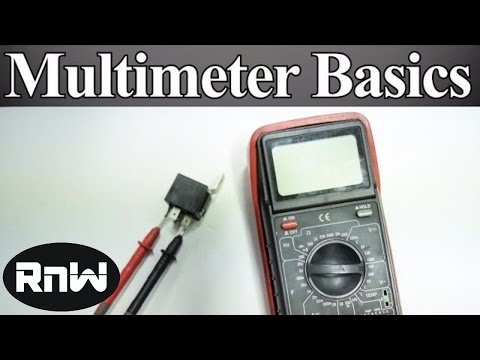
1. Connect the black probe to the common (COM) jack on the multimeter. Plug the red probe into the jack labeled as AC voltage or ohms. It may also be labeled VΩmA, VΩ or V (for voltage).
2. Set your multimeter to the ohm meter function (Ω). Some multimeters will automatically adjust resistance measurement settings while other meters may require you to choose from a range of high or low resistance settings. You want to select the setting that is closest to what you believe you are measuring. If you’re not sure of your range, start measuring around 200 ohms or higher.
3. Isolate the part of the circuit you wish to test. Touch the probes to either side of the item you’re testing. Positive and negative doesn’t matter in this situation.
4. If a number does not display right away, adjust the ohm range on your multimeter gradually. The “0”, “1”, or “OL” on a digital multimeter display will change to a number. If you’re not getting a proper reading, turn down the multimeter range. A high setting won’t pick up low ohms.
 0:00:27
Measuring Resistance with a Digital Multimeter
 0:08:04
How To Measure Resistance With A Multimeter-Tutorial
 0:02:24
Measuring Resistance with a multimeter
 0:11:33
How to Test for Resistance? What is Continuity?
 0:08:08
How to Use a Multimeter for Beginners - How to Measure Voltage, Resistance, Continuity and Amps
 0:02:30
how to measure resistance with a multimeter | check resistance with digital multimeter
 0:03:07
Digital Multimeter Tutorial, Making Resistance Measurements, Understanding 4 Wire Ohm Measurement
 0:00:52
How to Measure Resistance with a Multimeter
 0:00:22
Measuring Resistance with a Multimeter the EASY WAY
 0:00:18
How to Measure Resistance with KAIWEETS HT118A Multimeter?
 0:00:38
Measuring resistance of Human body
 0:02:51
How to measure Wire resistance
 0:01:51
2.2. Lab Guidance - Multimeter - Measuring Resistance
 0:05:38
How to measure Resistance with Digital Multimeter / Multimeter tutorial
 0:06:37
9 DIGITAL MULTIMETER MEASURING RESISTANCE
 0:04:58
How to measure Resistance with a Digital Multimeter in Urdu | Multimeter in hindi
 0:10:23
HVAC Multimeter Basics: Measuring Electrical Resistance vs Continuity! Testing and Tips!
 0:04:27
How to use multimeter to measure Voltage , Current and Resistance
 0:07:26
how to test and Measuring electric resistance using Digital Multimeter Model DT9205A (For Beginners)
 0:11:14
Examples of how to Measure Resistance using a DMM ( Digital Multimeter )
 0:05:02
Digital Multimeter DMM Resistance Measurements - What NOT to do
 0:02:14
how to measure resistance
 0:01:46
Measuring Resistance with Multimeter in Tinkercad
 0:12:24
Intro to Multimeters - How To Measure Voltage, Current, Resistance, Capacitance, & Inductance
Комментарии