filmov
tv
Why 50% of All Crimp Connections Fail - Up or Down?

Показать описание
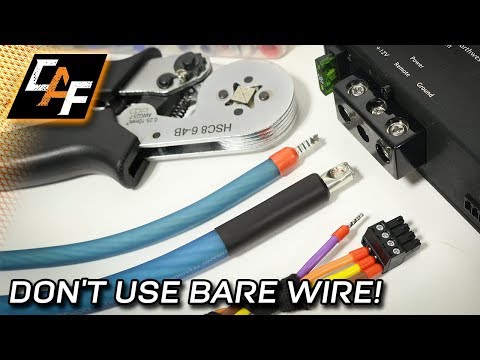
Crimped connections can suck for one reason that most DIY'rs have no idea bout. Should the connector seam should be UP or DOWN? How do I know wat size wire to use? Are manual tools really stronger? End the Crimp anxiety when you pull that wire and learn to crimp like electric Connectors, Insulated & Non-Insulated like a pro.
Nothing in this video was sponsored
This video, description and comments contain affiliate links, which means that if you click on one of the product links, I’ll receive a small commission. This helps support the channel and allows us to continue to make videos like this. Thank you for the support!
Disclaimer:
Due to factors beyond the control of Silver Cymbal, I cannot guarantee against improper use or unauthorized modifications of this information. Silver Cymbal assumes no liability for property damage or injury incurred as a result of any of the information contained in this video. Use this information at your own risk. Silver Cymbal recommends safe practices when working on machines and or with tools seen or implied in this video. Due to factors beyond the control of Silver Cymbal, no information contained in this video shall create any expressed or implied warranty or guarantee of any particular result. Any injury, damage, or loss that may result from improper use of these tools, equipment, or from the information contained in this video is the sole responsibility of the user and not Silver Cymbal.
Why 50% of All Crimp Electric Connections Fail - Up or Down?
 0:04:57
Why 50% of All Crimp Connections Fail - Up or Down?
 0:00:45
That's not a Crimp Tool - THIS is a Crimp Tool
 0:05:17
CRIMP Almost Anything with The Klauke EK50ML
 0:09:30
Solder Vs Crimping | Why is Soldering So HATED In Motorsport Wiring?
 0:00:37
Crimp Almost Anything With The Klauke EK50ML
 0:10:01
How to splice wires - how to solder, how to crimp, wire connectors
 0:15:47
Guide to crimp connectors on 3D printers - Take your wiring to the next level!
 0:03:17
What Is a Ferrule or Crimp? From AutomationDirect
 0:30:53
How to Make the Meteorain SilverSilk Necklace with Capture Chain
 0:01:39
Ratcheting crimp pliers. For Anderson terminals but better for all elec terminals
 0:00:56
How To Crimp Large Gauge Wires - Best Value 2022
 0:09:39
Wire Ferrules - BEST Amp Connection - WHEN TO CRIMP!?
 0:00:27
20 seconds crimp the Al lug on cable by Tianze battery operated hydraulic crimping tool NBC-713U
 0:05:45
RJ45 Crimp Tool Kit
 0:26:37
'Overexplained' Series - How to crimp wire connections like a pro
 0:01:00
ELECTRICIANS' TOOLS - ALL in ONE crimp set - ferrules, copper tubes and insulated terminals #sh...
 0:00:07
Ready, steady, crimp! 🔥🔥🔥
 0:03:43
How to Crimp RJ45 Cat6 Ethernet Cable Crimping
 0:39:26
Cost-Effective Crimping | Affordable Connectors AND Tools [GOLD WEBINAR]
 0:31:25
Crimping tool test that I screwed up. (Read description.)
 0:07:20
Learn How to Crimp MC4 Connectors for Solar Panels
 0:15:33
How to Crimp Various Electrical Wires: Beginner and Expert Tutorial
 0:00:07
Crimp it good. 👍 #klauke #electricalengineering #tools
 0:05:09
How to crimp Dupont Terminals, and why you SHOULDNT
Комментарии