filmov
tv
Wi-fi Soil Moisture Sensor with ESPHome

Показать описание
A quick and easy solution to monitoring plant soil moisture. Integrates into Home Assistant with ESPHome.
Board: Seeed Xiao ESP32-C3, I use a capacitive moisture sensor and 1200mAh battery available on Amazon.
YAML (pay attention to the greater than/less than notes below):
esphome:
name: wifi-moisture-sensor
friendly_name: WiFi Moisture Sensor
on_boot:
then:
on_shutdown:
then:
esp32:
board: esp32-c3-devkitm-1
framework:
type: arduino
# Enable logging
logger:
# Enable Home Assistant API
api:
encryption:
key: "your_key"
ota:
password: "your_pwd"
wifi:
ssid: !secret wifi_ssid
password: !secret wifi_password
fast_connect: on
power_save_mode: LIGHT
manual_ip:
# Enable fallback hotspot (captive portal) in case wifi connection fails
ap:
ssid: "your_fallback"
password: "fallback_pwd"
captive_portal:
sensor:
- platform: adc
pin: 3
name: "Soil Moisture"
unit_of_measurement: "%"
device_class: MOISTURE
update_interval: 2s
attenuation: 11db #required
filters:
- calibrate_linear: #set your own values here
- 1.45 -> 100.00 #replace ">" with greater than symbol (YT doesn't allow angled brackets)
- 2.821 -> 0.00
- lambda: |
if (x < 0) return 0; #replace "<" with less than symbol (YT doesn't allow angled brackets)
else if (x > 100) return 100;
else return (x);
accuracy_decimals: 0
- platform: adc
pin: 4
allow_other_uses: True
name: "Battery Life"
unit_of_measurement: "%"
device_class: BATTERY
update_interval: 2s
attenuation: 11db #required
filters:
- multiply: 2.0
- calibrate_polynomial: #set your own values here
degree: 4
datapoints:
# Map 0.0 (from sensor) to 0.0 (true value)
- 3.4 -> 0.0
- 3.6 -> 8.43
- 3.81 -> 50.06
- 3.86 -> 57.63
- 3.92 -> 72.56
- 3.96 -> 90.96
- 4.05 -> 100
- lambda: |
if (x < 0) return 0;
else if (x > 100) return 100;
else return (x);
- platform: adc
pin: 4
allow_other_uses: True
name: "Battery Voltage"
update_interval: 2s
attenuation: 11db #required
filters:
- multiply: 2.0
- platform: wifi_signal
name: "WiFi Signal Sensor"
update_interval: 2s
switch:
- platform: gpio
pin: GPIO10
id: sensor_power
internal: true
deep_sleep:
run_duration: 10s
sleep_duration: '5:59:50'
=== Timestamps ===
0:00 Introduction
0:44 Commercial Products... Fail
1:10 DIY Solution
3:54 YAML Configuration Overview
7:25 Conclusion
 0:07:58
Wi-fi Soil Moisture Sensor with ESPHome
 0:01:20
WiFi Enabled Soil Moisture Sensor
 0:01:28
zigbee soil moisture sensor temperature humidity sensor works with tuya smart irrigation
 0:01:44
SONOFF New Product Release - MS01 Smart Soil Moisture Sensor works with TH10/16 Smart Switch
 0:00:33
Wi-Fi Soil Moisture Meter, Plants Humidity Meter, Soil Temperature Monitor for Gardening & Farmi...
 0:05:34
#RainPoint | Review RainPoint Smart Irrigation System (WiFi water Timer + Soil Moisture Sensor)
 0:00:54
#RainPoint | How to setup the Smart Garden Soil Moisture Sensor .#MoreThanWaterSaving
 0:14:39
Ecowitt WH 51 Wireless multichannel soil moisture sensor
 1:17:51
Air Quality Sensors Workshop
 0:09:25
TOP 5 BEST Soil Moisture Meters (2023)
 0:00:33
WiFi Project: Lora Soil Moisture Sensor- MicroPython + ESP32 + Lora
 0:00:46
Soil Moisture Meter, with Real-time Monitoring & One-button Control, for Potted Plant, Flowers &...
 0:01:31
SoilWatch 10 - Arduino - Capacitive soil moisture sensor
 0:03:16
I Used GeoDrops Wireless Soil Moisture Sensor for 3 Months
 0:01:08
Tuya Smart Zigbee Soil Moisture and Temperature Sensor
 0:00:47
Eden Wireless Soil Moisture Sensor - Europe edition
 0:17:45
Spruce Irrigation Soil Moisture Sensor (Gen 2) Gen2 Connection and Integration with SmartThings App.
 0:01:15
How to Install LoRWAN Wireless Soil Moisture & Temperature Sensor
 0:11:50
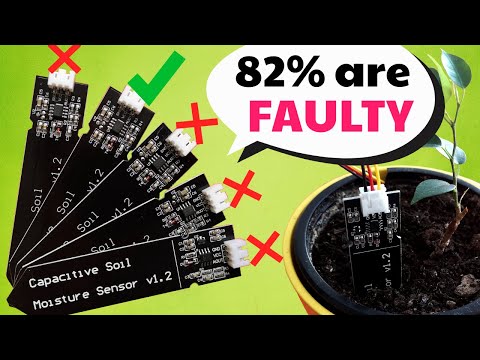
Capacitive Soil Moisture Sensors don't work correctly + Fix for v2.0 v1.2 Arduino ESP32 Raspber...
 0:00:32
Muse Lab- Skin Moisture Sensor Demonstration (WiFi Booster)
 0:02:14
HILIMNY Soil Moisture Meter, Plant Water Monitor.
 0:06:09
#RainPoint | Connection settings for Wi-Fi Sprinkler Timer with soil sensor and APP.#watersaving
 0:01:00
China Factory RS485 12-24V DC Soil Moisture Meter Temperature and Humidity Sensor
 0:00:10
Moisture sensor with NodeMCU ESP8266
Комментарии