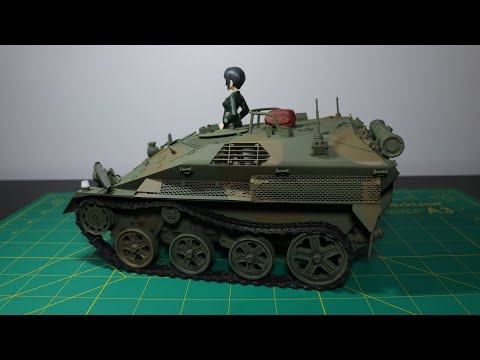
Buiding the New 1/16 Takom Panzer I [Building a big scale tank]

preview_player
Показать описание
DON'T FORGET TO SUBSCRIBE AND NEVER MISS A NEW VIDEO.
.Instagram:
I am now on instagram
Face book:
ANDY'S HOBBY HEADQUARTERS or
Join the Mediocre Modelers group on Facebook and share your work

Thank you for watching
Don' t forget if you are in the Phoenix Arizona area come visit us:
ANDY'S HOBBY HEADQUARTERS
15224 N 59TH AVE SUITE 12
GLENDALE, AZ 85306
Рекомендации по теме
Комментарии
Автор

Just for interests sake: The complete Panzer one weighed only slightly more than one set of tracks of the Tiger II (King Tiger).

jv
Автор

Looking forward to Takom and other brands introducing more affordable 1/16 kits. Great and simple-to-follow build by the way!

abcmodeling
Автор

Andy, without a doubt you have the heart of a teacher. You build videos are arguably some of the best on YouTube. I not only enjoy them but I always learn something as well. Keep up the great work.

jxvolker
Автор

Looks like a great kit. Also happy it doesn't have an interior!

JJ-cfnb
Автор

Andy: if you take a piece of tin foil and put it over the head light, then burnish it down, and cut off the excess, and then add the clear lens you'll a perfect looking head light!🤓

vernebeck
Автор

Hi Andy thank you for your videos. Ive been modelling for over 30 years, but since ive discovered your videos you have helped me to the next level of modelling and give me confidence with my spray gun. Thank you again and keep up the brilliant work. Davy W. Belfast, NI, UK

davidwright
Автор

Hey Andy! Awesome to see another video! I missed these build vids. I'm happy the store is doing good, and that 1/16 panzer I is AWESOME.

jordyncollier
Автор

Crazy to think that Germny started the war with a literal armored machine gun nest, and ended with the King tiger and the elephant in just a matter of 3-4 years

tyates
Автор

Bro, every piece of your work has moved me.

hobbyjohnny
Автор

Andy, I virtually LIVE on Mozart! So glad you use his music in your builds. THANK YOU!

coinsmith
Автор

You can heat up brass photo etch with a lighter and then quench it afterwards it’ll be easier to bend especially for doing muffler covers

urichrudel
Автор

HOLY CRAP, love this one in 1/16 scale! Very well done Andy!

Vmssupplies
Автор

Nice job Andy..ive bin building models of all sorts for years and years but stopped about 10 yrs ago because all the stores selling models and all the other stuff needed where i live have vanished..planes and tanks and ships wer my fave and seeing this video makes me wanna get back into this awesome hobby..i used to do weathering and all and was verry technical about detail and neatness and even used real pictures and info from books and so on..my fave model was the Bismark and got it to the exact thing by making my own handrail cables and stansions and rigging that never came with the model using the part holder frames by melting and stretching it out to the desired thickness..rigging cables the same..thnx once again for this vid on a verry good looking model 👍

frednel
Автор

I can't wait to grab one for myself. You really can't beat that price for its size.
Great work Andy! The modulation is almost perfect and very visible without the distracting camo.

dantimmerman
Автор

May have mentioned it before, but I LOVE the Mozart while you are building!

charleslarson
Автор

Andy, according to my info (AK book "Real colors of WW2", internet, book collection) the primer on German tanks was red-brown RAL 8012. Grey primer was usually a heat resistant primer, used on the barrels, only.
I have seen plenty of color pictures of German tanks, used in Africa during WW2, and they all show a red primer !!!
If you ever see grey worn spots on a tank, i't has been worn down to the metal, but it hasn't rusted yet, because of dry weather conditions. Or it is the first grey layer of paint.
Tanks were  painted in grey, RAL 7021, at the factory. ALL of them. Only when needed, did they get an extra layer of Sand Yellow. These tanks had therefor three layers : Red etch primer, the standard Panzer Grey, then Sand Yellow, sometimes hand painted in situ.
In the AK book you can see examples of parts of tanks with these THREE layers of paint !!!
Remember, these are photographs of the real German tanks which actually fought in WW2 in Africa !!

Also, don't use (black) pre-shading. It's totally unrealistic. Instead, add a bit of very light grey (almost white) to the Sand Yellow, and weather the tank with that. Paint weathers all over the tank, irregularly, not just in the middle of each panel. The paint does not know it is sitting in the middle of a
And when paint weathers, it get LIGHTER, everywhere, and not DARKER (at the edge). Therewith, the reason for pre-shading disappears.
Use photographs of real WW2 tanks to show you where and how to simulate worn paint, instead of randomly blotting a sponge all over....
You are a good modeler, you can do better.
Large models like these are ideal to use the hair spray technique on !!  The effect is far more realistic than blotting paint on.

telescopereplicator
Автор

You’re a hero for mentioning a panzer 2 and 3 in the end lol! I would definitely love a StuG iii 😩

aoscustoms
Автор

Nice looking kit. I'm crossing my fingers for a Luchs in the future.

LeonidasRex
Автор

Really hope you can do a video on good weathering techniques. Still struggle with this side of my work. Excellent build.

bazza
Автор

Just did that on the panzeryager96 times 2, pins are very fragile, easy to make with a heated sprue

rickbarg