filmov
tv
How to INSTALL PLUGINS in Final Cut Pro - UPDATED for FCPX 10.4

Показать описание
How to INSTALL PLUGINS in Final Cut Pro - UPDATED for FCPX 10.4
Learn to install custom Titles, Generators, Effects and Transitions in Final Cut Pro 10.4. We’ll take a look at installing custom plugins in FCPX 10.4, both by using the provided installer file if available, and performing a manual install if necessary
Final Cut Pro comes pre-loaded with a great variety of built in Titles, Generators, Effects and Transitions to use in your next project. But, even with all these goods available to use, there is a number of features missing. Fortunately, custom plugins allow you to add these features, or effects to Final Cut Pro, for a more custom and streamlined workflow.
There are two ways of installing Final Cut Pro plugins, depending on the plugin developer has provided. The first install method is an automatic install, used if the plugin comes as a DMG file containing an installer. The second, slightly more complicated method, is a manual install, and is used if the plugin comes as a ZIP file containing a Motion Template. Check out the video below for a complete walkthrough of both of the install methods.
🔹 Automatic Install Method🔹
If you download a plugin as a DMG file containing the installer, the install method is very simple. First, quit Final Cut Pro. Next, double click on the DMG file to open a provided disk image, and accept the license agreement if necessary. A window containing the installer package, and sometimes install instructions will open up.
From here, read the provided instructions, and double click the installer package to begin installation. Follow the on screen instructions, and the new template or plugin will be installed in the proper destination.
🔹Manual Install Method🔹
If your downloaded plugin comes as a ZIP file, containing a Motion Template, the install method is slightly more complicated. First, you have to ensure you have the necessary root folders, with proper formatting to house the templates. Open your computer’s home folder (SHIFT + COMMAND + H), and navigate to the Movies folder. If you see a Motion Templates folder inside your Movies folder, carry onto the next step. If you don’t have a Motion Templates folder, simply create a new folder and name it Motion Templates. Spelling and capitalization is very important, so make sure your folder is named “Motion Templates”. Next, right click on your new folder, and select Get Info. In the Info inspector, add a .localized extension to your folder name and hit Enter. Just like the name, this extension is also very important.
Inside the Motion Templates folder, you need four folders, named Titles, Effects, Generators, and Transitions. All these folders must have exactly these names, and you must add a .localized extension to each folder.
To install your downloaded Motion Template, double click on the ZIP file to unzip it, and drag and drop the plugin folder into one of the four folders in Motion Templates. Make sure to read the info page on the plugin website for directions on the proper destination folder. Sometimes the obvious destination, ie. Transitions folder for Transitions, is not the right place to house your plugin folder. If your transition is built as a Title template, it has to be stored in the titles folder, or it will not function properly in FCPX. This is the most common cause of plugin issue in FCPX. The info page of your plugin should clearly state where the plugin is to be housed.
MY PLUGINS:
SERVICES I USE AND LOVE:
DISCLAIMER: Links included in this description might be affiliate links. If you purchase a product or service with the links that I provide I may receive a small commission. There is no additional charge to you! Thank you for your support, so I can continue to provide you with free content each week!
#FCPX #FinalCutPro #LPTGuy
▶️ Connect with me on Social Media
▶️ LPT Guy's Video Editor Tips, Tricks and Tutorials
 0:02:07
How to install plugins to FL Studio
 0:00:32
How to Install Plugins - Adobe After Effects Tutorial
 0:00:32
How to Install Plugins in Premiere Pro and After Effects
 0:00:32
HOW TO INSTALL PLUGINS IN FL STUDIO #typebeat #music #beats #flstudio #producer #tutorial
 0:01:28
How to Install Plugins on Ableton
 0:00:49
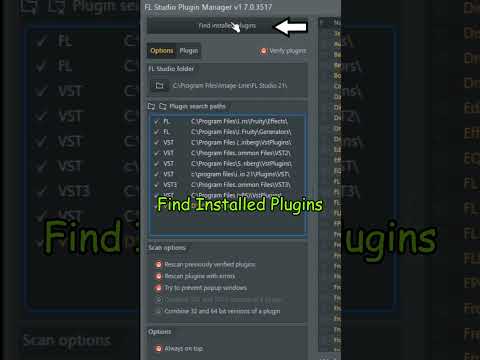
How to Install VST / Plugins in FL Studio 21 | FL Studio Basics
 0:00:24
Fastest Way to add new VST Plug-ins in FL Studio 🤓💎 #flstudio #flstudiotips
 0:00:26
How to Install Plugins
 0:00:56
How To Install WordPress Plugins From Files Upload? Tutorial #wordpress #guide #upload
 0:00:44
Install VST Plugins in FL Studio 2024 | add plugins to fl studio
 0:04:15
How To Add Plugins To FL Studio 21 | How To Install VST Plugins
 0:07:03
How to Install Plugins in (almost) Every DAW
 0:06:34
Installing VST Plugins on Windows: FULL TUTORIAL
 0:06:30
How to Install and Manage Plugins in FL Studio
 0:01:05
How to install PLUGINS in Roblox Studio! (2024)
 0:09:08
Full Guide to Installing Plugins on your Minecraft Server
 0:00:20
How to Install VST / Plugins in Studio one | Studio One 6, Studio One 5
 0:00:51
How to install a DLL file plugin in FL Studio
 0:00:58
How to install plugins in #abletonlive11 #abletontutorial #abletonproducer #abletontips
 0:00:30
How To Install Plugins In After Effects | Install .Aex Files | NYEditz
 0:00:22
How to add plugins to Photoshop? #Shorts
 0:00:44
adding plugins in fl studio
 0:00:47
How to Install Plugins in Adobe After Effects 2024 | Install Plugin After Effects Tutorial
 0:04:26
How to Install Plugins in GarageBand
Комментарии