filmov
tv
Raspberry Pi Advanced Guide (wiringPi Tutorial, C Programming, GPIO Buttons, POSIX Multi-Threading)

Показать описание
*****************************************
Update, March 2024:
WiringPi has been updated to support the latest Raspberry Pi 4/5, but it is not included with default Raspberry Pi OS image. You can use the following commands in your Raspberry Pi Terminal to get WiringPi installed:
cd wiringPiBasics
The above will give you access to the 'gpio' command and you will be able to compile C programs that use wiringPi library, for example:
gcc -Wall blink.c -lwiringPi -o blink
*****************************************
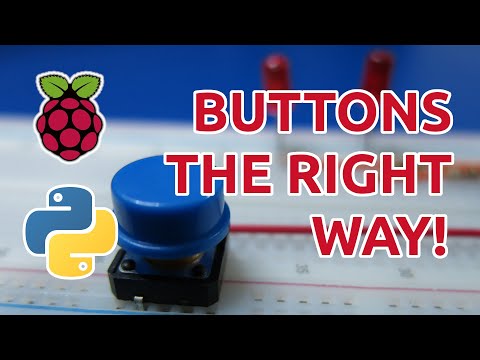
This 2-part Raspberry Pi GPIO tutorial shows how to correctly use buttons with wiringPi (C Programming). While I use the buttons to control LEDs, you can use the same approach with any other electronic components (or code in a subroutine/function in general).
If you are using Raspberry Pi 4 you may receive an error when attempting to use the gpio command. Follow this guide to fix it:
Part 1 video gives a general overview of wiringPi as of today, explains the concept of pull-up and pull-down resistors and demonstrates the circuit used in this tutorial.
Part 2 video covers the C coding part of this project, including:
- GPIO port initialization and safe deactivation
- Asynchronous button handlers using wiringPi interrupts
- Button de-bouncing using time and sampling methods
- Button callbacks using POSIX multi-threading
0:00 Intro
1:00 wiringPi Status
3:01 Pull-up and Pull-down Resistors
3:53 The Circuit
(Note: code posted may contain small updates and/or bug fixes not shown in the video)
Disclaimer:
"Raspberry Pi" and the distinct logo are a trademark of the Raspberry Pi Foundation.
Update, March 2024:
WiringPi has been updated to support the latest Raspberry Pi 4/5, but it is not included with default Raspberry Pi OS image. You can use the following commands in your Raspberry Pi Terminal to get WiringPi installed:
cd wiringPiBasics
The above will give you access to the 'gpio' command and you will be able to compile C programs that use wiringPi library, for example:
gcc -Wall blink.c -lwiringPi -o blink
*****************************************
This 2-part Raspberry Pi GPIO tutorial shows how to correctly use buttons with wiringPi (C Programming). While I use the buttons to control LEDs, you can use the same approach with any other electronic components (or code in a subroutine/function in general).
If you are using Raspberry Pi 4 you may receive an error when attempting to use the gpio command. Follow this guide to fix it:
Part 1 video gives a general overview of wiringPi as of today, explains the concept of pull-up and pull-down resistors and demonstrates the circuit used in this tutorial.
Part 2 video covers the C coding part of this project, including:
- GPIO port initialization and safe deactivation
- Asynchronous button handlers using wiringPi interrupts
- Button de-bouncing using time and sampling methods
- Button callbacks using POSIX multi-threading
0:00 Intro
1:00 wiringPi Status
3:01 Pull-up and Pull-down Resistors
3:53 The Circuit
(Note: code posted may contain small updates and/or bug fixes not shown in the video)
Disclaimer:
"Raspberry Pi" and the distinct logo are a trademark of the Raspberry Pi Foundation.
 0:12:19
Raspberry Pi Advanced Guide (wiringPi Tutorial, C Programming, GPIO Buttons, POSIX Multi-Threading)
 0:04:47
Raspberry Pi Advanced Guide (wiringPi Tutorial, C Programming, GPIO Buttons, POSIX Multi-Threading)
 0:11:09
Raspberry Pi Beginner Guide (wiringPi Tutorial for Linux BASH Shell and C, GPIO LED Blink)
 0:32:15
Raspberry Pi Unit 7: Programming the GPIO
 0:15:07
RPi cross-compilation (4/5) - WiringPi
 0:00:20
Raspberry Pi using C++ to control LEDs
 0:00:13
Raspberry Pi, WiringPi, softPWM
 0:43:09
Raspberry PI B+ DIY Extended IO Pt1
 0:03:56
Blinking Morse Code LED Raspberry Pi C++ wiringPi
 0:10:18
How to Use Push Buttons With Raspberry Pi GPIO (with Python gpiozero)
 0:02:46
Installing WiringPi2 On A Raspberry Pi | Single Board Computer
 0:10:04
#8- Raspberry-pi GPIO buttons- Part1
 0:00:18
WiringPi Toggling LED
 0:03:56
Raspberry Pi: libpgiod vs wiringPI code/configuration (3 Solutions!!)
 0:00:16
Blink program on a Raspberry Pi 4 using wiringPi 2.52.
 0:02:14
Raspberry Pi: Why doesn't GPIO commands work? (2 Solutions!!)
 0:01:25
Raspberry Pi: WiringPi vs default Raspbian RPi.GPIO module (2 Solutions!!)
 0:13:42
Ler status de botão no Raspberry e dispositivos I2C
 0:04:35
WiringPi installation and Eclipse setup for cross-compiling with WiringPi library
 0:02:29
Raspberry Pi: Controlling a servo with hardware PWM using wiringPi (2 Solutions!!)
 0:01:34
Raspberry Pi: wiringPi cleanup command (2 Solutions!!)
 0:00:22
Raspberry Pi Zero W WiringPi multi threading
 0:18:12
Raspberry Pi 3 B+ || GPIO || Button and Blink || WiringPi || BCM2835 || (Buton ile Led Yakma)
 0:19:15
Raspberry Pi - Control GPIO Pins with GPIOzero Library
Комментарии