Bookbinding 101 - Tools and Materials

preview_player
Показать описание
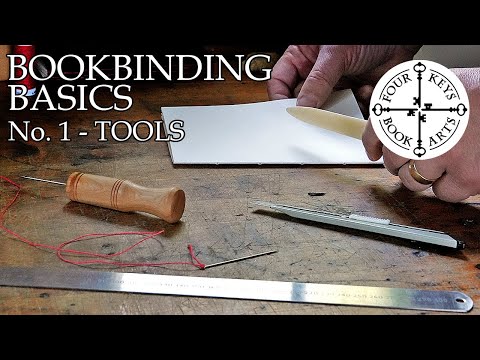
Welcome to this DIY tutorial on making your own hardcover case for rebinding your books! In this step-by-step guide, I'll show you how to make your very own special edition of your favourite books by making a custom hardcover case from scratch. In this video, we’ll cover all the tools and materials needed to get started.

Socials
Рекомендации по теме
Комментарии
Автор

As a beginner bookbinder, I found your videos super helpful! Thank you!

estotz
Автор

I'd love a video showing how you made your book press. There's not many videos from Aussies, it's nice to have advice on what to use that's available here 😁

joletapetty
Автор

Yaaayyy!!!! I can't wait to start book binding.

sithlord_dani
Автор

Can you please do a tutorial on how you make your book cloth? It would be good to learn how to do it. 💙🇦🇺

KCRileyGyer
Автор

I've been bookbinding a little while now and I just wanted to share some extra things that have been super helpful for me.

Extra equipment (uses explained below)
Pasty board
Large straight edge
Stanley fatmax box cutter with tungsten blades
Longer spacers (30cm)
Paperweights
Big Cricut EasyPress
LARGE book press

In Australia, I get everything from
Spotlight
Amazon
Officeworks
Bunnings
Etsy

The primary tip is be focused and patient. Bookbinding punishes you for rushing. There is nothing you can undo so if you mess up placing the foil design, you are back to cutting chipboard again. If you mess up gluing the fabric, you are back to cutting chipboard again.

To help cut the chipboard (I use thicker 3mm board) I have bought a pastry board, which is basically a large chopping board with a lip to hold onto the counter or table and then a lip at the other end that goes the other way (so like a Z shape from the side). This helps so I can jam the board against the back lip to keep things straight, but the board won't move.

I use a straight edge, a large L shaped ruler. I had to get this from a hardware store. If starting with A2 board, a big square that's 600mm long is what I would recommend. A2 is 450mm wide and set square sizes are generally 400mm and then 600mm.

I use a more robust box cutter for the chipboard specifically a Stanley Fatmax with tungsten carbide blades. The craft knives are fine for fabric and paper but struggle with the chipboard. I got the Stanley knife from Bunnings and it has a handle that snaps the blades of so you don't need pliers.

If you're buying a book press, most of the ones on Amazon are too small for most books, so you need one that's over 10 inches. Alternatively, Harris Scarfe have heavy chopping boards for about $80 or $90, these are the cheapest I've found, other equivalents are usually $200 or more.

For book cloth I use Pemberley Bookbindery, they have an Esty store and are based in Perth. They are awesome.

I recently used faux leather from Spotlight that worked pretty well. It's for making couches I think, so it's in the curtain section, not the regular fabric section. It can be a bit stubborn to glue so I've modified the process and work in smaller stages with a lot of pressing and waiting. So for example I'll glue the spine then press with a heavy chopping board for an hour, then the hinges, then press for an hour etc... I set a timer and then usually go read or do some chores while waiting.

Speaking of Spotlight, they have regular sales so always wait, especially if buying Cricut supplies. Oh and sometimes they even have the machines at 40% off so if you can wait, wait. I got my Cricut from FB Marketplace.

I have the Cricut Easy Press (the big one) and the beauty of this is that you don't have to move it around, you just place it straight down, so this stops accidentally moving the foil with the iron. It's quite expensive though, so FB Marketplace or Spotlight sale. I recommend the bigger one because it completely covers most book sizes. The little one is ok but I ended up buying the larger one.

I struggled with the hinges. So I had some longer, 300mm, spacers made from a local 3D print shop. They are 90mm for a 100mm hinge. So I press the fabric in the hinge and then place a square 90 × 90mm spacer in and set a heavy chopping board over it, then leave it for about an hour. It's an extra step but it's given me great results. The reason I had to go to a shop is the length required a large 3D printer. I chose 300mm so they run the entire length of the book. Most spacers available are about 250mm and this is too short for most books. I paid about $120 for 18 spacers (multiples of varying sizes).

I also bought some cube shaped paper weights to help press little corners and things. I got them from AliExpress.

Lastly, I get my endpapers printed, so that I can get something that really fits the book design and theme. I will find digital art on Etsy that is usually quite affordable, then print at Officeworks on to 220GSM cartridge paper. I supply the paper because the options Officeworks offer give a really shiny result which I didn't like. The best paper I've found so far for this is Born To Draw A3 Heavy Drawing Pad, medium grain cartridge paper. I have gone through A LOT of trial and error with this and that's the best paper to use. You might have to do some trial runs on normal paper to get the size right. Depending on the person they may not charge for the trial prints and over all making my own end papers costs less than $20, sometimes even less than $10.

melissataylor
Автор

I came here from Harlee on TikTok after she rebound the Harry Potter series, delighted to discover you’re an Aussie! This is a fantastic resource, thank you for the time you put into this!!! Super excited to begin my book binding journey ☺️☺️☺️

Littleswaring
Автор

Omg yes! 🙌🏻 I’m super keen to try this out and your videos are going to make that happen! I’m so excited! ♥️🫶🏻

madcatz
Автор

OMG, thank you for these tutorials!!! 🎉😍

tessib
Автор

wow this is amazingly detailed, thanks so much for doing it! book binding is so amazing I hope I can try my hand at it one day!

shaheemak
Автор

Thank goodness you’re Australian because all the other bookbinding people I find are not and so have easier access to book cloth

youraveragefan
Автор

Loving these tutorials! Cannot wait to try this myself!

maddisonlillie
Автор

Im learning to book bind and your tutorials have all been absolutely amazing. I had no idea where to start! But now I feel prepared and ready to go! I’m super excited and will keep watching to help me improve!

iamyournerdfighter
Автор

Thank you! I've been wanting to learn how. 😊

carissabrace
Автор

omg!! thank you I been buying up materials slowly (still missing a few) but I will try this out with a used book since I am scared haha

CynthiaP-sv
Автор

So helpful! your instagram has made me determined to start doing this myself. This series is going to be on loop through the process!

bssypnts
Автор

Omg thank you so much for the video!! Ive been wanting to try bookbinding so these videos are sooo helpfull!

SenSenChan
Автор

Yeah - we all know what the paper crane charm is for ❤😭

carolyn
Автор

Love to see the video for the book cloth and the design video!

In another video you also used a see through board (when you were weeding) is it just used for support or does it have another function?

Lillie
Автор

Hi
Mull doesn't seem to be available near me, and is not available at the store you list. Is there an alternative please?
I really enjoyed your videos and would love to try, following your tutorials 😊

clarissepotriquet
Автор

Don’t EVER soak paintbrushes especially overnight. It ruins them. The glue that holds them together will disintegrate and the brush will come apart. Use dish soap and water to clean straight away.

alexandrawinsor