filmov
tv
DIY Drawstring Bucket Bag

Показать описание
Hi, thanks for watching.
You could also use the drawstring bucket bag as a fabric bin.
First, I made a circle template for the base. The radius was 4 3/8” and it had a circumference of about 27 1/2”. I added a 1/2” border around it for the seam allowance. I taped the border so that it could be easily removed when tracing my template.
Then, I made a rectangle template. The width was half the circumference of the circle, which was 13 3/4”. The height was 10 3/4” and I added a 1/2” border around it.
I also made a 13 3/4” x 3” strip with a 1/2” border around it.
I’m used a thick black cotton fabric for the outside, a patterned fabric for the inside, and muslin cotton for the lining.
I’m also used HeatnBond Ultrahold to make the bag sturdy. There’s a shiny side and the other side has the paper. I drew the rectangle on the paper side and cut it out leaving a little bit of extra paper around it. I made 2 of these.
Place the shiny side over of the fabric used for lining. Then, iron it. I placed fabric over the HeatnBond so that the iron wasn’t directly touching it. Take your time ironing and make sure that the edges stick to the fabric.
Then, cut out the rectangle. Do the same to the other sheet. I also made a circle piece.
I drew and cut the rectangle with the border on the outer fabric, and I made 2 of them. I also drew and cut the circle with the border. I made halfway marks on the circle to use as a guide.
Peel the paper off the HeatnBond and iron it onto the outer fabric.
Align the 2 rectangles, with the backs facing out, and sew along both sides of the lining. I also made a zigzag stitch along the edge so that the fabric wouldn’t fray.
Next, pin the circle piece to the bottom. I aligned the halfway marks on the circle with the seams of the rectangles.
Then, sew them together. I trimmed the border and once again, sewed a zigzag stitch along the rim.
Turn it inside out and set it aside.
Repeat this process with the inside fabric. But leave an opening, bigger than the one I made (mine was a bit small), on 1 of the sides and leave it inside out.
Next, I cut the 2 strips using the outer fabric.
Fold along the side marks and fold over again. Then, sew it.
Align the top and bottom of the strip. I marked the top and bottom’s 1/2” border on the other side of the fabric.
Align the 2 folded strips with the edge of the outer fabric. Place and pin the inside fabric over it.
Then, sew them together. I trimmed the border and made a zigzag stitch along the rim.
Pull the fabric through the opening to turn the bag inside out.
Then, sew the opening closed with a ladder stitch.
Tuck in the inside fabric. I ironed the top and clipped it for a few minutes flatten the seam.
I’m used parachute cord and cut 2 pieces at 36”.
With a safety pin, I pinned 1 end of the cord and strung it through both strips.
Then, I strung the other cord going in the opposite direction.
I knotted the ends using an overhand knot and cut the extra cord.
I melted the ends so that the cords wouldn’t unravel.
__________
instagram: @itscreatewithjenn
 0:50:18
How To Make The Drawstring Bucket Bag by Kandou Crafts
 0:12:34
DIY drawstring bag | How to make mini bucket bag
 0:04:42
DIY Drawstring Bucket Bag
 0:13:43
DIY drawstring bag | How to make mini bucket bag
 0:13:42
DIY drawstring bucket bag | How to make round bucket bag
 0:14:40
*EDITED SIZE in comment* DIY drawstring bag with double handle | How to make mini bucket bag
 0:00:09
DIY Drawstring Backpack ✂️🧵
 0:15:51
HOW TO MAKE QUILTED DRAWSTRING BUCKET BAGS | Rosie Caldwell
 0:36:28
DIY Drawstring Bucket Bag | Crochet Tutorial
 0:05:35
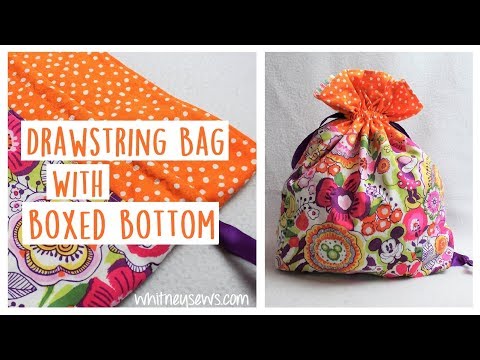
EASY Drawstring Bag with Boxed Bottom | Whitney Sews
 0:24:31
DIY Easy Drawstring Bucket Bag with Multiple Pockets | Sewing Tutorial and Free PDF Pattern
 0:00:26
#diy Drawstring Bucket Bag | Perfect for your lunchbox! #sewing #tutorial #beginners
 0:06:21
🛍️ How to Sew a Cute and Simple Drawstring Bag from Fabric Scraps
 0:16:50
DIY drawstring tote bag | How to make drawstring bag with pocket
 0:10:08
Drawstring Project Bag | Sewing How to
 0:13:29
DIY Drawstring Canvas Bucket Bag From Scratch
 0:08:11
Diy drawstring bag | how to make drawstring bag | diy ideas | tote bag tutorial | tote bag painting
 0:00:13
CUCUBIRD Leather Drawstring Bucket Bag DIY Kits
 0:18:14
DIY drawstring bag with pocket | How to make drawstring bag
 0:00:27
DIY Drawstring Bucket Bag #crochet #shorts
 0:16:51
DIY KNITTING BAG | PROJECT BAG | DRAWSTRING BAG | TOTE BAG | BAG SEWING TUTORIAL
 0:00:58
Drawstring Bag (medium size) #sotakhandmade #sewing #bag #learntosew #sewingtutorial #drawstringbag
 0:31:08
Bucket Bag Sewing Pattern, Project Bag Pattern, Easy Bucket Bag, Drawstring Bag
 0:00:15
Crochet drawstring bucket bags-YarnEden
Комментарии