filmov
tv
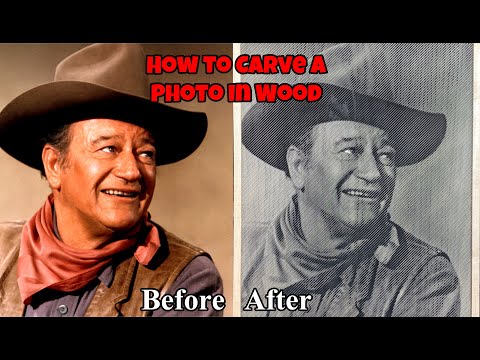
Carving a Photo with a CNC Router

Показать описание
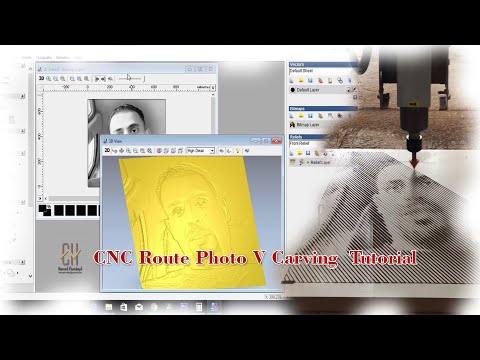
Learn how to create stunning Photo V-Carves with your CNC machine using VCarve Pro or Aspire! In this step-by-step guide, I’ll show you the best bits, materials, and settings for high-contrast photo engravings on wood and epoxy—perfect for beginners and pros
==========
🛠 BITS & MATERIALS USED IN THIS VIDEO:
==========
Other Photo V-Carve Videos I've Done:
==========
Follow Cutting It Close on Social Media:
==========
About Cutting It Close:
Our goal is to help aspiring craftsmen do what they love for a living! We hope to share our knowledge in the woodworking field and CNC routering through training videos, CNC router techniques, unique projects, and practical applications.
==========
🛠 BITS & MATERIALS USED IN THIS VIDEO:
==========
Other Photo V-Carve Videos I've Done:
==========
Follow Cutting It Close on Social Media:
==========
About Cutting It Close:
Our goal is to help aspiring craftsmen do what they love for a living! We hope to share our knowledge in the woodworking field and CNC routering through training videos, CNC router techniques, unique projects, and practical applications.
 0:24:55
Carving a Photo with a CNC Router
 0:01:01
Don’t Be Scared of Photo Carving – It’s Easier Than You Think!
 0:04:06
Photoshop: Create a WOOD-CARVING Effect from PHOTOS.
 0:03:04
Creating a Photo Carving
 0:10:57
Carving a Photo into Wood | How to Finish a Photo Engraving
 0:05:46
Amazing Photo carving of BANE from The Dark Knight Rises | Shapeoko 3 XXL CNC router | VCarve Pro
 0:05:34
How to Carve Wood in Adobe Photoshop | Wood Carving Effect in Photoshop | Photoshop Tutorial
 0:05:54
CNC Router Image Engraving on MDF | | ArtCAM Tutorial | | V bit Carving || Halftone photo tutorial
 0:00:39
A PHOTO OF AN ANCIENT ARTEFACT THAT YOU HAVE NEVER SEEN SO FAR #rarephotos #artefacts #historical
 0:00:26
AmazingChina: Freehand Wood Carving (Chip Carving)
 0:00:29
CNC router and ArtCam V bit carving photo ll Pictures cut in wood llHalftone images
 0:08:51
Tutorial To Turn a Photo Into a Wood Carving
 0:00:15
#Sample Carrot 🥕 carving cutting design#Carrot cutting#Vagetable carving#Easy Carrot carving design#...
 0:08:18
How to carve a portrait into wood from a photograph (+ Arbortech Power Chisel review)
 0:20:17
How to use the sketch carving toolpath in Vectric software | 2.5D Toolpaths | V12 Tutorials
 0:10:54
'A Royal with Cheese' Photo V-Carving in CARVECO Pulp Fiction.
 0:12:44
Vbit Carving A Photo
 0:00:57
Medium Photo Carving sample
 0:33:24
Memories in Wood with PhotoVCarving | CNC Carving Filmstrip PhotoVCarve | Vectric FREE CNC Projects
 0:07:51
Wood Carving from a Google Image
 0:16:06
Making a robot to carve photos into pumpkins
 0:01:49
Carving A Photo Into Wood
 0:00:25
#character #carving #photo frame #craftsman
 0:16:40
Easy 3d carving with VCarve Pro - can it really be that simple?
Комментарии