filmov
tv
Geekcreit 3V FM Radio Kit from Banggood

Показать описание
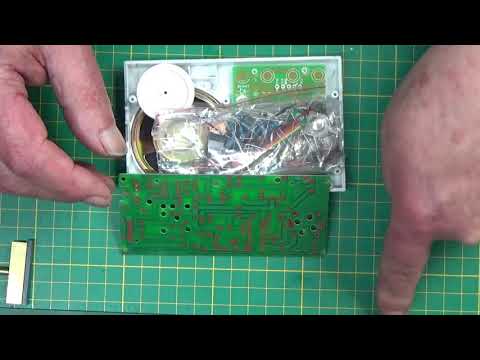
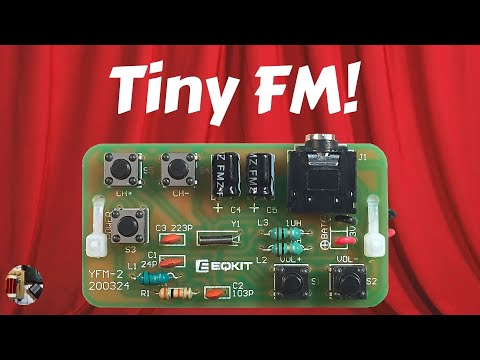
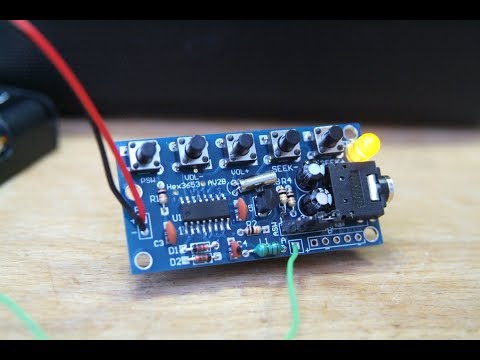
In this video we put together and FM radio kit from Banggood. This was a very easy kit to build although you do have to take your time and make sure you have the components correctly situated on the board.
Once the kid is complete you will need to tune the radio. To do this set the tuning dial to the maximum frequency, and then adjust the trimmer C1 in the tuning capacitor until the frequency readout shows 108.0. next adjust the tuning dial to the lowest frequency and if it does not read 88 then you will need to spread out the loops in inductor L1 until it does. You will next need to go back and retune the high-end and possibly the bottom end.
The parts supplied in the kit are excellent quality the kit goes together well and there are good diagrams on Banggood's webpage. This is one kit that I highly recommend.
-~-~~-~~~-~~-~-
Please watch: "Diodes: The basic building block of all digital circuits"
-~-~~-~~~-~~-~-
Geekcreit 3V FM Radio Kit from Banggood
 1:35:36
Banggood: Geekcreit® DIY 3V FM Radio Kit Frequency Range 72MHz-108.6MHz
 0:14:55
Geekcreit DIY FM Radio kit build
 0:13:50
Geekcreit 3v FM Radio Tutorial Part 1/5 Set Up and Capacitors
 0:13:24
build the Geekcreit® FM Radio Kit (timelapse)
 0:32:18
Geekcreit electronic FM radio Kit Assembly
 0:14:31
Geekcreit 3v FM Radio Tutorial Part 4/5 LCD CONTINUED WIRES SPEAKER & ANTENNA
 0:26:25
Geekcreit FM Radio Build Part 1
 0:10:36
Geekcreit FM Radio Part 1
 0:12:12
DIY LCD FM Radio Kit Assemble | Electronic Educational Suite Frequency Range 72-108.6MHz
 0:21:31
ICStation DIY FM Stereo Radio Kit Build & Review
 0:06:47
DIY FM Stereo Radio Module 76-108MHz - KIT ICStation
 0:11:27
Geekcreit 3v FM Radio Tutorial Part 2/5 RESISTORS INDUCTORS TRANSISTORS PILLOWS CRYSTAL DIODE
 0:11:04
DIY FM Radio Kit Build
 0:00:06
DIY FM Radio Electronics Kit #DIY
 0:52:49
#261 FM Radio - Clock Kit From ICSTATION
 0:25:12
#762 AM/FM Radio Kit Build
 0:06:17
FM Frequency Modulation Micro SMD Rdio
 0:00:16
Radio FM Kit Build pt.2
 0:38:14
#812 Clear Case FM Radio Kit Rechargeable Battery
 0:33:43
FM Radio module - kit build (#68)
 0:07:19
Banggood Black FM Radio Diy Kit tips and tricks
 0:14:15
Geekcreit 3v FM Radio Tutorial Part 3/5 CHIPS WHEELS BUTTON JACK BATTERY PLATES LCD
 0:08:21
Wireless Stereo FM Radio Receiver Module PCB 76MHz-108MHz Assemble | Diy Electronic Project Kit
Комментарии