filmov
tv
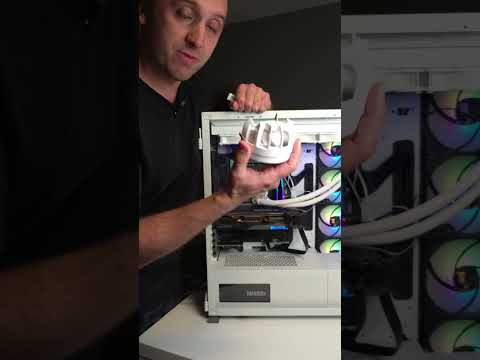
Liquid Freezer III 360/420 – Installation on AMD

Показать описание
Liquid Freezer III – Multi-Compatible All-In-One CPU Water Cooler
00:00 Liquid Freezer III 360/420 on AMD
00:03 In the box
00:09 Motherboard Preparation, AMD AM4/AM5 Installation
00:37 Mounting Preparation
00:58 Choose Connector Cable and Install
01:13 Cooler Installation
01:57 Radiator Installation
02:58 Outro
Let ARCTIC take you through the step-by-step installation process for the Liquid Freezer III 360/420 on AMD AM4/AM5.
IMPROVED AESTHETICS
The design of the pump has been completely overhauled to
give it a sleek and modern look that matches most systems.
For those, who prefer brighter systems, a white option was added.
MOTHERBOARD VRM COOLING FAN
An additional 60 mm fan sitting on the pump helps to cool the
motherboard's VRM chips. This helps especially for overclocking
and allowing continuous heavy loads.
NEWLY DEVELOPED PWM-CONTROLLED PUMP
As its predecessor, the Liquid Freezer III features a new, PWM-controlled
pump comes with an improved copper base, improved efficiency, and quiet operation.
When no cooling is needed, the pump controls itself with PWM,
allowing even lower noise levels and power consumption.
CONTACT FRAME FOR MODERN INTEL CPUS
The Liquid Freezer III uses a proven mounting frame for LGA1700
and LGA1851 sockets, ensuring the CPU is evenly locked to the socket
for better contact with the cooler.
IMPROVED RADIATOR DESIGN
Even if the radiator has not changed visually at first inspection,
it has a significantly enlarged fin surface for further improved performance.
TWO CONNECTION OPTIONS
All PWM components of the Liquid Freezer III can be controlled
together using the same PWM curve and a single header.
In addition, individual control is possible via several curves and headers.
MAINTENANCE-FREE WATER LOOP
The water loop is sealed, therefore no water or additives have to be
refilled.
More information:
Find us on:
 0:03:06
Liquid Freezer III 360/420 – Installation on Intel
 0:03:03
Liquid Freezer III 360/420 – Installation on AMD
 0:03:20
Liquid Freezer III 360/420 A-RGB – Installation on AMD
 0:00:15
FINALLY A NEW MODEL - ARCTIC LIQUID FREEZER III #asmr 🔊
 0:03:12
Liquid Freezer III 360/420 A-RGB – Installation on Intel
 0:29:53
The New Best: Arctic Liquid Freezer III 360 & 280 CPU Cooler Review & Benchmarks
 0:00:58
Installing the ARCTIC Liquid Freezer III 360mm AIO on the AMD Ryzen 9 7950X test bench 😎
 0:00:18
Arctic liquid freezer iii argb 420. #pcbuild #pcgaming #pc #pccomponets
 0:15:56
RTX 5090 Undervolt/Overclock Guide + Benchmarks! (Also 5060ti, 5070/70ti and 5080)
 0:00:11
Arctic Liquid Freezer III 360 ARGB #music #pc #rgb #computer #watercooling #pc #cpu
 0:18:42
The BEST Cooler just got BETTER.... | Arctic Liquid Freezer 420mm III AIO [Review]
 0:08:32
Arctic Made A HUGE Mistake - Arctic Liquid Freezer III 420 in Push-Pull
 0:30:46
Arctic Liquid Freezer III 360 + P12 Fans : How To Install, Control Fan Curves & RGB Control on A...
 0:00:12
Arctic Liquid Freezer III 360 AMD Noise (very quiet at 100% pump duty)
 0:01:00
Arctic Liquid Freezer iii 420 ARGB White. Will this be the best AIO of 2024 #pcbuild #pcgaming
 0:25:17
Arctic Liquid Freezer iii 360 - unboxing, installing and testing on AM5 Ryzen 9 7900X.
 0:00:56
Best AIO 2025 - Arctic Liquid Freezer III
 0:02:37
Liquid Freezer II 360/420 – Installation on Intel 1200/115X
 0:30:33
Arctic Liquid Freezer III Pro 360 White : How To Side Mount, Control Fan Curves & RGB Control on...
 0:23:24
Hidden Changes: Tear-Down of Arctic's Liquid Freezer III CPU Cooler & Disassembly
 0:17:36
Why We're Not Buying the Hype: Arctic Liquid Freezer III AIO Review
 0:27:46
Unboxing, Installing and Testing the all new Arctic Liquid Freezer iii 420 aio
 0:00:17
I love my Build x Arctic Liquid Freezer III 360 #14700 #Corsair3500x #aio #gaming #viralvideo
 0:06:37
Arctic Liquid Freezer iii 360 vs Arctic Liquid Freezer iii 420
Комментарии