filmov
tv
java jsp upload image and show it in jsp page

Показать описание
sure! in this tutorial, i'll guide you through the process of creating a simple java web application that allows users to upload an image and display it on a jsp page. we will use java servlet and jsp technology for this purpose.
prerequisites
1. a java development kit (jdk) installed (at least version 8).
2. an ide like eclipse or intellij idea (with a web server like apache tomcat).
3. basic knowledge of java, servlets, and jsp.
step-by-step tutorial
step 1: set up your project
1. **create a new dynamic web project** in your ide. for example, in eclipse:
- go to `file` - `new` - `dynamic web project`.
- name it `imageuploadexample`.
- select a target runtime (like apache tomcat).
- click `finish`.
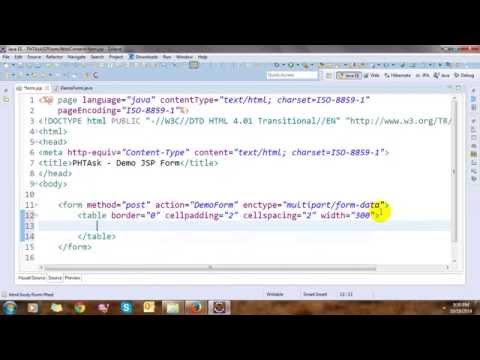
step 2: create the jsp file for uploading image
step 3: create the servlet to handle image upload
step 4: create the jsp file to display the uploaded image
step 6: create the uploads directory
make sure you create a folder named `uploads` inside your `webcontent` directory. this is where the uploaded images will be stored.
step 7: run your application
1. deploy your application to your server (e.g., tomcat).
3. upload an image and see it displayed on the next page.
conclusion
you've successfully crea ...
#Java #JSP #windows
Java JSP image upload
JSP file upload
upload image JSP
display image JSP
Java file upload example
JSP image display
file upload in JSP
Java web application image upload
upload and show image JSP
image handling JSP
Java image processing
JSP image management
servlet image upload
Java web image display
JSP upload tutorial
prerequisites
1. a java development kit (jdk) installed (at least version 8).
2. an ide like eclipse or intellij idea (with a web server like apache tomcat).
3. basic knowledge of java, servlets, and jsp.
step-by-step tutorial
step 1: set up your project
1. **create a new dynamic web project** in your ide. for example, in eclipse:
- go to `file` - `new` - `dynamic web project`.
- name it `imageuploadexample`.
- select a target runtime (like apache tomcat).
- click `finish`.
step 2: create the jsp file for uploading image
step 3: create the servlet to handle image upload
step 4: create the jsp file to display the uploaded image
step 6: create the uploads directory
make sure you create a folder named `uploads` inside your `webcontent` directory. this is where the uploaded images will be stored.
step 7: run your application
1. deploy your application to your server (e.g., tomcat).
3. upload an image and see it displayed on the next page.
conclusion
you've successfully crea ...
#Java #JSP #windows
Java JSP image upload
JSP file upload
upload image JSP
display image JSP
Java file upload example
JSP image display
file upload in JSP
Java web application image upload
upload and show image JSP
image handling JSP
Java image processing
JSP image management
servlet image upload
Java web image display
JSP upload tutorial
 0:19:21
 0:13:55
 0:22:49
 0:03:21
![[Update]File download using](https://i.ytimg.com/vi/_MLTr0_XXhs/hqdefault.jpg) 0:14:40
0:14:40
 0:23:25
 0:13:18
 0:38:35
 0:22:33
 0:44:01
 0:09:51
 0:47:50
 0:08:55
 0:17:41
 0:26:15
 0:29:44
 0:36:59
 0:06:31
 0:17:25
 0:03:25
 0:46:45
 0:35:12
 0:42:55
 0:19:36