filmov
tv
2.9 Xbow vs Lavahound Clone (Tower Trade)

Показать описание
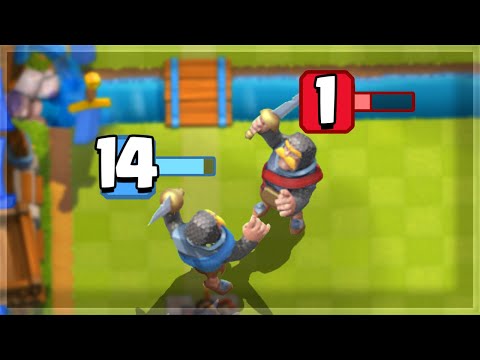
This deck has slowly started fading out of the metagame, but it's still lurking among the sidelines. While it originally gave me a lot of trouble closer to the 20-Win Challenge, changing my approach and mechanical play in this matchup has resulted in a much greater rate of success against the deck. In this video I explored a tower trading approach, because the opponent over-committed on offense and I knew it wouldn't be worth it to fully defend. Tower trading against Lavahound matchups is generally good as long as you are going same lane (opposite lane tower trading is bad, because they can place troops directly on top of your Xbow in the free zone). The exact situation depicted in this video is generally why I prefer to go same lane in all Lavahound matchups.
One of the biggest factors affecting your defense against this deck is the placement of the Archers; they are a crucial tool in this matchup due to being fully spell-proof (don't die to Snowball and opponent only has one damaging spell). However, placing the Archers wrong makes them susceptible to Baby Dragon splash or Flying Machine snipes, and ideally they would be protected. Therefore, I have coined the term "safe zone" for this matchup, which describes the zone you would ideally place your Archers to be safe against opposing troops. There is a writeup I previously made, describing this safe zone and its functionality. Due to limited YouTube description space, I'll have to include it in the comments below, so make sure you check the pinned comments for that writeup and mini-guide.
Another key in this matchup is protecting your Tesla. The Tesla is your key Lavahound killer and provides insane value when protected right, one-shotting Lava Pups, taking out Baby Dragons & Flying Machines and generally providing insane DPS. Therefore, you always want to protect a Tesla to maximize its value, whether it's through blocking Baby Dragon splash with an Ice Golem, kiting / distracting FM / BD with your cycle cards, or straight-up Fireballing the Flying Machine.
In addition to this, using your Ice Golem and Ice Spirit effectively are very helpful, as their splash can help deal with Clone very well. Also in addition to protecting your Tesla is Tesla placements: the placements I used in this video are generally acceptable as they will kite a Lavahound placed on any tile. There are actually two Tesla placement options in tandem with an offensive Xbow to defend an incoming Lavahound (one to the side like I did in this video, and one behind, closer to the tower of the corner). Which one you use is completely personal preference; I use both to a great effect. In this match I just felt like using the side placement, but it really doesn't change too much.
Lastly, the Fireball. I prefer to save the Fireball for three situations:
- 1. Defensive Fireball. Wait until the opponent uses their Clone and the original Lavahound + the cloned Lavahound pops, then attempt to encompass as many troops as possible with the Fireball. Since it can one-shot all cloned troops as well as the Flying Machine and deal significant damage to the Baby Dragon, it's vital that you maximize its effect. It might be useful to wait a split second or so to ensure all the troops clump up before usage.
- 2. Sniping Flying Machines. They are probably the most difficult troop to deal with in this matchup due to range, and usually tanked for by the Lavahound / Bats. Therefore, I prefer to Fireball it a lot of the time, especially in single elixir behind a Lavahound, in order to completely get rid of the threat.
- 3. On offense. If you've finished defending an opposing Lava-Clone push while saving your Fireball, it's very useful to ensure Xbow pushes get through. The thing with this matchup is that the opponent usually struggles to deal with an Xbow defense due to support cards. With this variant in particular, running Barbarians over Lumberjack, you can Fireball either an FM or Barbs in front of your Xbow to completely wipe them out. This can usually result in some serious tower damage. (Mostly applicable if Xbow is not in cycle when they Lavahound in the back, and you're forced to go full defense)
Well, that's all for this matchup. I had quite a few replays against this matchup but never formally uploaded a singular game... so here it is.
In this clash royale video I played against a clash royale Lavahound Clone Flying Machine Baby Dragon Barbarians beatdown deck. I was using the clash royale 2.9 Xbow cycle deck, and this deck has the clash royale xbow and tesla siege defense as well as the clash royale cycle cards for quick defense and mechanical gameplay. This is currently a very strong but high skill-cap clash royale deck and I'm happy I was able to beat Lavahound! Ultimately, this clash royale matchup is not too bad, if you keep a few key pieces of information in mind during gameplay, and hopefully my clash royale tips in the description assist in that.
Комментарии
 0:11:51
 0:00:59
 0:00:52
 0:00:33
 0:00:59
 0:12:26
 0:19:29
 0:38:23
 0:00:57
 0:21:30
 0:01:00
 0:49:02
 0:10:31
 0:21:43
 0:21:15
 0:13:56
 0:06:32
 0:55:48
 0:15:06
 0:54:13
 0:09:20
 0:20:48
 0:07:23
 0:20:03