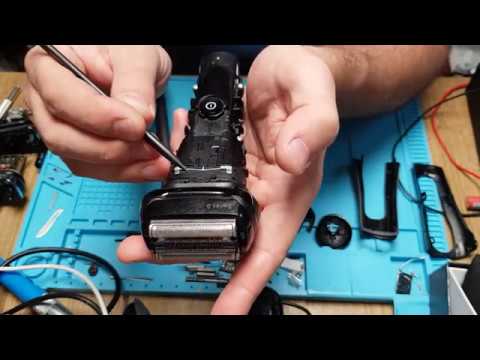
Complete teardown of Braun series 7 shaver, repair of trimmer

preview_player
Показать описание
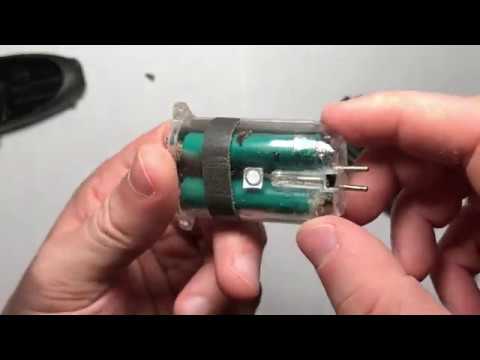
Complete disassembly and assembly of Braun series 7 shaver for cleaning. Repair of the trimmer when it doesn't fold down completely.

These are affiliate links, so if you buy directly from them small amount will be provided for channel support
Soldering iron set
Soldering Iron tips
Screw driver and bits that I use
Рекомендации по теме
Комментарии
Автор

My trimmer had this exact issue after 7.5 years of use. I followed your video to dismantle, fix, and reassemble. Thanks so much for making this!

gnorberg
Автор

Thanks! This has helped me a lot. I am also glad my shaver is not as dirty as the example you used. I‘ve not been able to get the long hair trimmer reassembled to retract correctly, and have ordered the replacement part at this point. It is indeed quite tricky to get the little actuator arm in to the slot, whiteout the spring jumping off one of the posts. I might try again out of personal ambition, but for now grateful I can take the shaver apart and reassemble, and save me $400 to buy a new one. I’ve only had this one about 8 years.😊

TheMrPastry
Автор

Trimmer wouldn't retract but the video showed how to take apart and reset the spring. Brilliant, thank you.

martingregory
Автор

Thank you for creating such a detailed video. I just fixed my 7 series shaver with a broken sliding trimmer. Braun sells the exact trimmer for $26. Your video made it really easy!!! Thank you!!!

gutnick
Автор

The trimmer on my eight year old Series 7 model 5962 recently broke. Not believing this was repairable and in the need of a good shave, I purchased a Braun Series 7 model 7075, but quickly learned newer isn't better. In fact, there were a few features missing on the 7075 that I really enjoyed on my 5962, one of which being the trimmer itself. This led me to wonder if it was possible to replace the trimmer. 'lo and behold I learned I could buy the Trimmer and your video provided me with the guidance to replace it, as well as to give my 5962 a thorough cleaning. The end result is that the 7075 went back into its box and is in closet, while my eight plus year old 5962 works like new again! Thank you very much for providing this video. It was well done.

commodon
Автор

Another Series 7 trimmer spring fix here (and very much needed clean-out!) due to your video. I also learned that it'll be simple to replace the battery when the time comes. Many thanks!

sethpurdy
Автор

Thanks a lot! My trimmer didn't stay all the way down anymore and with your tutorial I was able to fix it without any issue! Good work!!

maxey
Автор

great video sir, this saved me some $$ in parts replacement. My 760 shaver had a few problems on the trimmer. A thorough cleaning and reassembly did the trick. Your video did skip the disassembly of the trimmer itself, would have been nice to have this to be a complete disassembly video. Much thanks though.

DSellors
Автор

TYSM for the trimmer tip. Opened it up, the spring ends were not secured under the plastic. Tucked both sides under the plastic (and did a cleaning of the trimmer), reinstalled the trimmer and now the trimmer stays secured!

JamesGarvey
Автор

Thanks for your continued demonstration on repair of variety of electronic gadgets.

hawkakroma
Автор

was able to fix my trimmer thanks to your video man!

onzbrau
Автор

Thanks to your video, I was able to replace the trimmer! Much appreciated!

RyokanDaigu
Автор

Thank you! Saved me hundreds of dollars! You’re the best! Liked and subscribed!

MiJo
Автор

Great tutorial. Thanks to him I have been able to replace my trimmer. I recommend looking at it carefully so as not to make mistakes that harm the shaver. thanks for her input.

josemariavivasmatas
Автор

You helped me to repair my grandfathers device, thanks!

Xaido
Автор

Thank you! The trimmer on mine came apart ages ago. I still had all the pieces but never any luck getting them back in. Your video helped get everything back. Not to mention cleaning it while it was apart. Amazing!

Devsmini
Автор

Thank you for this! It showed me the CORRECT way to get the outer rubber handle off (start at the bottom). I used a No 5 Torx driver on the screws, which fit perfectly. I don't know why others call for 8 torx. I also had trouble getting it to turn on after reassembly. The trick was to make sure the upper screws pass through the correct holes in the copper tabs. The shaver head keeps trying to squeeze upwards, forcing a misalignment, so look from the side angle and verify the screw goes into the correct hole in the copper and also the housing. And now my shaver is like new!

jmgreuner
Автор

I had no idea it was this easy to break down these shavers. Thank you so much and I am glad I found this video! :)

philearnshaw
Автор

Thank you so so much for your help. My shaver was driving me insane. Thanks for the tutorial.

TheIbi
Автор

Super video. Helped me take the shaver apart and get it fixed.

DermotDay