filmov
tv
CAT6 Keystone Jacks installed to the Network Faceplate

Показать описание
Putting into place CAT6 keystone jacks into a network faceplate involves a sequence of actions to set up the elements and ensure a good connection. Below, you will find a guideline providing an overview of the process:
Materials Needed:
- CAT6 keystone jacks
- Network faceplate
- CAT6 Ethernet cable
- Punch-down tool
- Cable stripper
- Wire cutters
- Screwdriver
Steps to Install CAT6 Keystone Jacks to a Network Faceplate:
Prepare the Ethernet Cable:
Employ a cable stripper to expose an area of about 2 inches from the outer jacket of the CAT6 cable.
After that, untwist the wire pairs and straighten them out.
Trim the Wires:
Remove 1.5 inches of wires using wire cutters. Of course, it will be much easier to plug the wires into the keystones.
Insert Wires into the Keystone Jack:
Observe the color-coded scheme (either T568A or T568B) of the keystones. T568B is employed more frequently.
Insert the wire into its hole according to the matching color on the keystones. Verify that each is actually fitted fully.
Punch Down the Wires:
Assemble a suitable amount of wires in each of the slots of the keystones with the punch-down tool. Moreover, with the help of the tool, the wires will be trimmed automatically.
Secure the Keystone Jack:
When all the wires are punched down, lock the cover of the keystone jack, or it could be secured if it comes with the cap.
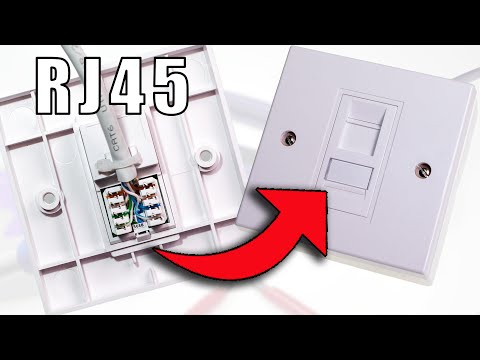
Install the Keystone Jack into the Faceplate:
Get the keystone jack snapped into the appropriate slot on the network faceplate. Expect a tick to be heard as it settles in a fixed position.
Mount the Faceplate:
Align the faceplate’s center square over the hole and connect the screws through the screwdriver.
Test the Connection:
Employ a network cable tester to rule it out that the keystone jack is properly connected and all the connections are accurate.
Tips:
Before using the punch-down tool, make sure that the cabling scheme is in accordance - whether T568A or T568B.
Prevent from cutting too far the jacket of the cable, only the top edge, so as not to hang out more copper optic cable shield.
Wire carefully to avoid potential damage of wiring while installing.
The provided steps comprise the main part of the installation of CAT6 keystone jacks to a network faceplate to build a confined network, which will be highly effective.
Materials Needed:
- CAT6 keystone jacks
- Network faceplate
- CAT6 Ethernet cable
- Punch-down tool
- Cable stripper
- Wire cutters
- Screwdriver
Steps to Install CAT6 Keystone Jacks to a Network Faceplate:
Prepare the Ethernet Cable:
Employ a cable stripper to expose an area of about 2 inches from the outer jacket of the CAT6 cable.
After that, untwist the wire pairs and straighten them out.
Trim the Wires:
Remove 1.5 inches of wires using wire cutters. Of course, it will be much easier to plug the wires into the keystones.
Insert Wires into the Keystone Jack:
Observe the color-coded scheme (either T568A or T568B) of the keystones. T568B is employed more frequently.
Insert the wire into its hole according to the matching color on the keystones. Verify that each is actually fitted fully.
Punch Down the Wires:
Assemble a suitable amount of wires in each of the slots of the keystones with the punch-down tool. Moreover, with the help of the tool, the wires will be trimmed automatically.
Secure the Keystone Jack:
When all the wires are punched down, lock the cover of the keystone jack, or it could be secured if it comes with the cap.
Install the Keystone Jack into the Faceplate:
Get the keystone jack snapped into the appropriate slot on the network faceplate. Expect a tick to be heard as it settles in a fixed position.
Mount the Faceplate:
Align the faceplate’s center square over the hole and connect the screws through the screwdriver.
Test the Connection:
Employ a network cable tester to rule it out that the keystone jack is properly connected and all the connections are accurate.
Tips:
Before using the punch-down tool, make sure that the cabling scheme is in accordance - whether T568A or T568B.
Prevent from cutting too far the jacket of the cable, only the top edge, so as not to hang out more copper optic cable shield.
Wire carefully to avoid potential damage of wiring while installing.
The provided steps comprise the main part of the installation of CAT6 keystone jacks to a network faceplate to build a confined network, which will be highly effective.
 0:00:26
 0:04:06
 0:00:58
 0:08:12
 0:03:14
 0:08:58
 0:09:52
 0:04:51
 0:01:23
 0:00:33
 0:00:21
 0:01:37
 0:00:44
 0:00:45
 0:02:06
 0:00:41
 0:01:01
 0:03:16
 0:04:00
 0:00:28
 0:01:01
 0:01:12
 0:04:13
 0:01:36