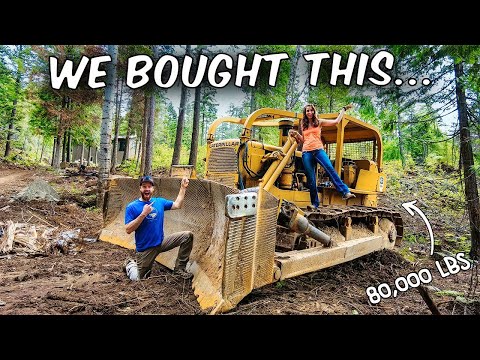
Buying & Fixing a Bulldozer, Cat D3 Dozer, Part 1/2

preview_player
Показать описание
Part 1/2, my initial run-through of fixes and maintenance on this old machine.

MERCH!:
Patreon:
Amazon Affiliate Storefront:
Buy me a coffee:
Facebook:
Evolution power tools affiliate link: (promo code: Farmcraft)
Save 5% for yourself and also help out the channel. Thanks!

#farmlife #farmcraft101 #farming #farmer

00:00 Problems with dozer
4:13 Install battery, how to drive dozer
9:06 Start on oil leak and alternator
18:49 Power wash
20:55 Meters, air filters, radiator
23:10 Alternator modification
28:35 Open and fix alternator
32:37 Dozer overview
35:22 Check fluids and wiring/breaker
41:12 Hour meter & oil pressure switch
49:17 Governor seal
54:00 Dozing!
Рекомендации по теме
Комментарии
Автор

I can imagine Matt from Dieselcreek clicking on this video like a mad man!

swede
Автор

I was wondering what that thing was in the background in the last video
waking up to another farmcraft video about repairing big machines is always a sign for a good day

KAINARTZ
Автор

Suggestion from a retired heavy equipment guy.
You don't need to replace your cylinder rods, you just send them out and have them ground and re chromed. You can get your cylinder repacked at the same shop or repack them yourself, it's easy. Either way the grinding, re chroming, polishing and repacking process could make a interesting episode if there's a shop that would allow you to film it.
Good luck

Kendoe
Автор

Could be wrong, but I believe those plywood "arm rests" are actually the base plates for the old arm rests. Looks like they just need a block of new foam and some vinyl upholstery wrap - unless you wanna go super fancy and do leather. 😆🤔

Love this project!! Can't wait to watch more, and glad to see the seals are back in action. Hehe.

NimblyJimbly
Автор

That special time in a man's life when he gets his first Catepillar!

redsable
Автор

Great video, Jon! A few suggestions:
1) put a closed-cell foam sheet in the bottom of the battery box to cushion the battery. Harbor Freight sells them as .Anti-Fatigue Foam Mat Set.

2) Fabricate or purchase a battery hold-down bracket. Otherwise, you will eventually have a bad day, probably sooner than later

3) Always use the glow plugs before attempting to start engine.

4) Connect the alternator field terminal to the accessory terminal of the ignition switch, otherwise you'll have a constant battery drain in your existing connection. The internal regulator will try to supply current to the field windings to increase the output voltage, which won't happen if the rotor is not spinning. Originally, the FIELD terminal was connected to one terminal of a 12v light bulb, the other terminal to the starter switch IGNITION terminal on gasoline powered cars, and the bulb labeled ALTERNATOR. The bulb served dual functions as an "idiot light" and a max field current limiter.

5) There is a small hole in the rear alternator housing that lines up with the holes in the brush housing. I find that a paper clip partially straightened works great for holding the brushes in for reassembly.

6) The alternator output should start out around 14.5v for quick charging, but after running for a while should drop to around 13.6V-13.8V or otherwise your battery will be overcharging. If the voltage remains above 14v, consider switching to an AGM battery, as they are more tolerant of high charge currents/voltages

7) The battery disconnect switch fried because they tried routing starter current through it. If you routed starter current elsewhere, a battery disconnect is not a bad idea. Switch the positive terminal, not the negative, and connect the starter solenoid direct to the positive terminal.

8) The rear alternator mounting tab now has a LOT of tension on it because there's nothing filling the space between it and the alternator mounting bracket. I suggest filling that gap with something like a chunk of water pipe, just to relieve the side pressure on the tab and allow you to cinch the mounting bolt down more. It will also relieve pressure on the front mounting tab.

stevewilke
Автор

Your content, editing and commentary are top notch. I don't own, nor will I ever own a dozer but I'll watch every video you make on repairing and operating yours.
Thank you!!

jimmyhat
Автор

I love that (for YOU) the seal joke never gets old!😂 A classic “Dad joke” if ever there was one.

bobdufresne
Автор

You can push a pin from the rear of the alternator to hold the brushes during assembly, there’s a hole there for that. Enjoyed the video!

markmaithonis
Автор

When you are going to switch gears, specifically from forward to reverse; use your brakes to stop the machine. The jerky hard reverse/hard gear changes is really hard on your transmission, as well as your back. Everything about this is great, keep on keeping on.

raymondwhite
Автор

I saw this pop up on the sidebar and actually got exited to watch it. This man has taught me so much about a lot of things I probably won't ever need to know, but just in case... I now know it.. and "Knowing is half the battle" - GI Joe

glock
Автор

Electritian here. The battery drain is probably coming from the bridge wire on the alternator. if you bridge it that way it will keep the winding nice and toasty. Just use the spare old wire to the alternator and connect it on the switched side of your oil pressure switch. this will switch off the alternator as long as the engine is not running

dercaradas
Автор

if you have concerns about chipping the concrete, we use old tires to put under the tracks, especially for turns. Can't wait to see part 2.

itrules
Автор

One hour video and you don’t want it to end. Great content! Thank you!

visiontrivia
Автор

Your battery draw comes from the way you have your alternator field coil hooked up. It is always energized in its current setup. Use the wire you left disconnected in the console attach it to the hour meter side of the oil pressure switch and attach the other end to the F on the alternator. This way the field coil is only energized when the engine is running and you will no longer have a parasitic draw on the battery.
Great video! I recently found your channel and have enjoyed watching. 👍

edpearce
Автор

Pro tip. If you get the whoopdey doos when pushing dirt, split your cut so that half the dozer is on smoother flat ground. and angle the blade that will help too. It essentially makes the dozer longer and the cut narrower.

erikcourtney
Автор

Living my life vicariously through you since I love heavy equipment but live in a subdivision.

Hiddenracin
Автор

Looks like the poor girl had minimal maintenance in it’s life! Glad it found a good home! Now just loosen up the tracks. Great video!

josephperkins
Автор

It's like a combination of Andrew Camatera and Abom79. I love this kind of content, cause you definitely have your own spin on it. Can't wait for part 2!

erichenao-
Автор

First time I've seen anyone pull the brush hold-back wire out through the drive side of an alternator. Most of the time there's a hole in the back side to pull the exposed wire out. Nice to have the machine tools to adjust, adapt, and over come!

dorightal
visit shbcf.ru