filmov
tv
python pytorch test cuda

Показать описание
Title: Testing PyTorch with CUDA: A Comprehensive Tutorial
Introduction:
PyTorch, a popular open-source deep learning library, provides support for GPU acceleration through CUDA. Utilizing CUDA can significantly enhance the performance of your deep learning models by harnessing the parallel processing power of NVIDIA GPUs. This tutorial will guide you through the process of testing PyTorch with CUDA, ensuring that your code is making the most of your GPU resources.
Prerequisites:
Before proceeding with this tutorial, make sure you have the following installed:
Step 1: Install PyTorch and CUDA Dependencies:
If you haven't already installed PyTorch, you can use the following command:
Ensure that your CUDA toolkit and cuDNN are compatible with your GPU and PyTorch version. Refer to the official PyTorch website for compatibility details.
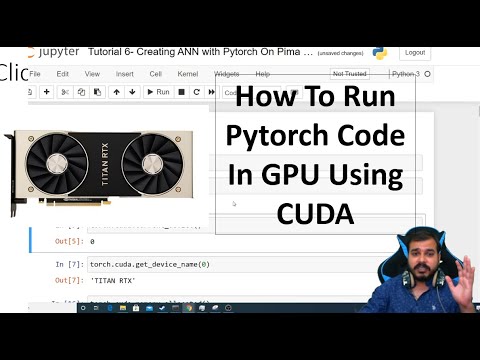
Step 2: Import PyTorch and Check GPU Availability:
This code snippet checks if a GPU is available and prints its name. If no GPU is available, the script defaults to using the CPU.
Step 3: Define a Simple Model:
Create a simple neural network model. For demonstration purposes, we'll create a basic feedforward neural network.
Step 4: Move Data to the Selected Device:
Ensure that your input data is also moved to the selected device (GPU or CPU). Modify your data loading code accordingly:
Step 5: Train the Model:
Train your model as usual, making sure that both the model and data are on the selected device:
Conclusion:
Congratulations! You have successfully tested PyTorch with CUDA for GPU acceleration. This tutorial covered the basics of checking GPU availability, defining a simple model, moving data to the selected device, and training the model with CUDA support. Feel free to apply these concepts to more complex models and datasets in your deep learning projects.
ChatGPT
Introduction:
PyTorch, a popular open-source deep learning library, provides support for GPU acceleration through CUDA. Utilizing CUDA can significantly enhance the performance of your deep learning models by harnessing the parallel processing power of NVIDIA GPUs. This tutorial will guide you through the process of testing PyTorch with CUDA, ensuring that your code is making the most of your GPU resources.
Prerequisites:
Before proceeding with this tutorial, make sure you have the following installed:
Step 1: Install PyTorch and CUDA Dependencies:
If you haven't already installed PyTorch, you can use the following command:
Ensure that your CUDA toolkit and cuDNN are compatible with your GPU and PyTorch version. Refer to the official PyTorch website for compatibility details.
Step 2: Import PyTorch and Check GPU Availability:
This code snippet checks if a GPU is available and prints its name. If no GPU is available, the script defaults to using the CPU.
Step 3: Define a Simple Model:
Create a simple neural network model. For demonstration purposes, we'll create a basic feedforward neural network.
Step 4: Move Data to the Selected Device:
Ensure that your input data is also moved to the selected device (GPU or CPU). Modify your data loading code accordingly:
Step 5: Train the Model:
Train your model as usual, making sure that both the model and data are on the selected device:
Conclusion:
Congratulations! You have successfully tested PyTorch with CUDA for GPU acceleration. This tutorial covered the basics of checking GPU availability, defining a simple model, moving data to the selected device, and training the model with CUDA support. Feel free to apply these concepts to more complex models and datasets in your deep learning projects.
ChatGPT
 0:13:14
 0:18:07
 0:03:31
 0:05:11
 0:10:29
 0:03:31
 0:16:39
 0:06:36
 0:00:25
 0:03:20
 0:03:13
 0:02:43
 0:03:19
 0:03:32
 0:03:34
 0:19:11
 0:11:50
 0:03:14
 0:01:34
 0:03:31
 0:03:20
 1:37:26
 0:00:58
 0:03:22