filmov
tv
How to grout, STEP by STEP

Показать описание
SUBSCRIBE Learn how tile the right way
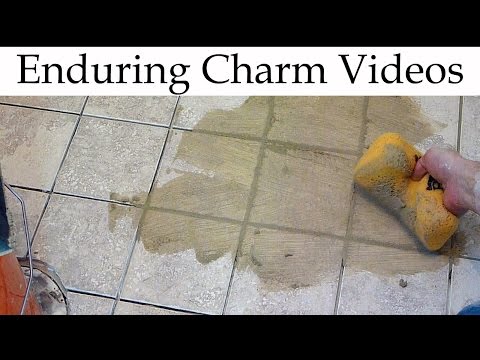
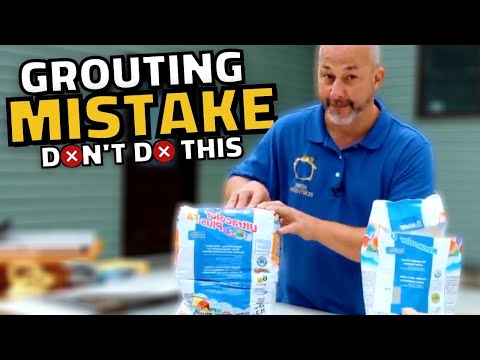
How to grout, no matter what the tile may be or whether it is a floor, or a wall. You will need a rubber float, a couple of buckets, a margin trowel a cordless drill and a mixing paddle for the drill., and some rubber gloves. Today there are many options ad different types of grout. Modern grouts are much better than the standard Cementitious grouts that are Portland Cement based, which were prone to staining and difficult to keep clean. Modern Satin resistant grouts provide a much denser and very stain resistant finish. Mix your grout according to the direction of the grout you are using. This is very important for these modern grouts, small discrepancies in the amount of water can impact the color of the grout. Once the grout is ready, I find the best way to grout, is to spread the grout with the rubber float while holding it at a very low angle to the floor and pushing the grout into the lines while applying a good amount of pressure. Once you have filled the lines go over the same area with the float at a very high angle in order to remove all the excess grout and leave the grout lines filled with the proper amount of grout. Let stand until there is no transfer to your finger when you touch the grout. Then with a grout sponge and a bucket of clean cool water, work the grout lines with the sponge. The sponge should have as little water as possible not dripping or soaked. At this point the goal is to shape the grout lines, not clean the tile. Once this is accomplished, the next step is to clean the tile. Again, with a damp sponge and clean water, place the sponge on the tile, with even pressure pull the sponge in one direction only, lift the sponge flip to the other side repeat, rinse and repeat until the grouted section is clean. Once the tile is grouted and cleaned in this fashion, wait until the area dries to a haze, most times you can wipe it down with a clean dry cloth to remove the haze. If needed, a second rinse with clean water can be done to remove the haze, and then follow with a cloth if any haze remains.
All tile installed by Sal DiBlasi, Elite-tile Company, in the Boston North Shore area. This video contains affiliate links, which means I will receive a small commission if you click on the product link.
#tile #transformthetrade #howtotile #installingtile #howtoinstalltile #Schlutersystems
☕ Buy me a coffee ☕
🙂 This is my Amazon Store 🙂
Facebook
Website
Twitter
Instagram
National Tile Contractors Association
Some of my favorite Tools
Opt into NTCA’s VIP Text Messaging program for training opportunities.
For Industry Professionals only
How to grout, no matter what the tile may be or whether it is a floor, or a wall. You will need a rubber float, a couple of buckets, a margin trowel a cordless drill and a mixing paddle for the drill., and some rubber gloves. Today there are many options ad different types of grout. Modern grouts are much better than the standard Cementitious grouts that are Portland Cement based, which were prone to staining and difficult to keep clean. Modern Satin resistant grouts provide a much denser and very stain resistant finish. Mix your grout according to the direction of the grout you are using. This is very important for these modern grouts, small discrepancies in the amount of water can impact the color of the grout. Once the grout is ready, I find the best way to grout, is to spread the grout with the rubber float while holding it at a very low angle to the floor and pushing the grout into the lines while applying a good amount of pressure. Once you have filled the lines go over the same area with the float at a very high angle in order to remove all the excess grout and leave the grout lines filled with the proper amount of grout. Let stand until there is no transfer to your finger when you touch the grout. Then with a grout sponge and a bucket of clean cool water, work the grout lines with the sponge. The sponge should have as little water as possible not dripping or soaked. At this point the goal is to shape the grout lines, not clean the tile. Once this is accomplished, the next step is to clean the tile. Again, with a damp sponge and clean water, place the sponge on the tile, with even pressure pull the sponge in one direction only, lift the sponge flip to the other side repeat, rinse and repeat until the grouted section is clean. Once the tile is grouted and cleaned in this fashion, wait until the area dries to a haze, most times you can wipe it down with a clean dry cloth to remove the haze. If needed, a second rinse with clean water can be done to remove the haze, and then follow with a cloth if any haze remains.
All tile installed by Sal DiBlasi, Elite-tile Company, in the Boston North Shore area. This video contains affiliate links, which means I will receive a small commission if you click on the product link.
#tile #transformthetrade #howtotile #installingtile #howtoinstalltile #Schlutersystems
☕ Buy me a coffee ☕
🙂 This is my Amazon Store 🙂
Website
National Tile Contractors Association
Some of my favorite Tools
Opt into NTCA’s VIP Text Messaging program for training opportunities.
For Industry Professionals only
 0:00:57
Grout Tutorial ✅
 0:12:24
How To Grout A Shower Wall - EASY Step-By-Step Guide
 0:06:08
BEST way to GROUT. No Haze! WINNI Vlog 018
 0:05:58
How To Grout A Backsplash - Step-By-Step Tutorial
 0:05:56
How to grout tiles
 0:00:12
How to Create Amazing Grout Lines on Tiles #satisfying @MNSmartTech
 0:10:45
How to grout, STEP by STEP
 0:05:16
How To Grout Tile: Correct Technique Makes It Easy
 0:45:42
E80 Chris Pisano Pitches Passion to Write a Novel on yWrite w/Angela Grout
 0:04:58
How to GROUT tiles - full process, step by step - EASY DIY
 0:00:23
ho to regrout tile, grouting uneven tile, grouting tile cleaning, grout filling in tiles
 0:05:18
This Grouting Mistake will Ruin Your Tile Job
 0:03:05
How to Make Your Bath / Shower Surround Grout Look New Again!
 0:18:49
How to Tile and Grout a Bathroom Floor - Complete Beginners Guide
 0:02:29
How To Grout Tiles - DIY At Bunnings
 0:05:53
7 Must See Beginner Steps - How To Grout Porcelain Tile Floor - Easy DIY Grouting
 0:00:29
grouting step by step
 0:00:16
How to apply grout tiles Epoxy tiles flooring
 0:01:35
Two Ways to Grout Outdoor Tiles #shorts
 0:00:25
Epoxy pearl gold tile grout installation
 0:04:36
How to re-grout tiles
 0:08:44
How to Grout Tile Backsplash
 0:04:06
TAL - How to Grout Step By Step Guide
 0:04:35
How To Grout a Tile Backsplash- Step by Step
Комментарии