filmov
tv
Thule T2 Pro XT and XTR Hitch Mount Bike Rack Assembly Tips

Показать описание
My video summarizes HOW TO properly assembly a Thule T2 Pro XT and XTR hitch mounted bike rack. THULE should be ashamed of themselves for creating such a horrible and utterly useless instruction book as it provides nearly ZERO information on how to build or use the rack properly.
In my video, I don't actually show myself building this rack but rather pointing out where all the bolts and washer and support bars go.
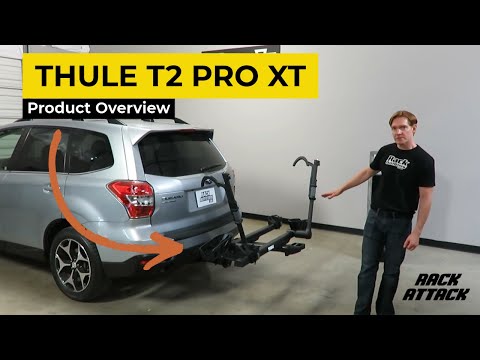
The 2021 Thule T2 Pro XTR is Thule's latest rendition of the already excellently designed T2 Pro XT. The XTR model adds a set of roller wheels to the bottom of the rack to help facilitate easier moving on smooth hard surfaces such as driveways and garage floors. This bike rack, while very well made is quite heavy and can be quite awkward to move without any help. Having roller wheels means that a single person can transport this rack around with relative ease. The Thule T2 Pro comes in two variants, the 9035XTR that has a 1.25-inch hitch mount while the 9034XTR uses the 2-inch hitch mount. Both versions will easily carry 2 bikes with ease however if you ever intend to upgrade to the T2 Pro XT/XTR to a 4 bike carrier using the T2 Pro XT/XTR 2 bike add-on (9036XTB) that ONLY the 9034XTR model with the larger 2-inch hitch pole can handle that kind of weight. Choose accordingly.
In my video, I don't actually show myself building this rack but rather pointing out where all the bolts and washer and support bars go.
The 2021 Thule T2 Pro XTR is Thule's latest rendition of the already excellently designed T2 Pro XT. The XTR model adds a set of roller wheels to the bottom of the rack to help facilitate easier moving on smooth hard surfaces such as driveways and garage floors. This bike rack, while very well made is quite heavy and can be quite awkward to move without any help. Having roller wheels means that a single person can transport this rack around with relative ease. The Thule T2 Pro comes in two variants, the 9035XTR that has a 1.25-inch hitch mount while the 9034XTR uses the 2-inch hitch mount. Both versions will easily carry 2 bikes with ease however if you ever intend to upgrade to the T2 Pro XT/XTR to a 4 bike carrier using the T2 Pro XT/XTR 2 bike add-on (9036XTB) that ONLY the 9034XTR model with the larger 2-inch hitch pole can handle that kind of weight. Choose accordingly.
 0:04:06
Thule T2 Pro XT Rack Review and Demo
 0:00:59
Hitch Bike Rack - Thule T2 Pro XT
 0:03:39
THULE T2 PRO XT AND XTR ADD-ON
 0:00:19
Thule T2 Pro XTR - Vidoe 1
 0:09:58
Thule T2 Pro vs. T2 Pro XT
 0:01:19
Thule T2 Pro XT, Hitch Bike Rack Showcase
 0:09:33
Thule T2 Pro XTR Bike Rack Demonstration
 0:25:49
Thule T2 Pro XT vs Kuat NV 2.0 Tray Bike Racks - FULL Comparison
 0:01:22
Thule - T2 Pro XT Bike Rack Installation - How To
 0:02:36
'See why you Don't NEED the Thule T2 Pro XTR 2 Bike Hitch Rack- IT WILL SHOCK YOU!'
 0:00:32
Loading and Unloading the Thule T2 Pro XTR Hitch Bike Rack
 0:11:18
Thule T2 Pro XT and XTR Hitch Mount Bike Rack Assembly Tips
 0:10:06
Thule T2 Pro XT with Add On 4 Bike Rack - Unbox and Install (2 Mistakes Made) #cycling #bikerack
 0:06:12
Thule T2 Pro XT Bike Rack Review | Best Bike Rack? | Hitch Bike Racks | Mountain Bike / Gravel Bike
 0:00:29
How to install a Thule T2 Pro XT bike rack on a hitch
 0:13:37
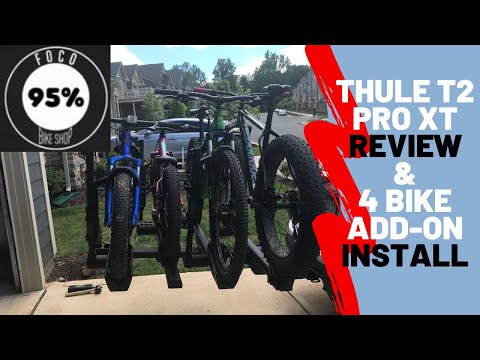
Thule T2 Pro XT Bike Rack REVIEW & Four Bike Add On INSTALL
 0:08:56
Our Go-To Bike Racks! Thule T2 Pro XTR Vs. Kuat Piston Pro X
 0:02:13
Real Review #2 - Thule T2 Pro XT
 0:04:37
Thule T2 PRO X | Bike Rack Setup & Review
 0:04:47
Thule T2 PRO XT and XTR Bike Rack Assembly
 0:00:16
Removing the Thule T2 Pro XTR Hitch Mount Bike Rack.
 0:12:46
Thule T2 Pro XT Platform Hitch Mount Bike Rack Demonstration - 9034XT
 0:08:30
Thule T2 Pro XT review, will this rack even work on the brand new 2018 Jeep Wrangler JLUR?!? 😬
 0:03:50
Is Yakima StageTwo or Thule XTR Pro the Better Hitch Bike Rack?
Комментарии