filmov
tv
Converting Kotlin to Java in Android Studio

Показать описание
Learn how to seamlessly convert Kotlin code to Java in Android Studio with this step-by-step guide. Whether you're transitioning between languages or collaborating with Java-centric teams, this guide will help you navigate the conversion process effortlessly.
---
Disclaimer/Disclosure: Some of the content was synthetically produced using various Generative AI (artificial intelligence) tools; so, there may be inaccuracies or misleading information present in the video. Please consider this before relying on the content to make any decisions or take any actions etc. If you still have any concerns, please feel free to write them in a comment. Thank you.
---
If you're working on an Android project in Kotlin but need to convert some or all of your code to Java, Android Studio provides tools to simplify the process. Whether you're transitioning between languages or collaborating with Java-centric teams, converting Kotlin to Java can help streamline development. Here's a step-by-step guide on how to do it:
Step 1: Install Kotlin Plugin (if necessary)
If your Android Studio installation doesn't already include Kotlin support, you'll need to install the Kotlin plugin. Go to File > Settings > Plugins > Marketplace, then search for "Kotlin" and install the plugin.
Step 2: Configure Kotlin Code Style
Before converting Kotlin code to Java, it's a good idea to configure your Kotlin code style to match Java conventions. This ensures a smoother transition between the two languages. Go to File > Settings > Editor > Code Style > Kotlin and adjust the settings as needed.
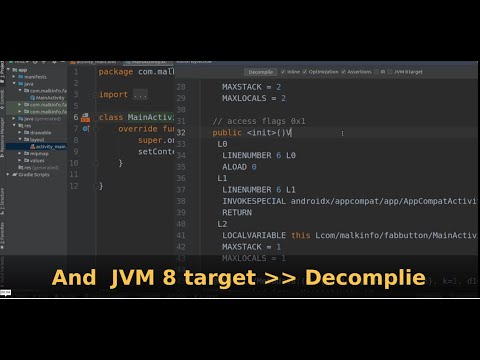
Step 3: Convert Kotlin File to Java File
Android Studio provides a built-in feature to convert Kotlin code to Java. Right-click on the Kotlin file you want to convert in the Project view, then navigate to Convert Kotlin File to Java. Android Studio will automatically generate a Java file with equivalent functionality.
Step 4: Refactor and Fine-Tune
After converting the Kotlin file to Java, you may need to perform some manual adjustments to ensure the Java code functions correctly. Pay attention to any Kotlin-specific features or syntax that may not have direct equivalents in Java, such as Kotlin extension functions or null safety operators.
Step 5: Test and Debug
Once you've converted and fine-tuned the Java code, it's essential to thoroughly test and debug it to ensure it behaves as expected. Run your app in debug mode, and use Android Studio's debugging tools to identify and fix any issues that may arise.
Step 6: Repeat as Needed
If you have multiple Kotlin files to convert, repeat the above steps for each file. Take your time to ensure the conversion is accurate and that the resulting Java code maintains the functionality of the original Kotlin code.
By following these steps, you can seamlessly convert Kotlin code to Java in Android Studio, allowing for greater flexibility in your development workflow and collaboration with Java-focused teams.
---
Disclaimer/Disclosure: Some of the content was synthetically produced using various Generative AI (artificial intelligence) tools; so, there may be inaccuracies or misleading information present in the video. Please consider this before relying on the content to make any decisions or take any actions etc. If you still have any concerns, please feel free to write them in a comment. Thank you.
---
If you're working on an Android project in Kotlin but need to convert some or all of your code to Java, Android Studio provides tools to simplify the process. Whether you're transitioning between languages or collaborating with Java-centric teams, converting Kotlin to Java can help streamline development. Here's a step-by-step guide on how to do it:
Step 1: Install Kotlin Plugin (if necessary)
If your Android Studio installation doesn't already include Kotlin support, you'll need to install the Kotlin plugin. Go to File > Settings > Plugins > Marketplace, then search for "Kotlin" and install the plugin.
Step 2: Configure Kotlin Code Style
Before converting Kotlin code to Java, it's a good idea to configure your Kotlin code style to match Java conventions. This ensures a smoother transition between the two languages. Go to File > Settings > Editor > Code Style > Kotlin and adjust the settings as needed.
Step 3: Convert Kotlin File to Java File
Android Studio provides a built-in feature to convert Kotlin code to Java. Right-click on the Kotlin file you want to convert in the Project view, then navigate to Convert Kotlin File to Java. Android Studio will automatically generate a Java file with equivalent functionality.
Step 4: Refactor and Fine-Tune
After converting the Kotlin file to Java, you may need to perform some manual adjustments to ensure the Java code functions correctly. Pay attention to any Kotlin-specific features or syntax that may not have direct equivalents in Java, such as Kotlin extension functions or null safety operators.
Step 5: Test and Debug
Once you've converted and fine-tuned the Java code, it's essential to thoroughly test and debug it to ensure it behaves as expected. Run your app in debug mode, and use Android Studio's debugging tools to identify and fix any issues that may arise.
Step 6: Repeat as Needed
If you have multiple Kotlin files to convert, repeat the above steps for each file. Take your time to ensure the conversion is accurate and that the resulting Java code maintains the functionality of the original Kotlin code.
By following these steps, you can seamlessly convert Kotlin code to Java in Android Studio, allowing for greater flexibility in your development workflow and collaboration with Java-focused teams.
 0:01:17
 0:03:12
 0:02:03
 0:02:06
 0:02:32
 0:04:13
 0:34:51
 0:03:38
 0:04:51
 0:01:26
 0:01:48
 0:02:15
 0:08:25
 0:07:43
 0:01:05
 0:03:19
 0:12:04
 0:02:19
 0:05:56
 0:00:17
 0:02:10
 0:03:08
 0:07:48
 0:00:58