filmov
tv
How to Enable mod_rewrite for Apache 2.2

Показать описание
Disclaimer/Disclosure: Some of the content was synthetically produced using various Generative AI (artificial intelligence) tools; so, there may be inaccuracies or misleading information present in the video. Please consider this before relying on the content to make any decisions or take any actions etc. If you still have any concerns, please feel free to write them in a comment. Thank you.
---
Summary: Learn how to enable the mod_rewrite module for Apache 2.2 to manage URL rewriting and improve your website's SEO and usability.
---
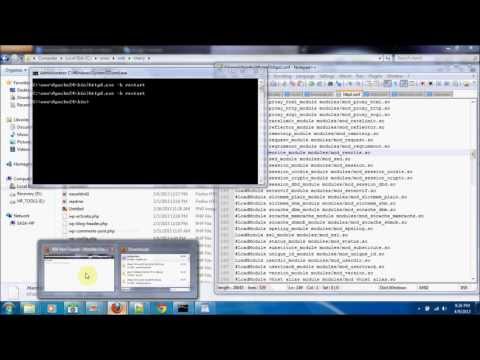
Enabling mod_rewrite for Apache 2.2
The mod_rewrite module in Apache is a powerful tool for manipulating URL requests. It allows you to rewrite URLs on the fly, which can be useful for SEO, user-friendly URLs, and various other web server tasks. Here's a step-by-step guide to enable mod_rewrite for Apache 2.2.
Step 1: Verify mod_rewrite Installation
First, check if mod_rewrite is already installed. You can do this by running the following command in your terminal:
[[See Video to Reveal this Text or Code Snippet]]
If mod_rewrite is enabled, you should see a line like this:
[[See Video to Reveal this Text or Code Snippet]]
If you don't see this line, you'll need to enable mod_rewrite.
Step 2: Enable mod_rewrite Module
For Debian/Ubuntu
If you're using a Debian-based system, enabling mod_rewrite is straightforward. Run the following command:
[[See Video to Reveal this Text or Code Snippet]]
After enabling the module, restart Apache to apply the changes:
[[See Video to Reveal this Text or Code Snippet]]
For Red Hat/CentOS
[[See Video to Reveal this Text or Code Snippet]]
Find the following line and uncomment it (remove the `` at the beginning):
[[See Video to Reveal this Text or Code Snippet]]
Save the file and exit the editor. Then, restart Apache to apply the changes:
[[See Video to Reveal this Text or Code Snippet]]
Step 3: Configure .htaccess
[[See Video to Reveal this Text or Code Snippet]]
Find the <Directory> section for your website. It might look something like this:
[[See Video to Reveal this Text or Code Snippet]]
Change AllowOverride None to AllowOverride All:
[[See Video to Reveal this Text or Code Snippet]]
Save the file and exit the editor. Then, restart Apache to apply the changes:
[[See Video to Reveal this Text or Code Snippet]]
Step 4: Test mod_rewrite
Create a .htaccess file in your website's root directory (e.g., /var/www/html/.htaccess):
[[See Video to Reveal this Text or Code Snippet]]
Add the following lines to the .htaccess file to test mod_rewrite:
[[See Video to Reveal this Text or Code Snippet]]
Conclusion
Enabling mod_rewrite for Apache 2.2 involves checking if the module is installed, enabling it, configuring .htaccess files, and testing the setup. This process allows you to take full advantage of URL rewriting, enhancing your site's SEO and usability.
---
Summary: Learn how to enable the mod_rewrite module for Apache 2.2 to manage URL rewriting and improve your website's SEO and usability.
---
Enabling mod_rewrite for Apache 2.2
The mod_rewrite module in Apache is a powerful tool for manipulating URL requests. It allows you to rewrite URLs on the fly, which can be useful for SEO, user-friendly URLs, and various other web server tasks. Here's a step-by-step guide to enable mod_rewrite for Apache 2.2.
Step 1: Verify mod_rewrite Installation
First, check if mod_rewrite is already installed. You can do this by running the following command in your terminal:
[[See Video to Reveal this Text or Code Snippet]]
If mod_rewrite is enabled, you should see a line like this:
[[See Video to Reveal this Text or Code Snippet]]
If you don't see this line, you'll need to enable mod_rewrite.
Step 2: Enable mod_rewrite Module
For Debian/Ubuntu
If you're using a Debian-based system, enabling mod_rewrite is straightforward. Run the following command:
[[See Video to Reveal this Text or Code Snippet]]
After enabling the module, restart Apache to apply the changes:
[[See Video to Reveal this Text or Code Snippet]]
For Red Hat/CentOS
[[See Video to Reveal this Text or Code Snippet]]
Find the following line and uncomment it (remove the `` at the beginning):
[[See Video to Reveal this Text or Code Snippet]]
Save the file and exit the editor. Then, restart Apache to apply the changes:
[[See Video to Reveal this Text or Code Snippet]]
Step 3: Configure .htaccess
[[See Video to Reveal this Text or Code Snippet]]
Find the <Directory> section for your website. It might look something like this:
[[See Video to Reveal this Text or Code Snippet]]
Change AllowOverride None to AllowOverride All:
[[See Video to Reveal this Text or Code Snippet]]
Save the file and exit the editor. Then, restart Apache to apply the changes:
[[See Video to Reveal this Text or Code Snippet]]
Step 4: Test mod_rewrite
Create a .htaccess file in your website's root directory (e.g., /var/www/html/.htaccess):
[[See Video to Reveal this Text or Code Snippet]]
Add the following lines to the .htaccess file to test mod_rewrite:
[[See Video to Reveal this Text or Code Snippet]]
Conclusion
Enabling mod_rewrite for Apache 2.2 involves checking if the module is installed, enabling it, configuring .htaccess files, and testing the setup. This process allows you to take full advantage of URL rewriting, enhancing your site's SEO and usability.
 0:02:07
 0:03:27
 0:01:04
 0:06:16
 0:04:47
 0:02:36
 0:05:33
 2:05:40
 0:03:40
 0:03:24
 0:03:24
 0:05:43
 0:01:34
 0:02:55
 0:02:04
 0:02:24
 0:00:42
 0:02:43
 0:01:20
 0:22:46
 0:03:08
 0:02:33
 0:01:43
 0:07:06