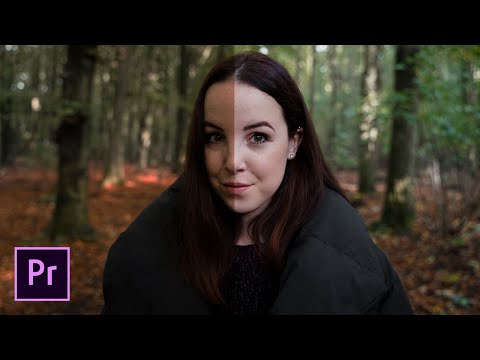
COLOR CORRECT Like A PRO

preview_player
Показать описание


COURSES!

GEAR USED↓↓↓

MY SOCIALS

If you want to get better at color grading you have to be color correcting. Remember to always color correct first in Premiere or Final Cut using whatever tools that work for your workflow and then color grade after.
Рекомендации по теме
Комментарии
Автор

Last week to enter the giveaway for the Fujifilm X-T30! Best of luck 🙏

mattih
Автор

Finally someone who properly explains the color grading. I thought people just color correct "as they please" and "eye ball" it, but your explanation of bumping the blacks, highlights and shadows makes sense to me. Thank you very much.

vivannguyenchi
Автор

This video just goes so deep down in details! I have seen lots of color grading by Daniel and Peter, and they do cover every step we need to do regarding color correction and color grading but somehow I just don't understand why they did that. Thank you so much Matti for breaking everything down and layed them out in order, the puzzle in my head has finally been solved. I really appreciate the effort you put in for those content!

jasonschiffer
Автор

So excited you made this. Was just telling my team to reference your channel for colour 🙏🏼

lostleblanc
Автор

Sir.. every month I come back to watch this video again and every time I get a new perspective and get a much deeper understanding. I have grasped very much out of what you've been teaching so far and it's so so practically re-creatable .. I can go back and try the same thing and it works for real as you've shown in the video... I really appreciate and thank you deeply for making this video.

SagarGanesh_ContentCreator
Автор

I started following you when you first made a video about colour grading. Full circles Matti. I've grown so much because of you. It's epic 😍

rishimodak
Автор

The Ansel Adams chart is the solution I've been searching for for months. THANK YOU.

stephencolor
Автор

This is the absolute best tutorial I've seen on color grading/correct, thank you! I bought Magic Bullet (Colorista) 4 months ago and have never used it until I watched this video and now I feel like I'm actually able to truly color correct and make the frames look consistent! Thanks Matti!

HigMedia
Автор

This walkthrough is phenomenal!! I’ve always wondered how certain photographers get rich beautiful colors in their photos ✨ this is everything I’ve been looking for!!

kao_
Автор

Loving all your vids lately Matti. We've learnt so much about filmmaking from yourself, Peter and Darious. We're complete beginners but have taken what we've learnt so far and started vloging our travels. So much of what we've learnt from you guys has gone into our vids so keep the good stuff coming 👌

WheresJalex
Автор

One of the most helpful videos I’ve watched. Awesome work, man!

masface
Автор

color correcting is something I started working on. I love high contrast with quite a bit of saturation. I love to have those colors pop! but skin tones I struggle with. I don't want to be orange or washed out in my videos. Thanks for the color correcting tips Matti!

AnnaKincaid
Автор

Hey Matti, here are some tips that can add to what you recommended. Hope they help. Tell me what you think:
- Use Adjustment layers so that you can visually see in your timeline what you have done. Also by using one big adjustment layer and cutting it in-between clips AFTER you corrected 1 hero shot, means that your sliders/values will already be adjusted and if you need to make 1 minor correction, you don't have to move 10 values or copy paste the effect every time and change it.
- (For Grading especially) Set these Adjustment layers to 50% opacity. This has 2 benefits:
1. If you're in a hurry and you don't want to tweak each individual slider to bump your grade effect, you can always turn up that opacity from 50 to 60. Before you could always go lower, but not higher than 100. (obviously this is for your own grade with multiple effects, since the Luts already have this kind of slider)
2. If you are a perfectionist and want to tweak values (like curves) by 2 pixels lower or higher, having the opacity at 50 means that those 2 pixels become 4, so it's less finicky when you do this with a mouse.
- If you want to mess with colors for a grade, be sure to grab a JPG of a "color card" (google it), or better yet, shoot one on your location and add it under your grade. You can visually see what it's doing to the colors and it's a nice reference to keep until you make your final export (at that point you remove it, obviously)
- Don't underestimate the Original Three-Way Color Corrector Effect from Premiere. It is not obsolete, as they call it. It's pretty much the ONLY effect that has color wheels that let you determine WHAT IS a shadow and WHAT IS a highlight through sliders. Furthermore, it has actual numerical values that you can even keyframe: When I'm going for a look I always bump my color to the max, so that I can see if i'm nailing it in the vectorscope, and then take the value from 100 to like 20, while the Hue remains the same. And before Premiere 2019 it was also the only tool that let you De/Saturate Highlights, Mids, Shadows separately (again those Highs and Shadows being determined by you as you liked). And for people that don't have Colorista, I think this can help them more than the default Lumetri wheels.

ToastedSynapseGaming
Автор

This was amazing Matti! This is something I've been spending a lot of time trying to get good at lately.

TraeRobrock
Автор

Beautiful color grading! One of my favorite YouTuber! Thanks for teaching us some awesome tips. 📷

ShaneEricks
Автор

I've watched about 100 tutorials on this specific task and I have to say yours was the best. Great job!

dgoddard
Автор

Damn glad to be here Matti, I've recently gotten into video and your help has really kickstarted everything, I've only done a few videos so far but the feedback I get is insane! Thank you so much!

Corefitz
Автор

Small tweaks go a long way in color correcting. That's the biggest take away from this video for sure. Thanks for sharing your updated workflow Matti!

NicksFort
Автор

Color correcting/grading is my achilles heel. This was awesome... super helpful! Thank you!

SpoonfulofImagination
Автор

Thanks Matti!! Looking at the color wheels and vector scopes has helped me tremendously. I am color blind so seeing variations in skin tones is very hard for me. While I can recognize a beautiful image on screen, I have trouble diagnosing the image for myself. This workflow has made the process a bit easier for me. Thank you so much!

LoganGardner