filmov
tv
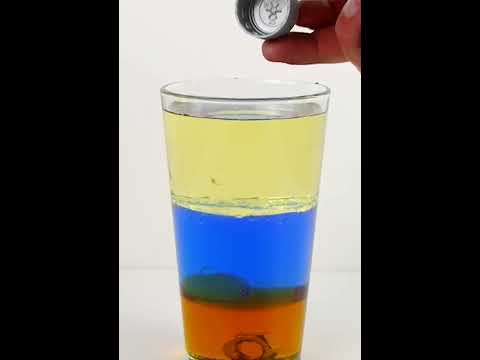
How I created this cool spawning effect using After Effects

Показать описание
How I created this effect 📽✅
1️⃣ I started by finding the perfect angle for the shot.
2️⃣ Then I placed all the objects on the table, making sure all objects was inside the frame.
3️⃣ Next step was to sit down and rotate the cup "on and off" a couple of times until I was happy with the motion.
4️⃣ Then came the crucial step; removing one item at a time in the reverse order of how I wanted them to spawn in. Very important: Don't move the camera!
5️⃣ Once I had the entire thing on video, I imported the footage to After Effects. Here I started seperating each of the "item spawns" into their own layers. Pro tip: CTRL + SHIFT + D will split the layer and move the second part to it's own layer.
6️⃣ Now it was time to create the graphics. I added a new solid color layer and added the Grid effect to it, and then did my best at aligning the layer in 3D space to make it look like it was flat on the table surface. The grid effect makes this part a lot easier.
7️⃣ I pre-composed the grid layer (solid color layer) and created the graphics inside of that new comp.
8️⃣ I wanted to control the arrow rotation on my graphics from the main comp. To do this, I added a Slider Control effect onto a new Null object and parented the rotation of the arrow to that slider. To do this, you first need to ALT-click on clock icon of the rotation attribute, and then add the following expression:
comp("NAME OF MAIN COMP").layer("NAME OF NULL").effect("NAME OF SLIDER EFFECT")("Slider")
9️⃣ The last part was to rotoscope my hand and cup and overlay it on the rest of the shots, and then I had to match the rotation of the coffee cup to the arrow.
And that's it.
Subscribe if you are a legend 💚💎
Happy editing 💚
 0:00:57
 0:23:33
 0:18:34
 0:00:38
 0:10:40
 0:00:26
 0:08:30
 0:00:54
 0:58:27
 0:00:26
 0:00:11
 0:00:14
 0:00:10
 0:01:00
 0:08:45
 0:00:24
 0:00:42
 0:00:22
 0:00:25
 0:00:25
 0:00:23
 0:00:09
 0:00:50
 0:00:32