filmov
tv
install virtual environment python windows 10

Показать описание
Virtual environments in Python allow you to create isolated environments for your projects, ensuring that dependencies are managed separately. This tutorial will guide you through the process of setting up a virtual environment on a Windows 10 system.
If you haven't installed Python on your Windows machine, you can download the latest version from the official Python website. Make sure to check the box that says "Add Python to PATH" during installation.
To open the Command Prompt, press Win + R to open the Run dialog, type cmd, and press Enter.
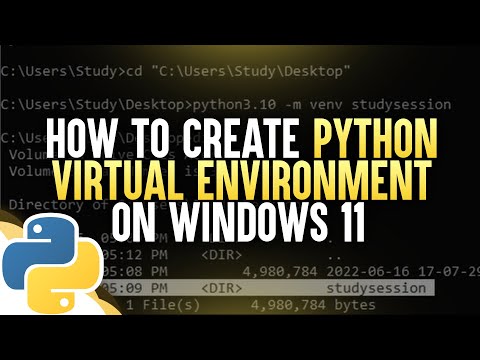
Choose or create a directory for your project, navigate to it using the Command Prompt, and then run the following command to create a virtual environment named "venv":
Replace venv with your preferred environment name.
To activate the virtual environment, navigate to your project directory in the Command Prompt and run:
You should see the virtual environment's name appear in the command prompt, indicating that you are now working within the virtual environment.
While the virtual environment is active, you can use pip to install Python packages, and they will be isolated to this environment.
For example:
When you're done working in the virtual environment, you can deactivate it by running:
Your command prompt should return to its original state.
By following these steps, you've successfully set up a virtual environment for your Python project on Windows 10. This practice helps keep your project dependencies isolated, making it easier to manage and share your code with others.
Remember to activate the virtual environment every time you work on your project and deactivate it when you're finished. This ensures that your project uses the correct dependencies and remains isolated from the rest of your system.
ChatGPT
If you haven't installed Python on your Windows machine, you can download the latest version from the official Python website. Make sure to check the box that says "Add Python to PATH" during installation.
To open the Command Prompt, press Win + R to open the Run dialog, type cmd, and press Enter.
Choose or create a directory for your project, navigate to it using the Command Prompt, and then run the following command to create a virtual environment named "venv":
Replace venv with your preferred environment name.
To activate the virtual environment, navigate to your project directory in the Command Prompt and run:
You should see the virtual environment's name appear in the command prompt, indicating that you are now working within the virtual environment.
While the virtual environment is active, you can use pip to install Python packages, and they will be isolated to this environment.
For example:
When you're done working in the virtual environment, you can deactivate it by running:
Your command prompt should return to its original state.
By following these steps, you've successfully set up a virtual environment for your Python project on Windows 10. This practice helps keep your project dependencies isolated, making it easier to manage and share your code with others.
Remember to activate the virtual environment every time you work on your project and deactivate it when you're finished. This ensures that your project uses the correct dependencies and remains isolated from the rest of your system.
ChatGPT
 0:09:05
 0:04:00
 0:06:05
 0:08:26
 0:01:13
 0:17:10
 0:05:45
 0:00:47
 0:05:34
 0:02:21
 0:04:08
 0:03:08
 0:12:06
 0:04:20
 0:00:33
 0:08:45
 0:21:38
 0:15:52
 0:06:50
 0:04:36
 0:00:29
 0:00:53
 0:12:38
 0:00:16