filmov
tv
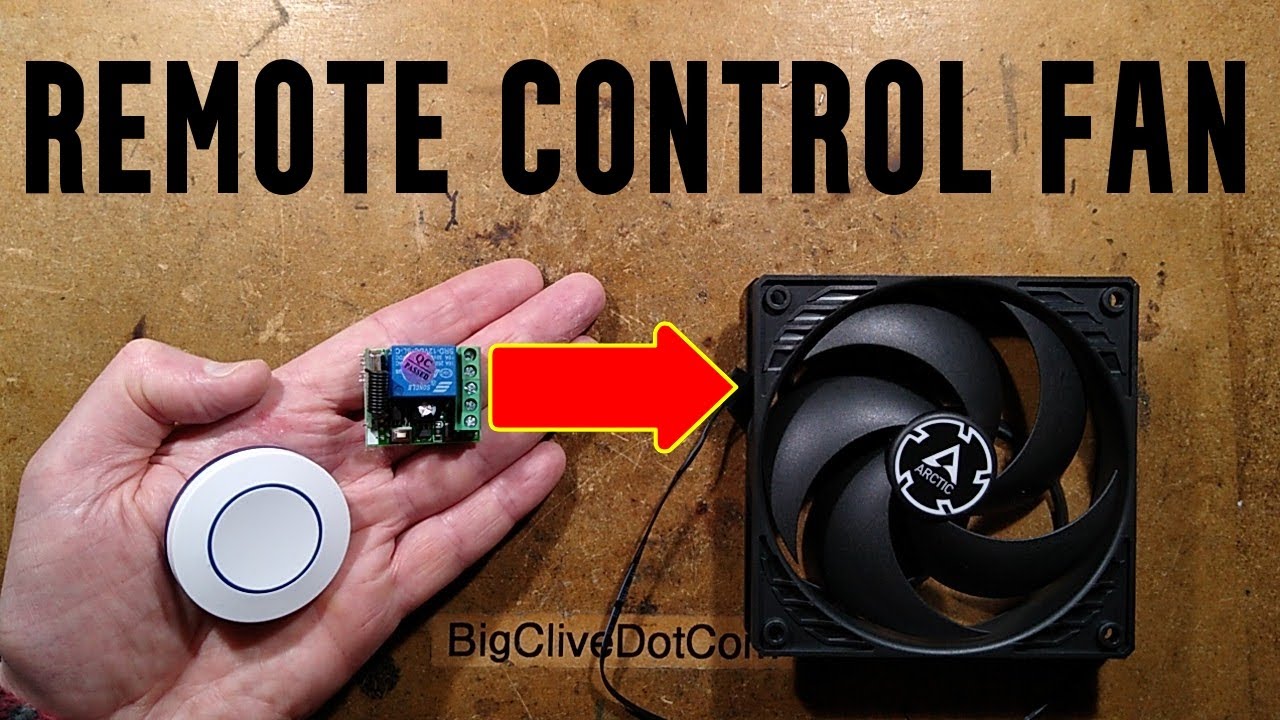
Adding remote control to a 12V fan
Показать описание
I've been experimenting with a system called PIV (Positive Input Ventilation) where a fan draws outside air into the attic, filters it, and then pushes it into your home to create a slight positive pressure that results in a steady airflow that displaces stale air out through natural building leakage.
Unlike America, where heating and cooling is done with ducted air, the most common heating system in the UK is still hydronic - a system where hot water is pumped around radiator panels. In older buildings this can result in stale air and mould (mold) issues. The continuous low flow of air using this system can help alleviate that issue. Like a more controlled way of having windows open.
There are commercial systems available that generally have a big slow running fan with speed options and a ducting system to a large vent on an upstairs ceiling. But I initially decided to test the system with a pressure optimised computer fan and some 3D printed adaptors for ceiling mounting with a standard HEPA filter.
I like the effect a lot. You can feel the freshness in the indoor air. But on the very cold or humid days it really needs to be turned off. I may add a temperature and humidity based control system at some point, but for initial tests I decided to add a simple remote control module that is very cheap and common on eBay.
Here's a link to the original video about the receiver:-
Here's how to program this unit and many others that use the same software.
To clear all existing codes, press and hold the button for about 5 seconds until the LED starts flashing, and then release the button and wait for a few seconds as it erases existing codes.
If the LED doesn't start flashing then the unit may use a different erasing technique. Turn it off and on again and then click the button 8 times. That should clear the existing codes.
To program each mode, press the button between 1 and 7 times, observing the brief LED flash with each press. After the required mode has been selected the LED will light to show it's waiting to receive a signal from the chosen remote button.
Press the remotes button and the LED will go out, or if it's the two button toggle mode it will blink and then wait for the second button to be pressed (which doesn't need to be on the same remote.)
If desired you can pair several other remotes by repeating the procedure. They can all have different functions.
Modes:-
1 - Single button momentary action. Non latching.
2 - Single button toggle on/off.
3 - Two button on/off. Each button is assigned independently.
4 - Single button timer 5-second delay.
5 - Single button timer 10-second delay.
6 - Single button timer 15-second delay.
7 - Single button timer 20-second delay.
Some similar units have an adjustable link for setting the mode. It usually offers momentary, latching or two button toggle. The button may only be for learning a code.
These units are common on eBay, usually supplied with a remote switch or key fob with a frequency choice of 433MHz or 315MHz. In the UK 433MHz is a standard frequency.
This also keeps the channel independent of YouTube's algorithm quirks, allowing it to be a bit more dangerous and naughty.
#ElectronicsCreators
 0:11:19
 0:00:42
 0:01:09
 0:02:07
 0:02:04
 0:01:48
 0:02:09
 0:04:07
 0:00:40
 0:05:20
 0:08:27
 0:02:24
 0:14:17
 0:03:16
 0:00:53
 0:07:04
 0:03:52
 0:02:24
 0:06:56
 0:00:51
 0:05:32
 0:08:56
 0:03:39
 0:00:53