filmov
tv
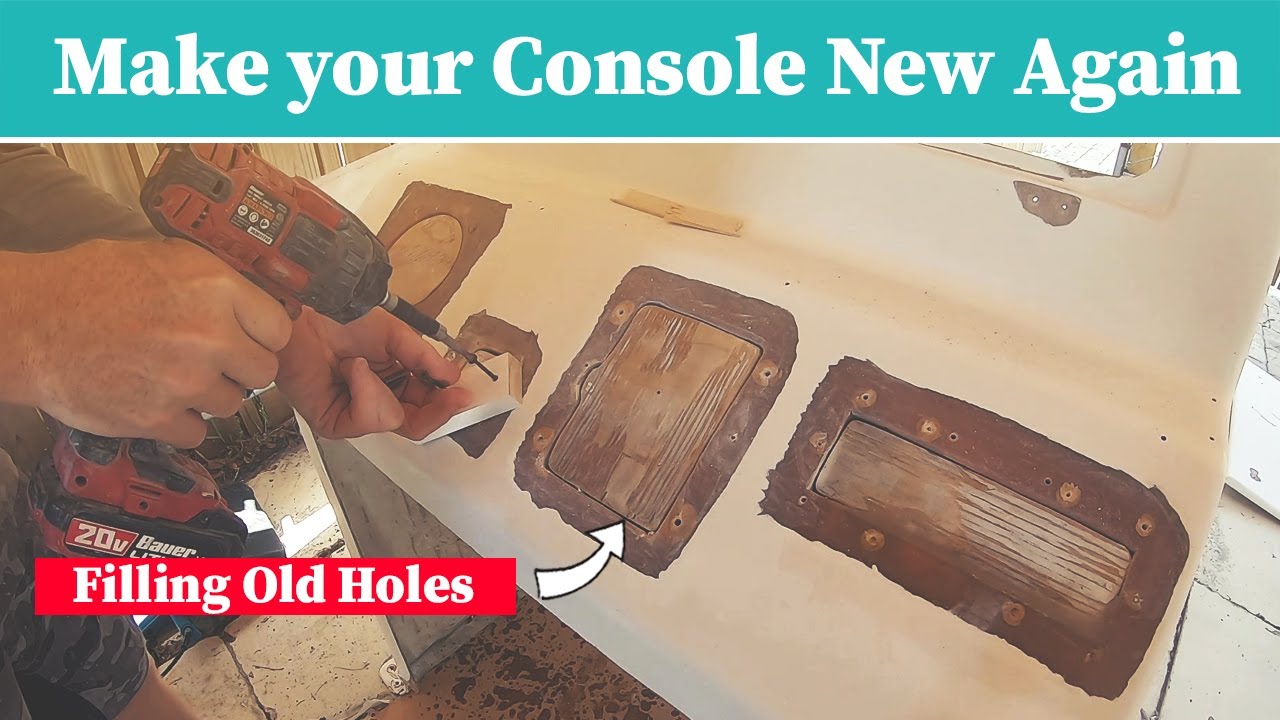
Fiberglass Console Repair | Step By Step Filling holes & Cracks DIY Boat Restoration
Показать описание
In this video, I document step by step how I filled in old center console dashboard holes, speaker holes, cup holders, and more. For this project, I used 3/4" marine grade plywood core for the dash and used 3/8" Nidacore / Carbon Core Honeycomb sheet to fill the other various holes.
All of the repairs were done using standard polyester boatyard resin, Fiber Glass Of Florida Radius putty, 1708 biaxial, and 1.5oz chopped strand mat along with a lightweight polyester compound for the finish fairing.
This customer requested I simply complete the repairs and shoot primer so that he could shoot the entire boat with AWLGRIP after the console was glass into the deck. I did not detail the primer application in this video, but after all of the repairs were complete I used several coats of Duratec White Surface Primer to complete the final finish. I also painted the interior of the console using a Gloss White Sherwin Williams Sherloxane 800 topcoat.
If you have any questions about the steps I did here or any questions on items I may have missed, please comment below or DM me on Instagram.
Blog post & More.
I get a small kickback from any purchase.
I post daily on Instagram
 0:19:30
Fiberglass Console Repair | Step By Step Filling holes & Cracks DIY Boat Restoration
 0:19:33
HOW TO BUILD FIBERGLASS LIVEWELL || CENTER CONSOLE SEAT
 0:04:54
Boat Repair: Repairing holes in a Fiberglass Console
 0:04:44
Easy Fiberglass Hole Repair: Fixing Drilled Holes with Expert Guidance
 0:07:09
How To Boat Restoration; Fiberglass Hole Repair
 0:15:39
Mako Boats || 171cc Restoration Project || Replacing Transom With Coosa
 0:13:09
PRO HACKS To Fix Stripped Screws In Fiberglass
 0:24:55
HOW TO REPAIR FIBERGLASS DAMAGE WITH LIMITED ACCESS!
 0:04:43
Optimist Dinghy Sailboat - Fast and Easy Fiberglass Repair
 0:29:56
Most Common Mistakes Working With Fiberglass!
 0:02:00
Fix Gelcoat cracks RIGHT 🏆 NO INSTAFIX, DO IT PROPERLY!
 0:18:47
Fiberglass Boat Hatch Repair Step By Step using epoxy and polyester resins
 0:00:20
Repairing large holes in thick fiberglass
 0:12:38
Rebuilding a Center Console Fishing Boat - Episode 8: Fiberglassing the Deck
 0:08:34
Stringer repair or replacement? -How to fiberglass stringers and over plywood-
 0:01:01
Wrapping boat stringers with fiberglass mat
 0:05:26
How to: Boat Fiberglass Repair
 0:03:45
Repair, filling large hole in fiberglass on boat
 0:12:09
How to Fix a Hole in Your Boat DIY (Below the Waterline)
 0:12:25
How To Repair Fiberglass: Step-By-Step Guide
 0:16:46
How To- Fiberglass & Gelcoat Repair- Stresscrack- Regal
 0:30:46
HOW TO MAKE AN ACYRYLIC DASH For Your Boat- Step by Step Using Map Gas & Propane Torches
 0:04:24
Part 1 - How to Repair Screw Holes in a Fiberglass Boat
 0:05:36
How to Repair a Fibreglass Crack for Beginners
Комментарии