filmov
tv
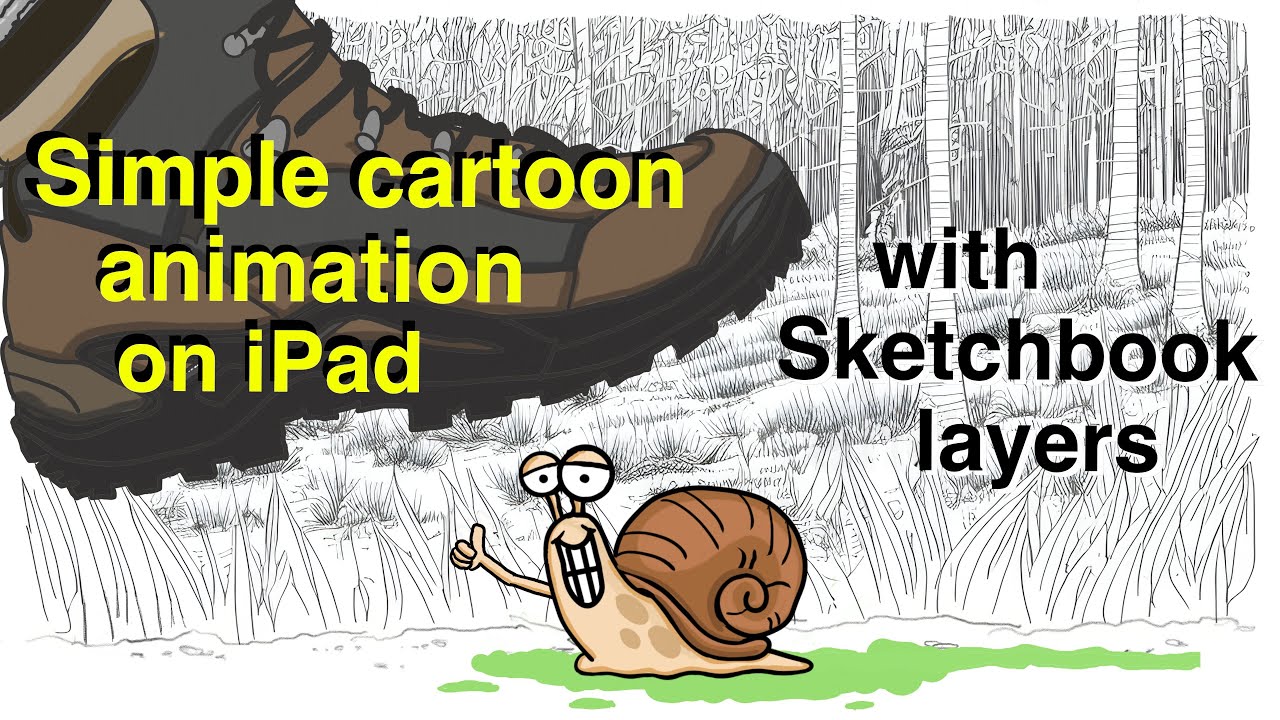
How to make cartoon animations on iPad with Sketchbook layers. Simple do-it-yourself animation.
Показать описание
No expensive animation software is necessary. Anyone can create original cartoon animations from scratch. Here I will show you how.
Hardware:
iPad Pro (11 inch) version 16.4.1
Apple pencil 2nd generation
Software:
Sketchbook(r) iPad application
(but any digital art editor with layers would likely work)
Apple iMovie
(but any movie editor would work)
Background photo:
(Prompt: Close up of grass clearing in a forest, line drawing, ink pen drawing, black and white, perspective drawing, Stephen Biesty, cartoon, coloring page, high detail. Style: Art. Runtime: 50. Upscale to 4x, 3840 x 2048, or higher resolution 8x, 7680 x 4096)
Photo references for snail and boot:
From Internet photo search
Sketchbook:
- image size 2160p (4k) 3840 x 2160
- fountain pen size 6.0
- predictive stroke feature (setting 3) helps keep lines smooth
- VERY IMPORTANT: make a duplicate layer of black lines to keep on top to allow coloring of layer underneath without messing up sharp outlines. Merge colored image layer and transparent black outline layer for crisp artwork when done coloring.
- use color select tool and then choose slightly lighter color for highlights and slightly darker color for shadow lines (do this before merging black line layer on top). Choose upper right borders (for example) for highlights, and lower left borders (for example) for shadow lines.
- use layers to place objects in front or behind without messing up sharp border lines then merge object layers (like the snail with slime trail).
Snail "movement"
- edit changing parts to create 3 (or more) snail positions. I cut and pasted the front part of snail body and filled in the middle parts.
- snail moves like an inchworm. First, the front part of body moves forward, then the back part of body moves forward.
- with three snail positions (1. short, 2. medium, and 3. long), I used the following position order: with shell stationary, 1, 2, 3, then with front body stationary, 2, 1, then with shell stationary 2, 3, and so on...
- I changed the mouth appearance for each snail position to make it look like the snail was huffing and puffing.
Placement over background for image creation
- I placed the snails over the background, inching them forward like an inchworm.
- I reduce the opacity of the previous layer to know where to position the next snail.
Saving movie images
- Once all the images (scenes) are created, I save each image in order. To avoid confusion with the order, I would save the image, then decrease opacity of the layer to make sure I am using the correct next snail position. I had 84 images for this short animation.
iMovie
- resolution 1080p
- I changed the setting of "time length of photos" to 0.2 seconds. Then I imported the 84 images and placed them on the timeline all together. "Select all" images and drag to timeline.
- I added background music (royalty free music) and a few sound effects (also, royalty free).
- I added some simple titles using iMovie title templates.
- I made a few of the frames a few seconds long for dramatic effect (for example, when the snail was squished)
- Save movie to file (1080p)
Feel free to ask questions in the comment section.
Good luck!
Michael K. Davis
 0:11:08
 0:16:40
 0:09:58
 0:04:56
 0:07:11
 0:06:45
 0:13:41
 0:16:16
 0:11:45
 0:06:52
 0:09:01
 0:13:38
 0:01:01
 0:08:24
 0:08:34
 0:11:25
 0:43:38
 0:05:52
 0:10:42
 0:07:33
 0:14:00
 0:16:02
 0:00:28
 0:22:26