filmov
tv
Convert Your MULTIMETER into an accurate SHORT CIRCUIT TRACER Finder for less than $1 Build This DIY

Показать описание
LER #204 Want a powerful easy to use Short Circuit Tracer but can't afford the price tag? Here is how to convert a multimeter into a powerful and accurate short circuit locator for less than $1!
Review: Vici 480C+ vs YR 2050 MicroOhm meters / short circuit tracers
I work in collaboration with:
The Electronics Channel (live streams with Carlos and Detlef)
Gran Canaria Uncovered
For All Your PCB needs: free $5 discount coupon
Equipment used in my videos. These are affiliate links, you pay the normal price and I make a small commission.
TEST METERS
ANENG AN8009 MULITIMETER
KAIWEETS HT118E MULTIMETER
VC480C+ MILLIOHM METER
MESR-100 ESR METER
XC6013L CAPACITOR METER
TM-902C TEMPERATURE METER
LCR-T4 COMPONENT ANALYZER
FNB58 USB ANALYZER
PCI POST ANALYZER
TL460S PLUS PCI_E ANALYZER
TOOLTOP ET120MC2 SCOPE
FNIRSI 1014D SCOPE
NPS3010W 30V 10A PSU
T12 STATION WITH M8 9501 HANDLE
M8 9501 HANDLE
YIHUA 982 Soldering Station C210/C245
FNIRSI HS-02 PORTABLE SOLDERING C210/C245
QUICK 861DW
PROS'KIT SS-331H
INFIRAY P2 PRO IR CAMERA + MACRO LENS
TOOLTOP ET13S THERMAL CAMERA METER
ET13S MACRO LENS
OPTICAL MICROSCOPE
TOMLOV TM4K AF FLEX
TL866 II+ PROGRAMMER
CH341 PROGRAMMER
NC-559-ASM FLUX
DESOLDER BRAID (I use size 8045)
HX-T100 SOLDER (0.6MM)
ESD-11 TWEEZERS
Learn Electronics Repair is now on Discord! Come and join the fun, it's free.
If you would like to support this channel
You can send donations
You can subscribe to Patreon
You can click Join to become a channel member
Thank you
Richard
 0:19:45
Convert Your MULTIMETER into an accurate SHORT CIRCUIT TRACER Finder for less than $1 Build This DIY
 0:01:24
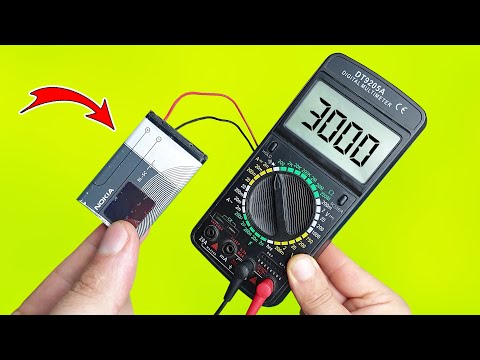
How to convert any ordinary multimeter into a rechargeable multimeter , with charging port / DIY
 0:04:53
How to convert multimeter into high precision milliohmmeter
 0:05:13
This Tool Should Be in Every Home, Turn a Multimeter into a Tachometer, Multimeter Upgrade
 0:08:49
8 diy Innovations to upgrade your multimeter to another level
 0:08:54
Upgrade your Multimeter! How to measure 200A High Current using 20A Basic Multimeter & DIY Shunt
 0:03:04
How to turn Old Multimeter into Smart Multimeter |Upgrade,Diy
 0:05:11
How To Make MultiMeter at home, DIY AC Voltmeter Hack, Convert ac analog voltmeter to multimeter
 0:05:05
📌EXPOSED 📢AliExpress Portable External SSD 1TB 2TB Solid State Hard Drive
 0:05:37
Tired of Constantly Changing Batteries? This Idea Is For You - Multimeter Upgrade
 0:00:59
Amazing Hack For MultiMeter, Digital Multimeter HACK, #shorts, #youtubeshorts , #shortsvideo, #HACK
 0:06:42
How To Make Multimeter using Android Mobile || How to make multimeter
 0:02:20
Additional circuit for multimeter | convert old multimeter into NCV tester. Non contact volt tester.
 0:08:08
How to Use a Multimeter for Beginners - How to Measure Voltage, Resistance, Continuity and Amps
 0:04:50
New İdea Turn a Multimeter into a Tachometer, Multimeter Upgrade V2
 0:00:50
Multimeter hack without battery use in charger
 0:02:12
INCREDIBLE Idea!! electronic circuit & get amazing option instead of multimeter |Homemade innova...
 0:44:04
Learn how to use a Multimeter - for solar power, DIY and more! #solar #diy #multimeter
 1:05:38
The Amazing $1 Short Finder Upgraded! Convert your multimeter to a 4 lead Kelvin Probe Short Tracer
 0:06:48
Electronic Basics #27: ADC (Analog to Digital Converter)
 0:05:36
Multimeter Upgrade | How To Make Multimeter Rechargeable
 0:06:38
That's why you should add this circuit to your multimeter
 0:04:41
Easily convert your battery charger, known as the socket, into a multimeter
 0:08:06
How to make multimeter using mobile
Комментарии