filmov
tv
Let's Learn How to Resin with Dollar Tree RESIN & Molds! New Dollar Tree Resin DIYS

Показать описание
Today I have 10 NEW Dollar Tree RESIN DIYS to learn how to use resin and make beautiful decor and gifts. Be sure to take proper precautions.
Dollar Tree Resin DIYS include:
00:00:48 A thin ocean scene coaster diy using dollar tree resin, a dollar tree $1.25 coaster mold, sand and sea creature stickers.
00:08:56 A large square photo coaster DIY using dollar tree resin, a dollar tree plus $3 coaster mold and photo on glossy paper.
00:18:22 An ocean scene small tray DIY using dollar tree resin, a dollar tree plus $3 soap tray mold, dye and sand.
00:26:17 A Hello word resin DIY using dollar tree resin, a dollar tree plus $5 word mold and dye. So pretty.
00:31:45 An icy blue heart resin coaster DIY using dollar tree resin, a dollar tree plus $3 heart coaster mold, chunky glitter, snowflake stickers, dye and paint.
00:37:56 FIVE resin necklace pendant DIYS using dollar tree resin, a dollar tree $1.25 resin jewelry mold, dye, glitter and stickers.
00:44:15 Resin DIY results after sitting overnight
I hope you got some wonderful resin crafting inspiration DIY and learned how to attempt to resin. This was definitely a learning experience for me as well. Lots of resin lessons learned but it was so fun.
#resin #resindiys #dollartreeresin #dollartree #winterdiy #dollartreediy #craftybeach
Shopping Links (I may earn commissions for purchases made through the links below.)
This includes all of my craft staples that I buy on Amazon
Facebook page:
Facebook group:
Instagram:
TikTok:
Pinterest:
Join this channel to get access to perks:
Super Thanks appreciated :)
 0:01:12
LET'S RESIN Resin Starter Kits, Resin Crafts Tutorial for Beginner
 0:10:01
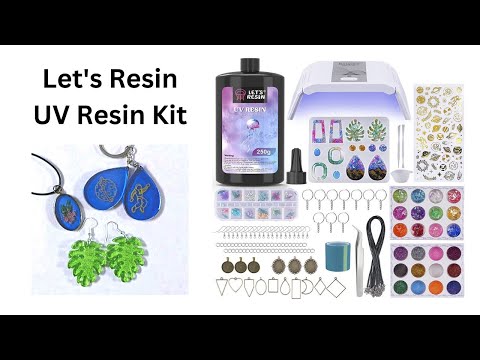
LET'S RESIN Epoxy Resin Kit, Diamond Resin Crafts/Resin Jewelry Making Kit for Beginners
 0:06:08
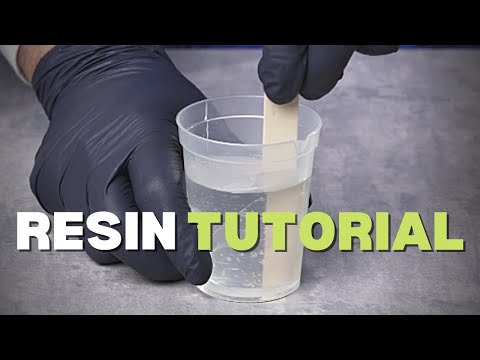
How to use Epoxy Resin For Beginners (Resin Tutorial) / RESIN ART
 0:03:25
The Easiest Way to Make UV Resin Jewelry for Beginners| Step by Step Tutorial
 0:08:14
LET'S RESIN Epoxy Resin Kit, Ashtray Resin Crafts/Resin Jewelry Making Kit for Beginners
 0:04:49
Resin Art Tutorial | Amazing Table of Flowers and Epoxy
 0:01:52
How to Make an Awesome Resin River Table with the Best Mold | Step By Step Tutorial
 0:07:20
How to Dry and Preserve Flowers in Epoxy Resin | Step by Step Tutorial
 0:00:59
Let’s make some donut twists from the NEW Miniverse cafe series 3 #miniverse #miniature #DIY #resin...
 0:11:50
Trying LET'S RESIN 44oz resin kit / Resin flower coaster for beginners / How to mix epoxy resin
 0:07:14
HOW TO MAKE RESIN COASTERS Using LETSRESIN Mold! FOR BEGINNERS STEP BY STEP!
 0:08:37
5 Ways to Get Bubbles Out of Resin | Resin ART
 0:19:36
The Secrets That No One Told You About When Using Resin
 0:03:28
Preserving Flowers In Epoxy Resin - Easy DIY Guide
 0:03:53
The Easiest Way To Make Beautiful Resin Chess 2022
 0:40:09
Resin Art for Beginners | Easy to Follow Tutorial with Resin Bookmark Pen Molds
 0:07:42
LET'S RESIN Domino Resin Molds - Resin Crafts| Resin Casting
 0:13:38
Let's Resin UV resin starter kit with light | Great for Beginners
 0:00:30
Resin & silicone putty? Why not! #resinart #uvresin #resincrafts #shorts #
 0:14:48
First time using resin! 10 Rookie Mistakes to Avoid
 0:24:54
First time with UV Resin (and I'm hooked!) Lets resin some stuff!
![[ASMR] Swatching Let’s](https://i.ytimg.com/vi/plsinlNsaFk/hqdefault.jpg) 0:07:28
0:07:28
[ASMR] Swatching Let’s Resin’s Resin Dyes
 0:01:00
How to make resin photo keychain❤️#resinart #giftideas #resin #diykeychains #diy #handmade
 0:05:11
How to make an Awesome Ocean Table Top | Epoxy Resin Art
Комментарии