filmov
tv
Small Anvil Restoration And Tall Stand Fabrication
Показать описание
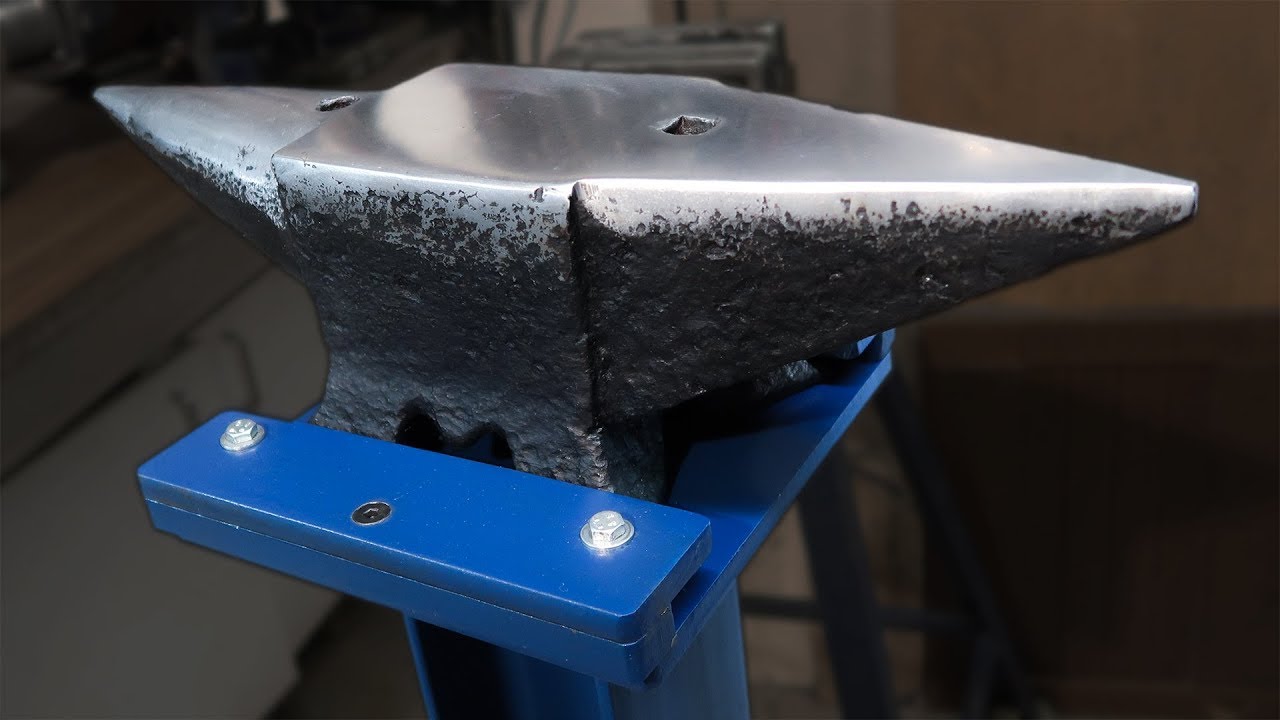
Watch me restore and fabricate a stand for this 15kg italian "pig" style anvil.
I found this cool anvil at a local flea market a couple months back, had to have it because it's the exact same shape as my big 85kg anvil that I use for forging.
This small one will not be used for forging, I mounted it so high to be comfortable when working on small and precise stuff, like centerpunching, riveting bolsters, texturing softer metals and so on. Maybe I'll use the horn when making jewels or forging small parts but that's not the primary use.
Of course this is not the right height for an anvil you want to forge with. It's something I wanted for convenience, so I don't have to bend all the way over my big anvil to accomplish the task mentioned above.
The stand works just like this other one I made for the leg vise I restored a while back:
So far it has been working great.
Index of operation and materials:
0:15 Removing loose particles with steel wire brush
0:35 De greasing with acetone so I won't have bits and pieces of old grease flying everywhere while using the angle grinder
1:13 Angle grinder! Starting off with a steel whire wheel to clean off rust from all sides except top
2:03 Thick grinding disk to remove deep scratches and pittings
2:38 Sandpaper pads from 40 to 200 grit
3:01 Palm sander from 180 to 400 grit to finish the steel nicely
3:30 Cutting the "I" beam for the stand with metal cutting band saw.
4:10 Stick welding the beam to a second hand car wheel with rebar bracers (all steel from the local steel scrapyard 10€)
5:12 blocking the holes of the car wheel with duct tape so it holds concrete
5:43 Puring wet concrete mix into wheel, it does not serve structural needs so it can be mixed wet to make for an easy pour
6:10 Marking steel pieces for the locking mechanism
6:33 Drilling necessary holes, integrating the ones already present in the beam plate as part of the locking mechanism
6:57 Painting steel parts blue (cleaned and degreased off camera)
7:25 Finishing the anvil with rust converter, the steel is so pitted it would have rusted back too easily without finish, I also like the black look of this converter after some oil is applied
8:45 The locking mechanism was not working as intended, had to drill holes for a flat head M6 screw to hold the two steel parts together
Thanks a lot for watching, I hope you liked the video!
Suggestions and comments are welcome.
Leave a like and share to anyone who might be interested!
And be sure to subscribe and ring the bell if you are new here so you don't miss upcoming projects!
★Patreon★
★Website★
★Follow me★
 0:11:04
Small Anvil Restoration And Tall Stand Fabrication
 0:10:55
Mini Anvil Restoration
 0:07:19
Restoration - Mini Anvil
 0:12:48
100lb Trenton Anvil - 'Light' Restoration and Clean Up
 0:12:59
Small Anvil Restoration part 1
 0:05:52
Anvil 80 YEARS ~ RESTORATION & REPAIR 🛠
 0:08:38
Antique ANVIL Restoration | Mini German Anvil Restore
 0:02:22
⚓️ NOMAD - Anvil Restoration
 0:10:08
BLACKSMITH ANVIL RESTORATION - how to restore an old and rusty ANVIL
 0:00:30
Mini anvil for Jimmy Diresta
 0:25:20
This 500 Year Old Fortress is Full of Giant Anvils
 0:12:22
Old Rusty Soviet Anvil - Perfect Restoration
 0:19:19
Anvil Restoration Part 2
 0:04:21
Vintage Anvil Restoration Part 4
 0:15:16
Rusty Anvil Restoration and Natural Wooden Stand
 0:23:31
80kg Anvil Restoration - Repairing a 1915 Söderfors Anvil
 0:15:01
Vintage Anvil Restoration part 3
 0:09:21
Repairing Century Old Anvil / derusting , resurfacing and painting
 0:17:25
Old ANVIL Restoration + Stump STAND / How to / Blacksmith
 0:09:27
1940 Anvil Restoration- Perfekt
 0:05:25
Restoration of my New Anvil
 0:20:01
Jeweler's Vise And Anvil Restoration
 0:08:09
Rusty Anvil Restoration
 0:17:28
Mounting and Partially Restoring My Anvil
Комментарии