filmov
tv
How to make id card/ Design Automatic Id cards/ Mail Merge For Id card/ Mail Merging for Idcards

Показать описание
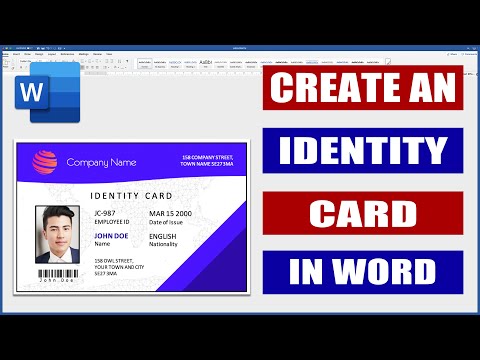
Welcome everyone, In this video we will learn how to design simple I d cards. Lets start the video. Go the start button and open microsoft word. Firstly we need to set the margin of the page. Keep it to a 4. Now insert the tables as per your need. Select all the tables and go the layout and adjust its height and width. I will keep it 2.5 and 3.9 respectively. Now lets insert a rectangle and design it. ADD ORGANIZATION NAME AND ADDRESS. Change the font as per your need. Now add the logo of your organization. Adjust it accordingly. Now add other informations. Add name, Class, Roll, Address, Date of birth , Father's name, contact or any other details as per your need and adjust its size. I am adding a small rectangle to make it more better. We will add a table for photo at last. Now our design is complete. Now to make its multiple copies. Go to mailings. Select start mail merge option. Now press ok. You will see a blank page. now press control plus z. You will see update labels option. Select it and you will have multiple copies according to the number of tables. save it.
DO WATCH OUR OTHER VIDEOS
Now open your m s word samples of identity cards. Remove the square and draw one table. Update the label . Now goto mailings and click on select recipients option. Select use existing list option. Now select your excel document. Select the sheet of your document and click ok. Now adjust the labels. Click on insert merge fields and match tge data. To add photo you have to press control plus f9. And type a command include picture space double inverted commas. Now merge with photo option. And update the labels. The table will become blank. Now just click on finish merge option. And get all your data inserted automatically. To insert photo press control plus a and press f9. You will see all the photoes updates. Hope this video was useful. Feel free to ask if you have any confusions. Thank you for watching.
Summary
To make multiple copies of id card=Mailing --- Start mail merge--- Label--- Ok--- Cntlr+z--- update label
To add photo in ms-excel= cntrl+k--- To replace / --- cntrl +h
To fill a/c in table= select receipents--- Use exixting list--- Insert merge field
For photo= cntrl+f9--- write code [includepicture "]--- Update labels--- Finish and merge--- Cntrl+a--- f9
Microsoft Corporation Microsoft Word How-to Microsoft Office Page Tutorial Microsoft Office 2007 Microsoft Excel Computer Microsoft Windows Typing Word Computer file PDF Page numbering Windows 10 Document Microsoft PowerPoint Laptop Writing Printing Margin Editing Table RISING Watermark Standard Paper size Cut, copy, and paste Research Space Citation Computer program Reference Presentation Row Character encoding Invoice Wedding invitation Clip art Reset Hyperlink Software Microsoft Office 2013
Mail Merge MS Word Excel | Create Automatic ID Cards, Labels, Student Database With Photo Mail Merge
#designautomaticidcardinword
 0:05:43
ID Card Design In MS Word | Create Employees Identity Card in Microsoft Word
 0:06:28
How to make Student ID Card in Microsoft word 2019 || Student ID Card Design in Ms Word || ID Card
 0:00:23
Temporary ID Card for New Student 💯 / School ID Card Making / Subscribe/URMagic/ Shorts
 0:12:36
How to Create ID Card in Microsoft Word | ID Card Design in MS Word
 0:09:40
Free online ID card maker
 0:13:07
Identity Card Design in Ms Word || How to Make Student Id Card Design in Ms Word Hindi Tutorial
 0:10:44
ID Card Design in Photoshop Tutorial | How To Make Professional Company ID Card | Maxpoint_Hridoy
 0:26:45
How to Create an ID Card in Word | Microsoft Word Tutorials
 0:02:04
HUMAN APP ID VERIFICATION guide
 0:11:45
Employee ID Card Design in Microsoft Word | ID Card Design in MS Word (Hindi)
 0:06:38
How to Create an ID Card - Online without the Use of any Software or Application - DIY Tutorial
 0:04:25
PVC ID Making Using i-Tech Laminating Sheet Tutorial
 0:04:34
How to make ID card for the first time & what documents are required | Nadra CNIC Requirements 2...
 0:01:01
How to make ID card yourself
 0:00:37
The Best Cheap ID Card Printer
 0:00:16
ID card printing process// ID card kaise print kare How to print ID card #idcard #printingtshirt
 0:07:13
How to Create ID CARDS & NAME TAGS with Canva
 0:00:12
Is this your id card ? #idcards #wallet #idcardholder
 0:05:36
How to Make ID card Easily in 5 Minutes l Prepare ID Cards identity cards
 0:12:38
ID Card Design Tutorial in MS Word | How to create Identity Card using Microsoft Word 2007 or 2010
 0:00:56
BEST way to create PVC ID Cards#printing #printingtutorials #byaheritajourneysouvenirs
 0:02:43
How to Make a Great ID Card?
 0:01:17
NADRA's New App | How To Get Your ID Card Made From Home Online? | Dawn News
 0:21:57
How to make ID card in Microsoft Word | MS Word me ID card design kaise banaye | MS Word Design
Комментарии