filmov
tv
How to Convert Time Series Data into a Spectrogram Using Python

Показать описание
Learn how to easily convert your time series data into a visually stunning `spectrogram` using Python. This step-by-step guide makes it simple for you to understand and visualize your data.
---
Visit these links for original content and any more details, such as alternate solutions, latest updates/developments on topic, comments, revision history etc. For example, the original title of the Question was: convert a time series data into spectrogram
If anything seems off to you, please feel free to write me at vlogize [AT] gmail [DOT] com.
---
How to Convert Time Series Data into a Spectrogram Using Python
If you have a time series data array and you're looking to visualize it in the form of a spectrogram, you're in the right place! A spectrogram is a powerful visual representation of the frequency spectrum of signals as they vary with time. This guide will walk you through the process of converting a time series data array with a frequency of 300Hz into a spectrogram image using Python.
Understanding Your Data
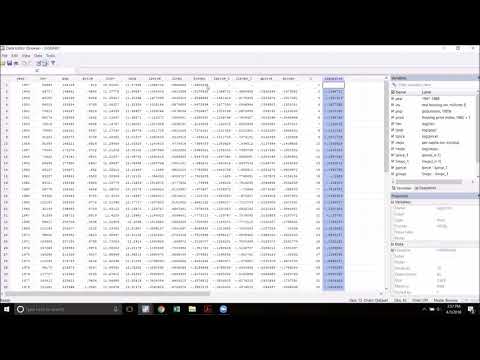
Before we dive into the code, let's take a quick look at your time series data:
Data: The specific time series data you have is structured as a 1D array with 9000 samples (e.g., [-127, -162, -197, -229, ..., -22, -21]).
Frequency: The sampling frequency of your data is 300Hz.
We will utilize the Python libraries NumPy, Librosa, and Matplotlib to accomplish this task.
Required Libraries
To start with, make sure you have the following libraries installed in your Python environment:
NumPy: A library for numerical computing.
Librosa: A library for audio analysis.
Matplotlib: A plotting library for creating static, animated, and interactive visualizations.
You can install any of these libraries using pip if you haven’t already:
[[See Video to Reveal this Text or Code Snippet]]
The Step-by-Step Process
1. Import the Necessary Libraries
We begin by importing the necessary libraries to work with the data and generate the spectrogram.
[[See Video to Reveal this Text or Code Snippet]]
2. Prepare Your Data
Next, we should define your time series data as a NumPy array and reshape it into a 1D array. Here’s how you can do that:
[[See Video to Reveal this Text or Code Snippet]]
3. Compute the Short-Time Fourier Transform (STFT)
The STFT is a crucial step in converting time-series data to a spectrogram. It breaks down the signal into its frequency components over time:
[[See Video to Reveal this Text or Code Snippet]]
4. Generate the Spectrogram
Next, we generate the magnitude of the STFT, which forms our spectrogram:
[[See Video to Reveal this Text or Code Snippet]]
5. Display the Spectrogram
Finally, we’ll display the spectrogram using Matplotlib:
[[See Video to Reveal this Text or Code Snippet]]
Conclusion
And there you have it! In just a few steps, you've learned how to convert a time series data array into a spectrogram image using Python. Visualizing your data in this way can be incredibly insightful, allowing you to analyze the frequency components and variations over time.
Feel free to experiment with your data and explore different parameters in the code to see how they affect the resulting spectrogram. Happy coding and visualizing!
---
Visit these links for original content and any more details, such as alternate solutions, latest updates/developments on topic, comments, revision history etc. For example, the original title of the Question was: convert a time series data into spectrogram
If anything seems off to you, please feel free to write me at vlogize [AT] gmail [DOT] com.
---
How to Convert Time Series Data into a Spectrogram Using Python
If you have a time series data array and you're looking to visualize it in the form of a spectrogram, you're in the right place! A spectrogram is a powerful visual representation of the frequency spectrum of signals as they vary with time. This guide will walk you through the process of converting a time series data array with a frequency of 300Hz into a spectrogram image using Python.
Understanding Your Data
Before we dive into the code, let's take a quick look at your time series data:
Data: The specific time series data you have is structured as a 1D array with 9000 samples (e.g., [-127, -162, -197, -229, ..., -22, -21]).
Frequency: The sampling frequency of your data is 300Hz.
We will utilize the Python libraries NumPy, Librosa, and Matplotlib to accomplish this task.
Required Libraries
To start with, make sure you have the following libraries installed in your Python environment:
NumPy: A library for numerical computing.
Librosa: A library for audio analysis.
Matplotlib: A plotting library for creating static, animated, and interactive visualizations.
You can install any of these libraries using pip if you haven’t already:
[[See Video to Reveal this Text or Code Snippet]]
The Step-by-Step Process
1. Import the Necessary Libraries
We begin by importing the necessary libraries to work with the data and generate the spectrogram.
[[See Video to Reveal this Text or Code Snippet]]
2. Prepare Your Data
Next, we should define your time series data as a NumPy array and reshape it into a 1D array. Here’s how you can do that:
[[See Video to Reveal this Text or Code Snippet]]
3. Compute the Short-Time Fourier Transform (STFT)
The STFT is a crucial step in converting time-series data to a spectrogram. It breaks down the signal into its frequency components over time:
[[See Video to Reveal this Text or Code Snippet]]
4. Generate the Spectrogram
Next, we generate the magnitude of the STFT, which forms our spectrogram:
[[See Video to Reveal this Text or Code Snippet]]
5. Display the Spectrogram
Finally, we’ll display the spectrogram using Matplotlib:
[[See Video to Reveal this Text or Code Snippet]]
Conclusion
And there you have it! In just a few steps, you've learned how to convert a time series data array into a spectrogram image using Python. Visualizing your data in this way can be incredibly insightful, allowing you to analyze the frequency components and variations over time.
Feel free to experiment with your data and explore different parameters in the code to see how they affect the resulting spectrogram. Happy coding and visualizing!
 0:03:36
 0:10:02
 0:00:57
 0:03:26
 0:11:50
 0:07:53
 0:02:23
 0:07:54
 0:08:14
 0:03:29
 0:35:41
 0:09:28
 0:05:56
 0:03:56
 0:16:14
 0:04:42
 0:05:27
 0:00:23
 0:09:43
 0:10:24
 0:02:31
 1:39:14
 0:00:23
 0:01:00