filmov
tv
Harley Sportster, Clutch Cable and Primary Case Removal !

Показать описание
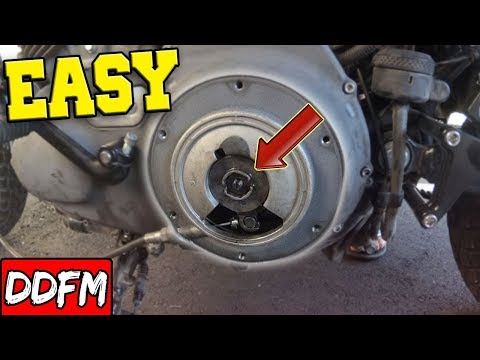
Need access to the Clutch, so drop the cable out and strip the cover off !
Like many busy channels these days, we support what we do here with the generous help of Patrons who make this channel possible.. We commit 60 hours a week to what we do, and make every video a polished production worthy of our viewers time and support, We also strive to pass on information and knowledge that our viewers can use to save themselves money and keep their bikes safe on the road too..
If you would like to join the team and help support our online activities, if you have maybe been helped and guided by our videos, or maybe just entertained.. then you can do that from just one dollar a month by clicking the link above and becoming a Patron of the channel...Thank you all so much for your support..
Gedore Red 172 Piece Socket Set:=
Spanner Monkey Special Offers :-
Delboy's Garage Merchandise Shop:-
Wiha Tools available from RECON Electrical :-
Follow us on Facebook :-
Become a Patron and join the team :-
 0:13:22
How to Replace a Harley Sportster Clutch - GetLowered.com
 0:03:35
EVO Sportster Clutch Adjustment : Pro Tip
 0:13:25
How To Harley Davidson Sportster clutch cable replace and fix oil leak .
 0:05:42
How to Adjust a Harley Davidson Sportster Clutch (Cable & Internal)
 1:08:04
How To Install An After Market Clutch In A Harley Davidson Sportster
 0:05:40
How To Quickly Adjust Your Sportster's Clutch
 0:11:50
How To Harley Davidson Sportster Clutch Adjustment
 0:00:59
Harley EVO Sportster CLUTCH ADJUSTMENT. Simple & Quick🤘
 0:04:36
Knoble Tech Tips: How To Adjust Your Clutch Cable On A Harley-Davidson Sportster
 0:04:54
1994-2003 Harley Davidson Sportster Clutch Cable Removal
 0:02:56
Harley-Davidson Throttle Cable Adjustment!
 0:04:39
Replacing 883 Sportster Clutch Cable with Burly Brand Cable Kit for T-Bar Install | Day 3 | Ep. 15
 0:40:48
HD Sportster Clutch Cable Replacement and Clutch Adjustment How-To
 0:05:55
You want Braided Cables and Brake Lines on your Harley?? Start here!!!!
 0:00:32
Clutch too sticky and clunky? Do this. #harleydavidson #iron883 #sportster #motorcycle #fyp #shorts
 0:02:43
How to lube the clutch cable on Harley Davidson motorcycles
 0:05:34
How to Adjust the Clutch Cable on a 2002 Haley-Davidson Evo Sportster
 0:00:19
Harley Sportster Foot Clutch & Jockey Shift! Prism Supply #motorcycle #shorts
 0:06:25
Sportster 48 Clutch Cable install and Adjustment |COVID-19|
 0:00:12
Harley Davidson Sportster 883 Iron cutch adjustment
 0:22:04
Idiot Replaces His Harley Sportster Clutch in 22 Minutes
 0:14:47
Delboy's Garage, Harley Sportster Clutch Adjustment.
 0:13:57
How to Remove and Replace a Clutch Cable Line on a Harley Davidson Sportster
 0:15:26
How to Replace a Harley Sportster Clutch Cable (and why you should)
Комментарии