filmov
tv
How to Install Google Chrome on Ubuntu 24.04 LTS (2024)

Показать описание
How to Install Google Chrome on Ubuntu 24.04 LTS (Linux) | Step-by-Step Guide
Installing Google Chrome on your Ubuntu 24.04 LTS system will give you access to a powerful and versatile web browser. This guide provides detailed instructions for downloading and installing Chrome using both the terminal and graphical user interface (GUI). Follow these steps to get Google Chrome up and running on your Ubuntu 24.04 LTS machine.
**Step-by-Step Instructions:**
**Method 1: Installing Chrome via Terminal**
**Step 1: Open Terminal**
1. Press `Ctrl + Alt + T` or search for "Terminal" in the Applications menu to open a terminal window.
**Step 2: Download the Chrome .deb Package**
1. Use the `wget` command to download the latest Chrome .deb package from the official Google Chrome website:
```bash
```
**Step 3: Install the .deb Package**
1. Once the download is complete, install the package using `dpkg`:
```bash
```
2. If you encounter any dependency issues, resolve them by running:
```bash
sudo apt-get install -f
```
**Step 4: Launch Google Chrome**
1. After the installation is complete, you can launch Google Chrome from the terminal by typing:
```bash
google-chrome
```
2. Alternatively, you can find Google Chrome in your Applications menu and launch it from there.
**Method 2: Installing Chrome via Graphical User Interface**
**Step 1: Open Your Current Web Browser**
1. Open the default web browser (usually Firefox) that comes pre-installed with Ubuntu.
**Step 2: Download the Chrome .deb Package**
2. Click the "Download Chrome" button.
3. In the download dialog, select "64 bit .deb (For Debian/Ubuntu)" and click "Accept and Install".
4. Save the file to your computer, typically in the Downloads folder.
**Step 3: Install the .deb Package**
1. Open your file manager and navigate to the directory where the .deb file is saved (usually the Downloads folder).
3. Click the "Install" button in the Software Center and enter your password when prompted.
**Step 4: Launch Google Chrome**
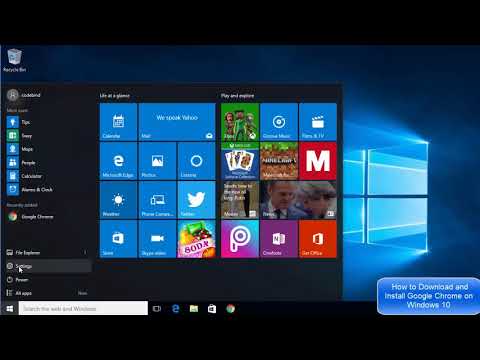
1. Once the installation is complete, you can launch Google Chrome from the Applications menu by searching for "Chrome".
2. Click on the Google Chrome icon to open the browser.
**Additional Tips:**
- **Keep Chrome Updated**: Chrome updates itself automatically. However, you can manually update it by running:
```bash
sudo apt-get update
sudo apt-get upgrade
```
- **Set Chrome as Default Browser**: To set Chrome as your default browser, open Chrome, go to Settings, and set it as the default under the "Default browser" section.
- **Sync Your Data**: Sign in to Chrome with your Google account to sync your bookmarks, history, passwords, and other settings across all your devices.
By following these steps, you can easily install Google Chrome on your Ubuntu 24.04 LTS system and enjoy a fast, secure browsing experience.
Don't forget to like, share, and subscribe for more Linux tutorials and tech tips!
#GoogleChrome #Ubuntu #Linux #Ubuntu2404LTS #TechTutorial #HowTo #WebBrowser #ChromeOnLinux #OpenSource #TechTips #Tutorial
Installing Google Chrome on your Ubuntu 24.04 LTS system will give you access to a powerful and versatile web browser. This guide provides detailed instructions for downloading and installing Chrome using both the terminal and graphical user interface (GUI). Follow these steps to get Google Chrome up and running on your Ubuntu 24.04 LTS machine.
**Step-by-Step Instructions:**
**Method 1: Installing Chrome via Terminal**
**Step 1: Open Terminal**
1. Press `Ctrl + Alt + T` or search for "Terminal" in the Applications menu to open a terminal window.
**Step 2: Download the Chrome .deb Package**
1. Use the `wget` command to download the latest Chrome .deb package from the official Google Chrome website:
```bash
```
**Step 3: Install the .deb Package**
1. Once the download is complete, install the package using `dpkg`:
```bash
```
2. If you encounter any dependency issues, resolve them by running:
```bash
sudo apt-get install -f
```
**Step 4: Launch Google Chrome**
1. After the installation is complete, you can launch Google Chrome from the terminal by typing:
```bash
google-chrome
```
2. Alternatively, you can find Google Chrome in your Applications menu and launch it from there.
**Method 2: Installing Chrome via Graphical User Interface**
**Step 1: Open Your Current Web Browser**
1. Open the default web browser (usually Firefox) that comes pre-installed with Ubuntu.
**Step 2: Download the Chrome .deb Package**
2. Click the "Download Chrome" button.
3. In the download dialog, select "64 bit .deb (For Debian/Ubuntu)" and click "Accept and Install".
4. Save the file to your computer, typically in the Downloads folder.
**Step 3: Install the .deb Package**
1. Open your file manager and navigate to the directory where the .deb file is saved (usually the Downloads folder).
3. Click the "Install" button in the Software Center and enter your password when prompted.
**Step 4: Launch Google Chrome**
1. Once the installation is complete, you can launch Google Chrome from the Applications menu by searching for "Chrome".
2. Click on the Google Chrome icon to open the browser.
**Additional Tips:**
- **Keep Chrome Updated**: Chrome updates itself automatically. However, you can manually update it by running:
```bash
sudo apt-get update
sudo apt-get upgrade
```
- **Set Chrome as Default Browser**: To set Chrome as your default browser, open Chrome, go to Settings, and set it as the default under the "Default browser" section.
- **Sync Your Data**: Sign in to Chrome with your Google account to sync your bookmarks, history, passwords, and other settings across all your devices.
By following these steps, you can easily install Google Chrome on your Ubuntu 24.04 LTS system and enjoy a fast, secure browsing experience.
Don't forget to like, share, and subscribe for more Linux tutorials and tech tips!
#GoogleChrome #Ubuntu #Linux #Ubuntu2404LTS #TechTutorial #HowTo #WebBrowser #ChromeOnLinux #OpenSource #TechTips #Tutorial
 0:04:30
How to Install Google Chrome on Windows 10
 0:01:21
How To Install Google Chrome In Laptop & PC - Full Guide
 0:02:48
How to Install Google Chrome on Windows 10
 0:01:33
How to Download Google Chrome on Laptop & PC
 0:04:45
How to Download and Install Google Chrome on Windows 10
 0:05:49
How to Download and Install Google Chrome on Windows 11
 0:02:27
How to Download and Install Google Chrome in Laptop or PC (2024)
 0:01:41
How to Install Google Chrome Browser on Windows 11 | Complete Installation
 0:04:00
How to Access Your PC with Google Chrome Remote Desktop
 0:02:35
How to Download Google Chrome for Windows 11
 0:01:15
How to Download and Install Google Chrome on Windows 10/11 Laptop and PC
 0:01:59
How To Download And Install Google Chrome
 0:01:39
How to Download and Install Google Chrome on Windows 7 (Tutorial)
 0:02:51
How to download & install Google Chrome on Laptop - PC Windows
 0:01:21
How to Download and Install Chrome in Windows 10
 0:05:25
How to install Google Chrome Browser on your Android TV
 0:03:19
How To Install Google Chrome In Laptop Windows 10 2022
 0:02:35
How to Download Google Chrome on Mac - Install Chrome on Macbook
 0:02:27
Google Chrome Installieren DEUTSCH ✅ TOP ANLEITUNG: Wie Browser bei Windows 10 & Mac Herunterlad...
 0:02:26
How to Install Google Chrome From Microsoft Edge
 0:05:02
How to Download and Install Google Chrome on Windows 10
 0:05:00
Chrome Install ပြုလုပ်နည်း (KCC)
 0:02:19
How to install google chrome on Ubuntu 22.04 LTS
 0:04:25
HOW TO INSTALL CHROME IN ANDRIOD TV
Комментарии