filmov
tv
How to Select an Option and Display Content Dynamically with jQuery

Показать описание
Learn how to use jQuery to dynamically show and hide content based on a selected option from a dropdown. This guide provides clear examples and explanations!
---
Visit these links for original content and any more details, such as alternate solutions, latest updates/developments on topic, comments, revision history etc. For example, the original title of the Question was: Select option and display content related to option with JQuery
If anything seems off to you, please feel free to write me at vlogize [AT] gmail [DOT] com.
---
How to Select an Option and Display Content Dynamically with jQuery
When building interactive web applications, you often need to show or hide content based on user selections. A common scenario is using a dropdown (select box) where each option corresponds to a specific content block. If you've been struggling to implement this functionality with jQuery, you're in the right place!
In this post, we will walk through a simple example of how to create a select box that displays related content when different options are chosen, complete with necessary jQuery scripts.
Understanding the Problem
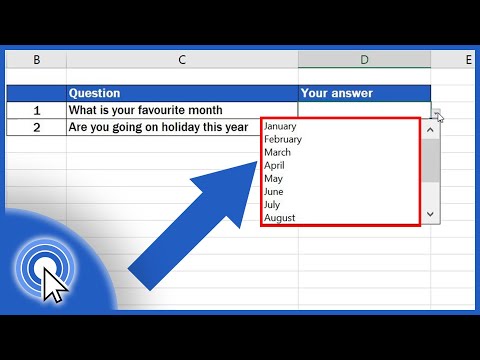
Imagine you've created a dropdown with several locations, and you want to reveal specific information about each location when one of them is selected. This could be anything from text descriptions to images, tailored to the user's choice.
The Current Challenge
Many developers may try to implement this functionality but can become bogged down with jQuery methods that just don’t seem to work, leading to confusion and frustration. The solution is straightforward once properly implemented.
Step-by-Step Solution
Let’s break down how to achieve the desired functionality using jQuery effectively.
1. Create the HTML Select Element
We'll begin by creating a simple select dropdown in HTML:
[[See Video to Reveal this Text or Code Snippet]]
2. Set Up the Divs for Each Location
Next, for every location selected, we should have corresponding divs that will contain the information about each location:
[[See Video to Reveal this Text or Code Snippet]]
3. Adding jQuery to Handle Changes
Now, we will write the jQuery script that will control which div is displayed based on the selected dropdown option. Here's how to do it:
[[See Video to Reveal this Text or Code Snippet]]
Explanation of the jQuery Code
Event Listener: The on('change') function listens for changes in the dropdown.
Value Extraction: $(this).val() captures the currently selected value.
Hiding/Showing Content: A loop runs through all possible divs (loc1, loc2, etc.), hiding those that don’t match the selected option while revealing the one that does.
Conclusion
By following these steps, you can create an interactive dropdown that displays content based on user selections seamlessly. If you feel lost, remember to take your time understanding each part of the code and how they interact with your HTML elements. With a bit of practice, managing interactivity with jQuery will become second nature!
Feel free to stretch this solution further by adding more locations or additional styling to enhance user experience!
If you have any further questions or need clarification on any of the steps, don’t hesitate to reach out. Happy coding!
---
Visit these links for original content and any more details, such as alternate solutions, latest updates/developments on topic, comments, revision history etc. For example, the original title of the Question was: Select option and display content related to option with JQuery
If anything seems off to you, please feel free to write me at vlogize [AT] gmail [DOT] com.
---
How to Select an Option and Display Content Dynamically with jQuery
When building interactive web applications, you often need to show or hide content based on user selections. A common scenario is using a dropdown (select box) where each option corresponds to a specific content block. If you've been struggling to implement this functionality with jQuery, you're in the right place!
In this post, we will walk through a simple example of how to create a select box that displays related content when different options are chosen, complete with necessary jQuery scripts.
Understanding the Problem
Imagine you've created a dropdown with several locations, and you want to reveal specific information about each location when one of them is selected. This could be anything from text descriptions to images, tailored to the user's choice.
The Current Challenge
Many developers may try to implement this functionality but can become bogged down with jQuery methods that just don’t seem to work, leading to confusion and frustration. The solution is straightforward once properly implemented.
Step-by-Step Solution
Let’s break down how to achieve the desired functionality using jQuery effectively.
1. Create the HTML Select Element
We'll begin by creating a simple select dropdown in HTML:
[[See Video to Reveal this Text or Code Snippet]]
2. Set Up the Divs for Each Location
Next, for every location selected, we should have corresponding divs that will contain the information about each location:
[[See Video to Reveal this Text or Code Snippet]]
3. Adding jQuery to Handle Changes
Now, we will write the jQuery script that will control which div is displayed based on the selected dropdown option. Here's how to do it:
[[See Video to Reveal this Text or Code Snippet]]
Explanation of the jQuery Code
Event Listener: The on('change') function listens for changes in the dropdown.
Value Extraction: $(this).val() captures the currently selected value.
Hiding/Showing Content: A loop runs through all possible divs (loc1, loc2, etc.), hiding those that don’t match the selected option while revealing the one that does.
Conclusion
By following these steps, you can create an interactive dropdown that displays content based on user selections seamlessly. If you feel lost, remember to take your time understanding each part of the code and how they interact with your HTML elements. With a bit of practice, managing interactivity with jQuery will become second nature!
Feel free to stretch this solution further by adding more locations or additional styling to enhance user experience!
If you have any further questions or need clarification on any of the steps, don’t hesitate to reach out. Happy coding!
 0:27:17
 0:10:55
 0:08:35
 0:10:48
 0:12:42
 0:00:54
 0:00:43
 0:34:40
 0:00:12
 0:00:52
 0:00:48
 0:00:46
 0:00:55
 0:06:12
 0:00:51
 0:00:07
 0:03:22
 0:26:59
 0:08:01
 0:03:39
 0:01:01
 0:17:14
 0:11:07
 0:10:07